Easy Christmas Ornament Wreath DIY
Article may have affiliate links. If you make a purchase, I may earn a tiny commission at no extra cost to you. Big thanks for supporting my small business.
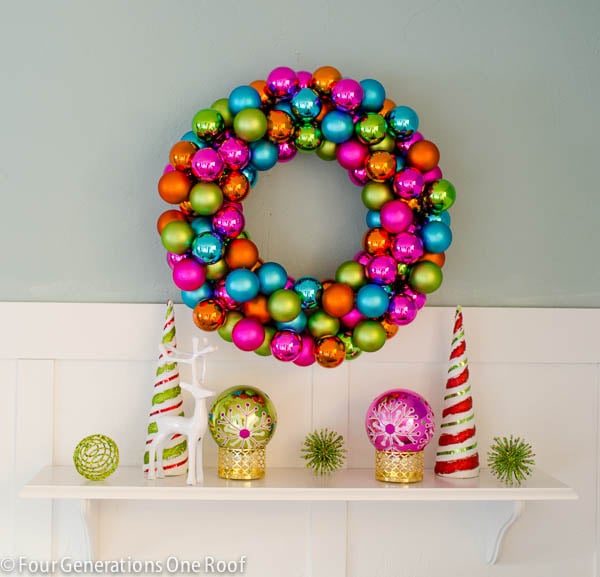
Today I am sharing how to make a Christmas ornament wreath using colorful bulbs. If you are looking for an easy affordable DIY Christmas craft, this is for you! I’ll show you how I used an old styrofoam wreath wrapped in pink yarn and decorated with colorful Christmas bulbs.

Christmas Ball Wreath
How to make a Christmas wreath using ornaments is the simplest craft on the planet. But one word of caution, use “shatter proof” ornaments.
I will admit, I didn’t because I couldn’t find any bright bold colored ones that were shatter proof and I REALLY wanted these colors.
I broke three of them and what a mess I made!
Materials needed:
- Styrofoam wreath or wreath base
- Christmas bulbs
- Yarn
- Hot glue / glue gun (low heat setting)

Step 1: Wrap the wreath in yarn
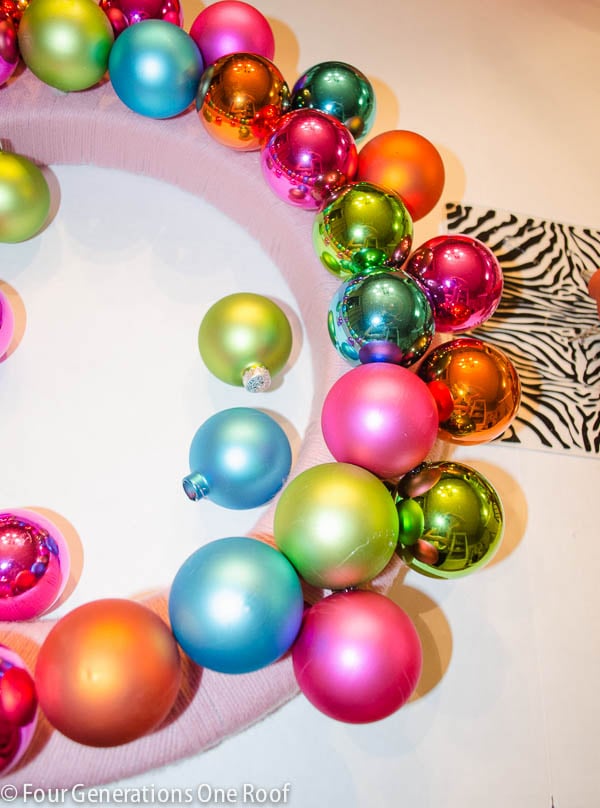
I opted to wrap the white styrofoam wreath in yarn so if the bulbs didn’t cover it completely, the colorful yarn would show vs. the white foam. Use a color yarn that will coordinate with your bulbs.
Step 2: Attach ornaments to a wreath
I removed the metal bulb hangers and simply glued the ornaments around the wreath.
Be sure to glue the part with the hole (where the metal hanger was) face down or pointed inward so it doesn’t show.
Once you start stacking ornaments on top of each other, you will not see it.

I glued them so they were just touching each other. I worked my way around the wreath glueing the ornaments and once I completed one circle, I started another along the outside and inside.

I have seen other people use smaller ornaments to fill in the holes but I couldn’t find any that were the same colors so I just filled in my holes with the larger ornaments.
Beautiful DIY Christmas Wreath
It is a matter of preference how many times you go around the wreath and how high/thick you create your wreath.
I would suggest using a low heat glue and be sure to glue the ornaments to each other in multiple spots to ensure they don’t fall off.
I went a little crazy with the glue!
This Christmas wreath took about 20 minutes to make! Easy Peasy!

Learning how to make a Christmas ornament wreath using colorful bulbs is a quick and easy way to add a pop of color to your kids playroom or any space for that matter.
More Christmas Decorating Ideas You Will Love
- The Ultimate Christmas Planner Freebie (15 Page PDF Download)
- How To Make A Christmas JOY sign
- 8 Ways: How To Decorate A Bedroom For Christmas –
- DIY Christmas Clothespin Wreath – cute Christmas craft decorating idea
- Christmas Bedroom Makeover with red plaid
- How to decorate outdoors for Christmas
- How to install and take care of an outdoor Christmas tree
- How to decorate a coastal Christmas Tree
- Coastal Christmas Dining Room
- 25 Blue Christmas Tree and Decor Ideas
- 5 Ways to Decorate a Flocked Tree
- 42 Front Door Christmas Decor Ideas so many front porch ideas
- DIY Christmas Ornament Wreath I love this colorful wreath
- 10 Minute Christmas Centerpiece Idea
- Christmas Kitchen Decorating Ideas
- Red and Gold Christmas Tree Ideas
- Blue and White Coastal Christmas Tree
- Ho Ho Ho Free Santa Clause Printable
- How To Decorate A Flocked Christmas Tree
- 50 Christmas Tree Ideas
- Christmas In The Kitchen 40 Ways
- Teen Girl Christmas Bedroom
- Red and White Christmas Living Room Ideas
- Christmas Staircase Decorating Ideas
- Red Christmas Living Room
- Christmas Entryway Ideas

Get our free
Ultimate Christmas Planner

Meet Jessica
What started as a hobby, Jessica’s blog now has millions of people visit yearly and while many of the projects and posts look and sound perfect, life hasn’t always been easy. Read Jessica’s story and how overcoming death, divorce and dementia was one of her biggest life lessons to date.


Jessica, this is wonderful! Happy Holidays to you ~
Hey Laura! Thanks so much and I appreciate you stopping by 🙂
I love the colors you chose – they are so bright and cheerful. I am wanting to make one of these wreaths also – thanks for the tutorial…. Cathy
oh I LOVE the colors Jess!!! I was going to ask you how yours turned out!! be careful storing it……when I did one like this, several ornaments were knocked off in storage – so I if you can, store it some place you can hang it , if you can.
thanks for the shout out too!!
Holy cow! So much easier than the wire coat hanger one I tried years ago. That was a nightmare. LOL! This is awesome! Thanks so much for the great tutorial! It’s adorable!
Beautiful colors! Love how your wreath turned out!
Thank you Jen!
So beautiful and fun Jess!! I adore the color combination you chose!
Heather
I can’t wait to make one this weekend! Thanks for the inspiration. Yours is so beautiful!!
I love the wreath. I have been wanting to make one and didn’t know how to get started. Thanks for the push. Also I love the cheery bright colors.
I LOVE the colors you picked out. I’m less traditional like red and green, and prefer the more colorful and cheery pink, aqua, and lime green. 🙂
Thanks for sharing this tutorial. I’ll definitely be making one soon!!
I absolutely LOVE this wreath. The colors are perfect and right up my alley. Now I really want to make one. I’ve always been curious on how to make these. 🙂
I am curious, how many ornaments did u use?
Beautiful wreath! Thank you for the tutorial! : )
This is a beautiful wreath, Jessica! I love the non-traditional colors, but even more I love how easy it was to put together. Thanks for the tutorial!
Thank you Helen! Hope you have a great Thanksgiving 🙂
Thank you Helen! It was really easy and it gives such a high impact in the room. Cheap and easy 🙂
Beautiful wreath! How many ornaments did you use?
3 packages of 12 🙂
Wow it’s a gorgeous wreath i have been looking for ideas as i have a poly ring to use so thank you! i make one for my dad’s grave every year.
Love your wreath. I like to make projects for every occasion
This is gorgeous! Thank you so much for sharing this!!
omg thats pretty.. love it!! i been wanting to do something like that…
So cute! What diameter wreath foam frame?