

Our Front Door Makeover With Sidelights
Article may have affiliate links. If you make a purchase, I may earn a tiny commission at no extra cost to you. Big thanks for supporting my small business.
As part of our split level home renovation series, today is all about updating your front door by increasing the front entrance with a wider door. Let’s take a look at how we removed a narrow 1960s style door and installed a beautiful modern entry door with sidelights and transom.
A front door makeover can be the perfect solution to enhance your home’s curb appeal and make a lasting first impression but what if your dream door doesn’t quite fit the existing opening?
We’ve got you covered with some help from our friends at Horner Millwork!

How Do I Modernize My Front Door
There are many ways to enhance your front door entrance and one of the most important features of any home, in my opinion, is the front door. The best way to modernize your front door is to expand the opening to accommodate a larger sized door.
Determining how to make you exterior door opening bigger can be a challenge but if you have enough room on either side of your current door, it may be possible.
Things to consider before you make your exterior door opening bigger:
- will you need to move any electrical wires
- are there any support structures like a header or columns on the side or top of the door
- can the existing door sill handle a larger door
Increase Door Size
Increasing or expanding your existing door size to accommodate a larger door with sidelights and a transom is a great way to not only flood your interior with a beautiful, natural light, but it will also drastically improve your home’s curb appeal.
Plus, with a newer insulated door, you’ll enjoy improved energy efficiency. Best of all, this upgrade isn’t just about aesthetics; it’s an investment in your home’s value.
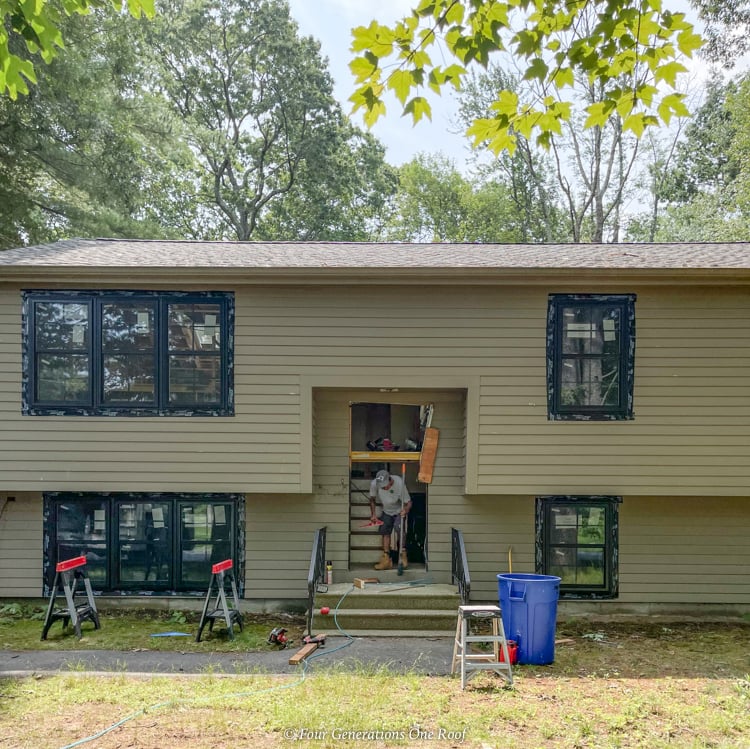
For our front door project, you will notice below that the existing front door was a standard size and nothing special. The front door was very old, narrow and added nothing to the curb appeal of the home.

The view from the inside was very dark and boxed off when looking at the front door from the top of the stairs.
This existing front entrance was very typical of a split level home.

Front Door Makeover Before and After
Let’s look at installing a larger door and boosting curb appeal. This combines functionality with visual enhancements, making a statement about your home’s character and charm.
Step 1 Remove The Existing Door
The first order of business when replacing your front door is to remove your old door.
Below is the rough opening after we removed the old door.
Once the electrician disconnected the existing light switch and moved to a new location, the door opening was ready to be cut.

Step 2 Remove Existing Sheetrock From Inside
We removed all the sheetrock from the inside wall around and above the door opening in preparation to cut the wall width and height to accommodate an oversized front door.

Below you can see the rough opening from outside our front door. Notice how much room is on either side of the door opening. The plan is to utilize all that extra wasted space with sidelights and wider front door.
Once the old door was removed, we had to cut the rough door opening to increase the height and width to fit the new front door from Horner Millwork and Masonite.
Step 3: Cut Opening To Make Wider and Taller
Prior to cutting into the wall, Jim installed a new header above the door opening to support the new larger front door. This is not a beginner diy project as it involves addressing existing headers in the house which you will need a professional to address.
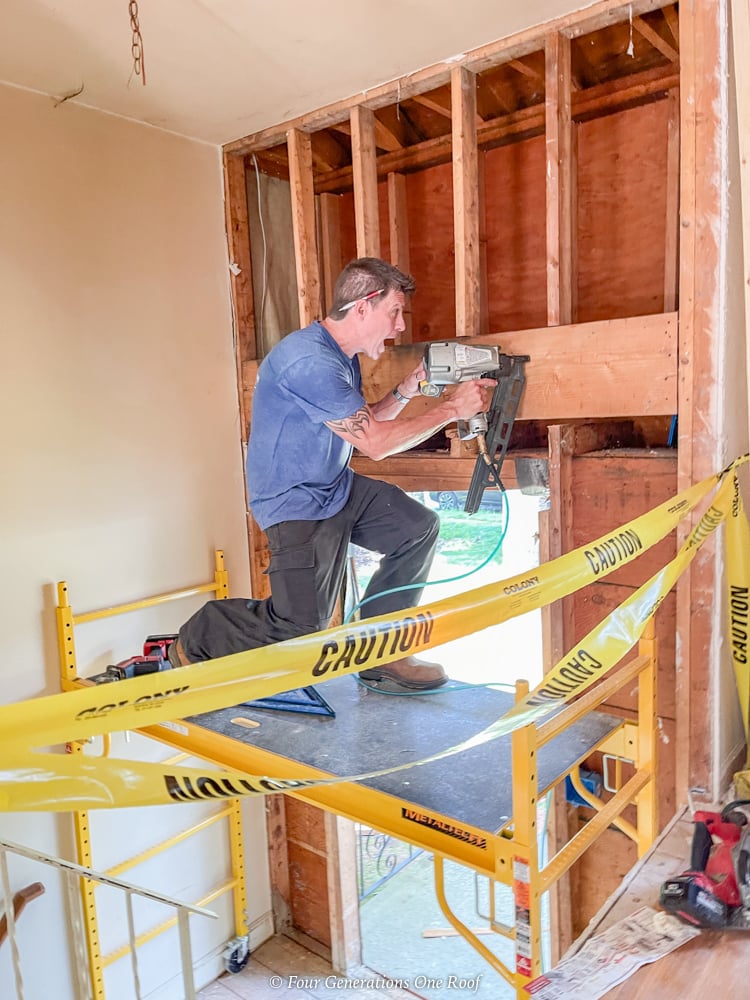
Once the new door header was installed, Jim cut into the wall and removed the old wall 2×4 framing and reframed the door opening to todays code standards to fit the new door.

Step 4: Install Door Flashing
Once the rough door opening was finished, Jim added the door flashing tape and Advanced Silicone Adhesive along door threshold.
The adhesive and flashing serve the dual purpose of securing the new door firmly in place while effectively insulating against cold weather.

Step 5: Install New Door
The front door arrived prehung from Horner Millwork, simplifying the installation process significantly.
In essence, a prehung door is preinstalled within its own frame, streamlining the task of fitting it into the new door opening.
This convenience not only saves time but also ensures a hassle-free and precise installation, making prehung doors an excellent choice for homeowners.
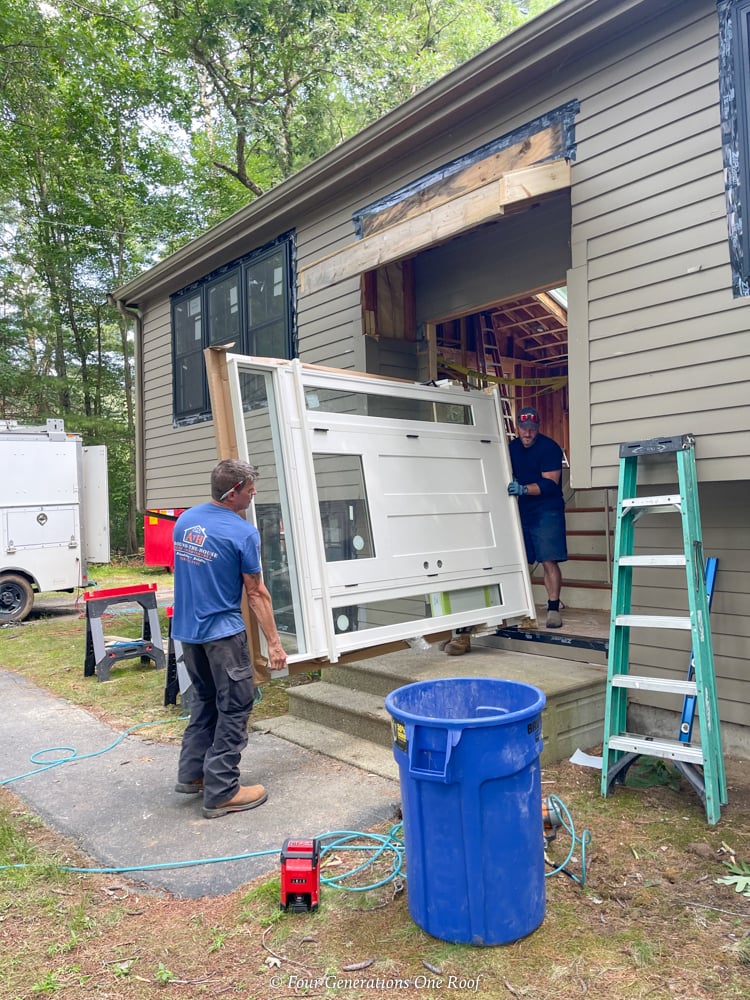
The new Masonite Craftsman front door is part of the Heritage Smooth Series featuring double sidelights and a 12″ transom.
The transom refers to the glass section positioned above the door, while the sidelights are the glass panels located on either side of the door.

The most difficult part of this front door installation project was addressing the header inside the house.
Step 6: Secure the door to the door frame by using screws
Work your way around the frame of the door to ensure the door is secure.

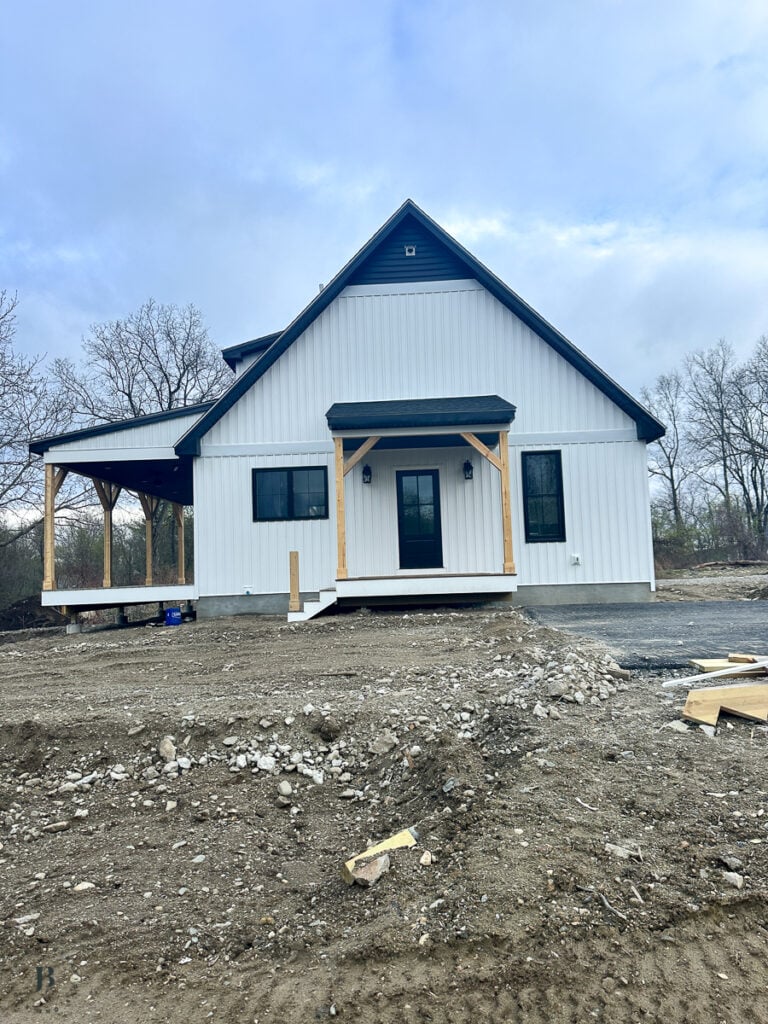
As you can see below, the new black windows and primed front door are really starting to change the look of the house!

The house with the new white board and batten siding below and stained front door is nothing short of amazing!

Here is another quick look at the front door makeover before and after.

Front Door Makeover Ideas
If installing a new front door is not an option, there are several budget friendly “DIY projects” that you can complete in just a couple hours.
Paint Your Front Door
Don’t ever underestimate the power of paint. Opting for a fresh color can work wonders on your front door, so select a color that coordinates with your current siding and architectural style. You’ll be pleasantly surprised by how straightforward this diy project is, when it comes to a front door makeover.
Add New Hardware
Upgrade the doorknob, lockset, hinges, and door knocker. Choose hardware that matches your home’s style or gives it a modern twist. This is an easy peasy project that anyone can do.
Change the House Numbers
Swap out old, faded house numbers with fresh, modern ones that are easy to read from the street.
Looking to see all of the home remodeling projects we did in this split level home? See them in order below.
Split Level Home Renovation Series
- Split level home remodeling project – how it all started and the home before we tore it apart
- Small 5×8 bathroom remodel with cost and how we saved money by keeping the same layout
- Kitchen demo + adding a load bearing beam between the living room, dining room and kitchen
- Split level kitchen renovation before and after (you will not even recognize it!)
- Kitchen cabinet review at the split level home and how we packed storage features into the new space
- Installing shiplap on the new vaulted ceiling in the kitchen and living room at the split level
- Opening up a load bearing wall in the kitchen
- Split level entry way foyer makeover (before and after)
- How to increase front door width and height – front door makeover
- Installing solid core interior doors for a modern look
- Split-level house exterior makeover before and after
- Why we picked black windows with white interior
- How to modernize a split level home exterior
- Finished basement vinyl floor plank installation
- Split level front door ideas
- BONUS – See another split level home that sold 80K over asking price
More Front Door Posts You Will Love
- How to build a portico over front door
- 20 Front door makeover ideas
- How to increase your front door size with sidelights and a transom
- How to install a prehung front door with sidelights
- Installing 2 large french patio doors foyer before and after
- How a new exterior front door can increase property value
- 20 colorful front door ideas
Latest Blog Posts


Meet Jessica
What started as a hobby, Jessica’s blog now has millions of people visit yearly and while many of the projects and posts look and sound perfect, life hasn’t always been easy. Read Jessica’s story and how overcoming death, divorce and dementia was one of her biggest life lessons to date.
Did you use a temporary support while changing out the door header? If so, what type & where was it placed? You inspired us to do the same in our current home but we want to avoid any mishaps! Any additional information you can provide would be greatly appreciated!
Hi, yes we used multiple 2×4’s to create additional tep support while adding new header. I don’t have any pictures but google temporary header support using 2×4’s or temp brace support. Definitely hire a professional contractor if it’s not something you are familiar with 🙂
I am looking to do this but I’m having a hard time finding a contractor who can do this since I’m not handy. I’m in Georgia. Any recommendations?
Hi Connie! We are in Mass and I am not familiar with GA contractors :(.
What color gel stain did you use for your front door?
I know this was a while ago, but I noticed you changed the direction that the door swings. Our current door swings towards the upstairs like your new door, and I hate it when tryingto let guests in and out. I was going to swap the direction of the swing. How did you like or not like the door swing after changing it?