

How To Remove A Load Bearing Wall And Install A Support Beam
Article may have affiliate links. If you make a purchase, I may earn a tiny commission at no extra cost to you. Big thanks for supporting my small business.
How to remove a load bearing wall starts with installing a load bearing beam in the attic to carry the structural load. Today I’m walking you through the exact step-by-step process Jim used for this kitchen wall removal.
Removing a load bearing wall requires an LVL beam installation, structural engineer drawings, building permits, and a licensed contractor who knows what they’re doing!

This split level fixer upper is about to be welcomed into the modern era and I can’t wait to see the kitchen wall between the dining room and living room removed! We are also vaulting the ceiling which will help drastically transform this older home.
How To Remove A Load Bearing Wall And Install A Support Beam
It’s crucial to add a support beam when removing any load bearing wall to ensure the stability and strength of the house.
Ideally, concealing the load bearing beam in the attic is the optimal solution for a clean and polished finish.

Adding an LVL beam is how you support the framing construction if you want to remove a load bearing wall.
Just a side note before we get started:
Identifying and removing a load bearing wall is for a licensed professional contractor and not a DIY homeowner project. Hire a professional (if you are local to central Massachusetts you can hire Jim!) and check with your local building department for building permit requirements.
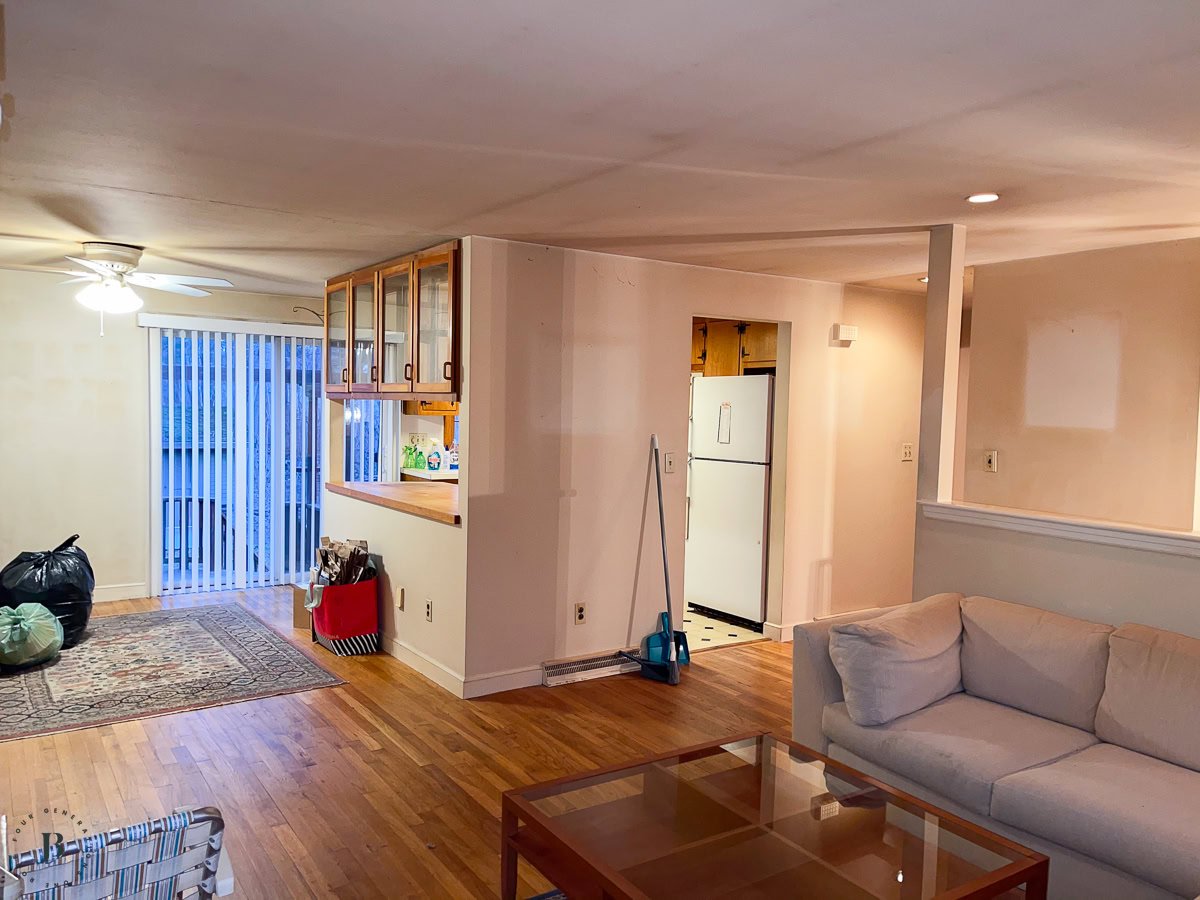
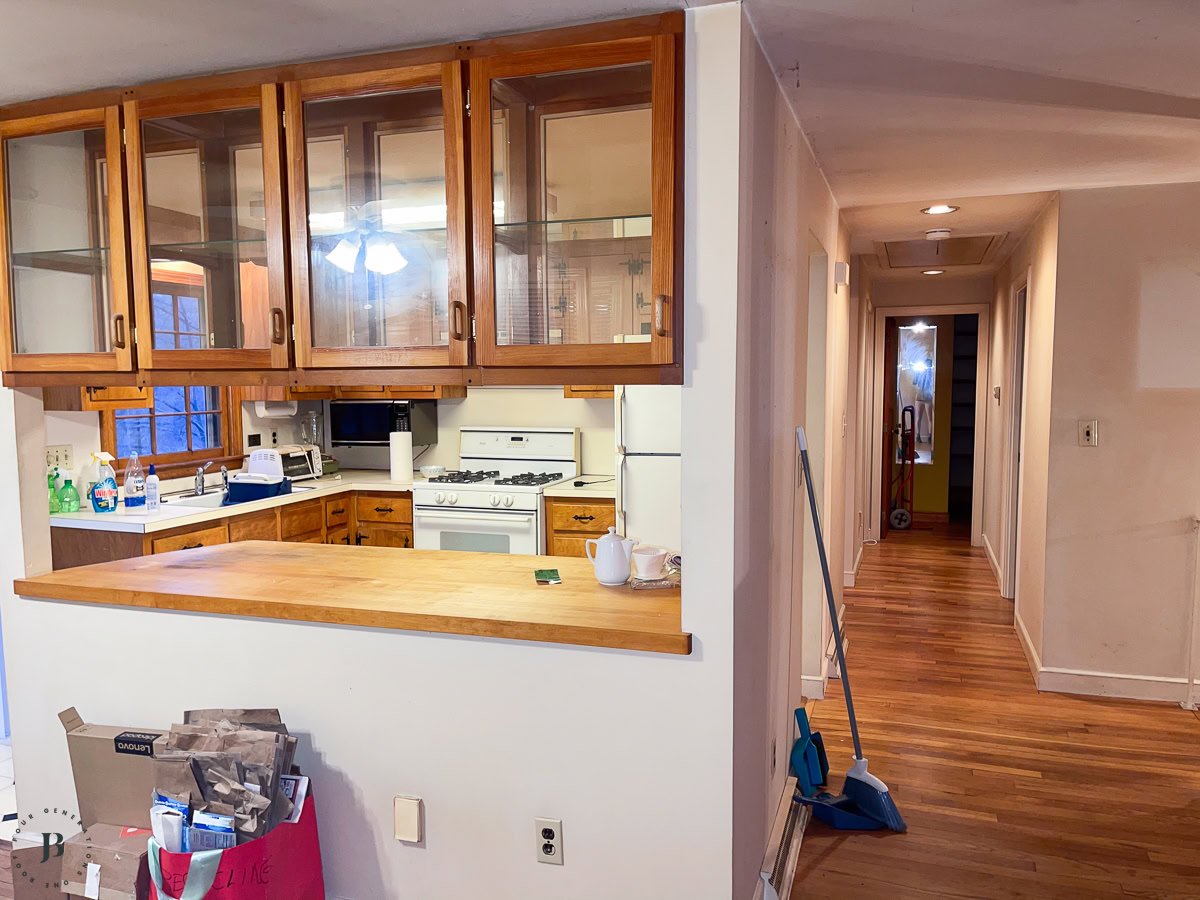
Here is the kitchen wall before the wall was removed.
How To Tell If A Wall Is Load Bearing Before Wall Removal
Before any contractor starts removing a wall, they need to confirm it’s actually load bearing. Here’s what Jim and his structural engineer look for when assessing whether a wall removal project requires a load bearing beam:
Direction of floor joists in framing construction: If you can access the basement or attic and see floor joists, load bearing walls typically run perpendicular (at 90 degrees) to those joists. Non-load bearing walls usually run parallel.
Location in the house: Walls near the center of the home are often load bearing, as they support the roof ridge or floor systems above. Exterior walls almost always carry load.
What’s above and below: If there’s a wall or beam directly above or below in the basement, that’s a strong indicator you’re looking at a load bearing wall. The load transfers straight down through the structure to the foundation.
Wall thickness: Sometimes load bearing walls are built with doubled-up studs (2x6s instead of 2x4s) or have thicker construction than partition walls.
The bottom line: Even with all these clues, you cannot confirm a wall is load bearing without a structural engineer’s assessment. They’ll review your home’s framing, calculate loads, and provide stamped drawings that specify exactly what load bearing wall beam size you need. No guessing allowed on this one.
What is a Load Bearing Wall?
The load bearing wall below is the wall between the kitchen, dining room and living room.
A load bearing wall is what supports the weight above the wall.
You do not want to remove a load bearing wall without replacing it with a load bearing support beam that will support the weight of the roof.
You will risk your roof caving in if you do!
Be sure to check with your local building department for permit information prior to any wall removal work.
Removing A Load Bearing Wall Before And After
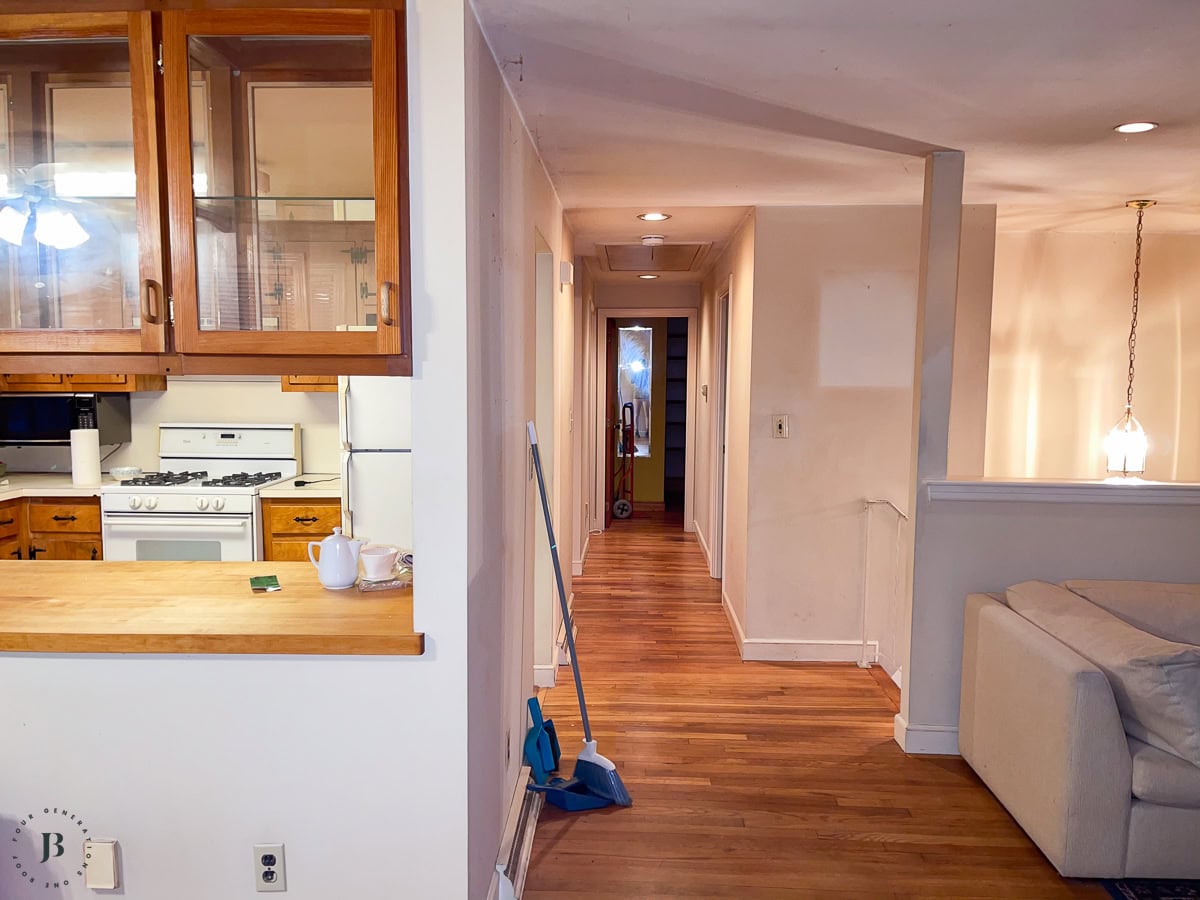
Here is a picture of the side hutch wall with most of the facing wall removed.
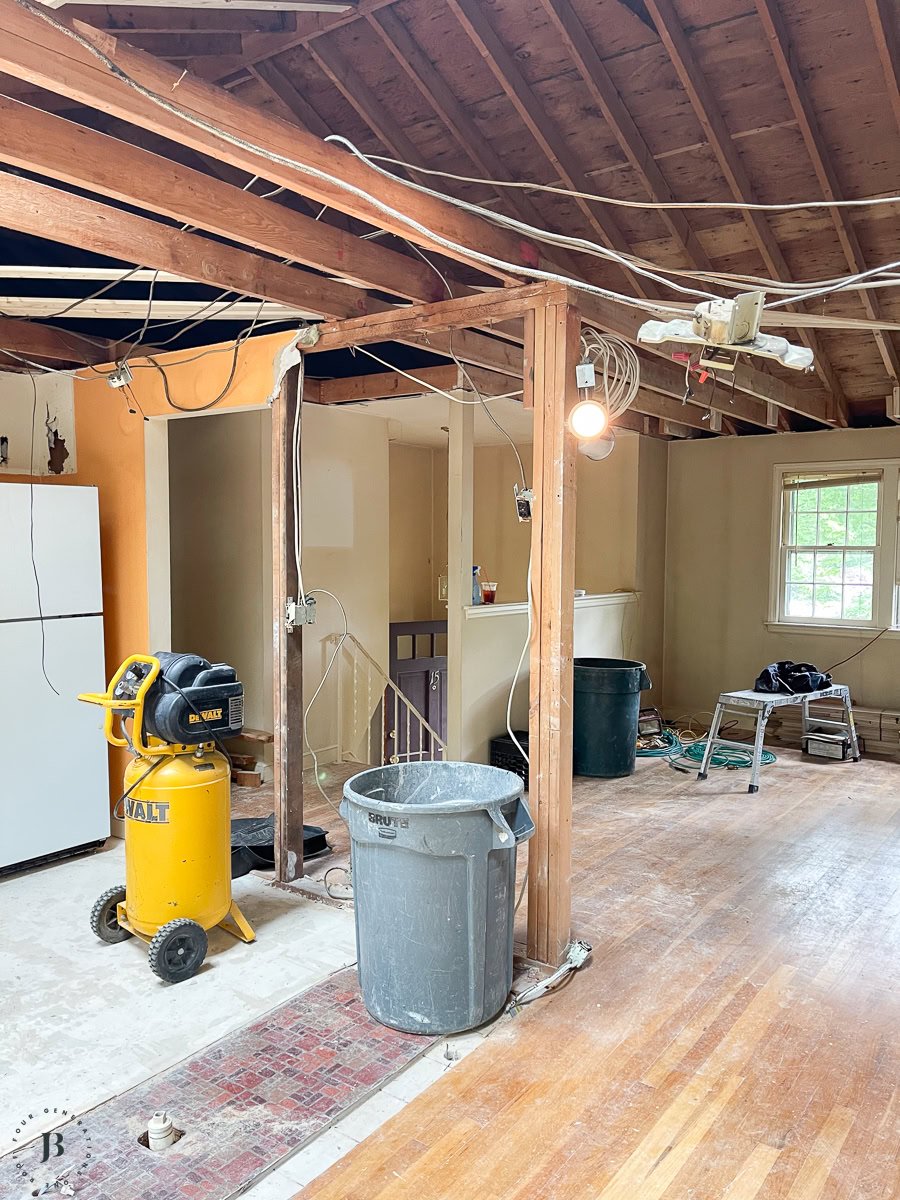
Here is a picture of the ceiling after we removed the load bearing wall (the wall that separates the kitchen from the dining and living room) and removed the ceiling in order to create a cathedral ceiling.

Installing a load bearing beam up in the ceiling is what allowed us to open up the space and complete the wall removal.

You can see the two LVL beams above the strapping pieces directly below the roof.
Here is a quick look at the fully remodeled kitchen. You can find a full tour of this kitchen by visiting, best split level kitchen remodel before and after blog post.

Step-By-Step: How To Install A Load Bearing Beam For Wall Removal
Here are the details about how to install a load bearing beam and how we completed this load bearing wall removal project.

Getting the LVL beam into the house was a challenge. The length of the beam was 20 feet long and very heavy, so they pulled it in through the window.

This is not a DIY project! Not only do you need to hire a professional contractor for removing a load bearing wall, but you need to do your research and make sure they are licensed and have experience with load bearing beam installation.
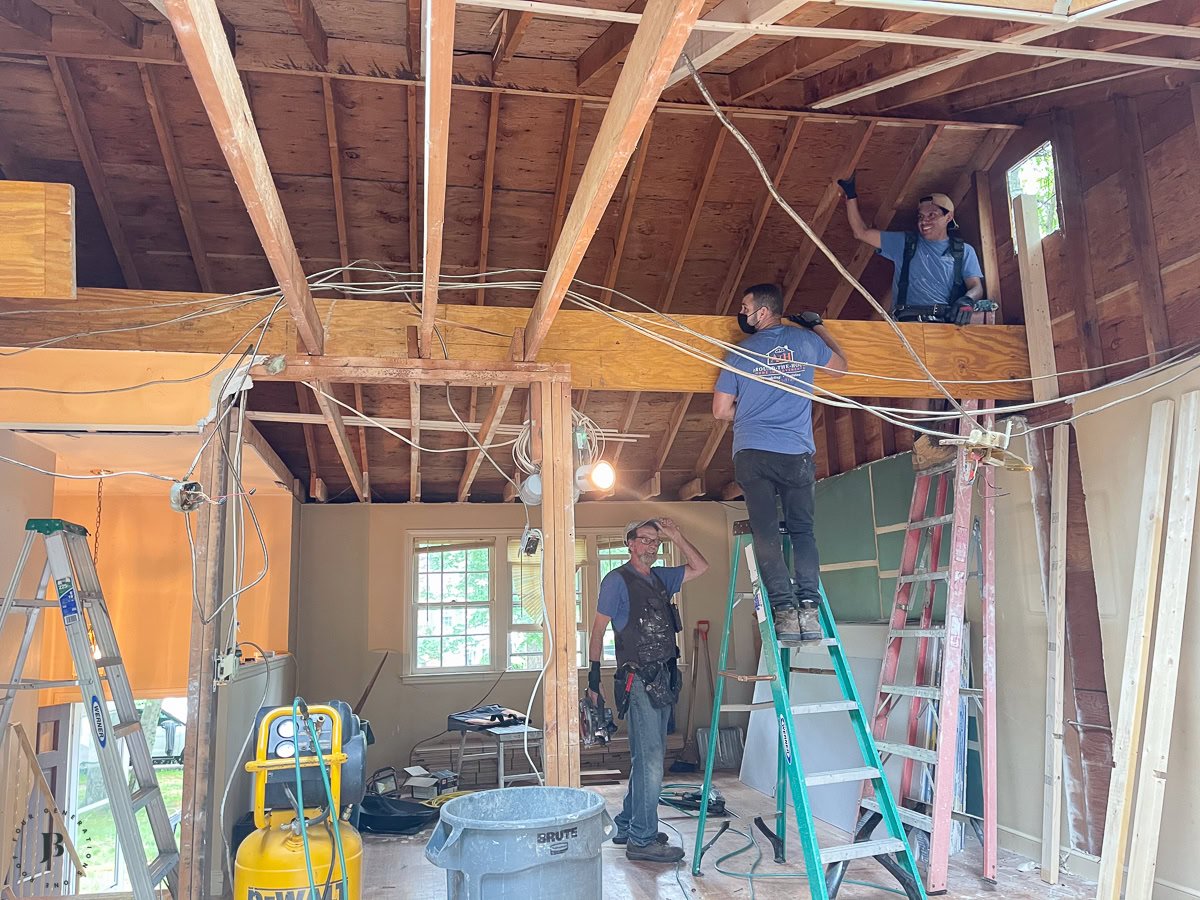
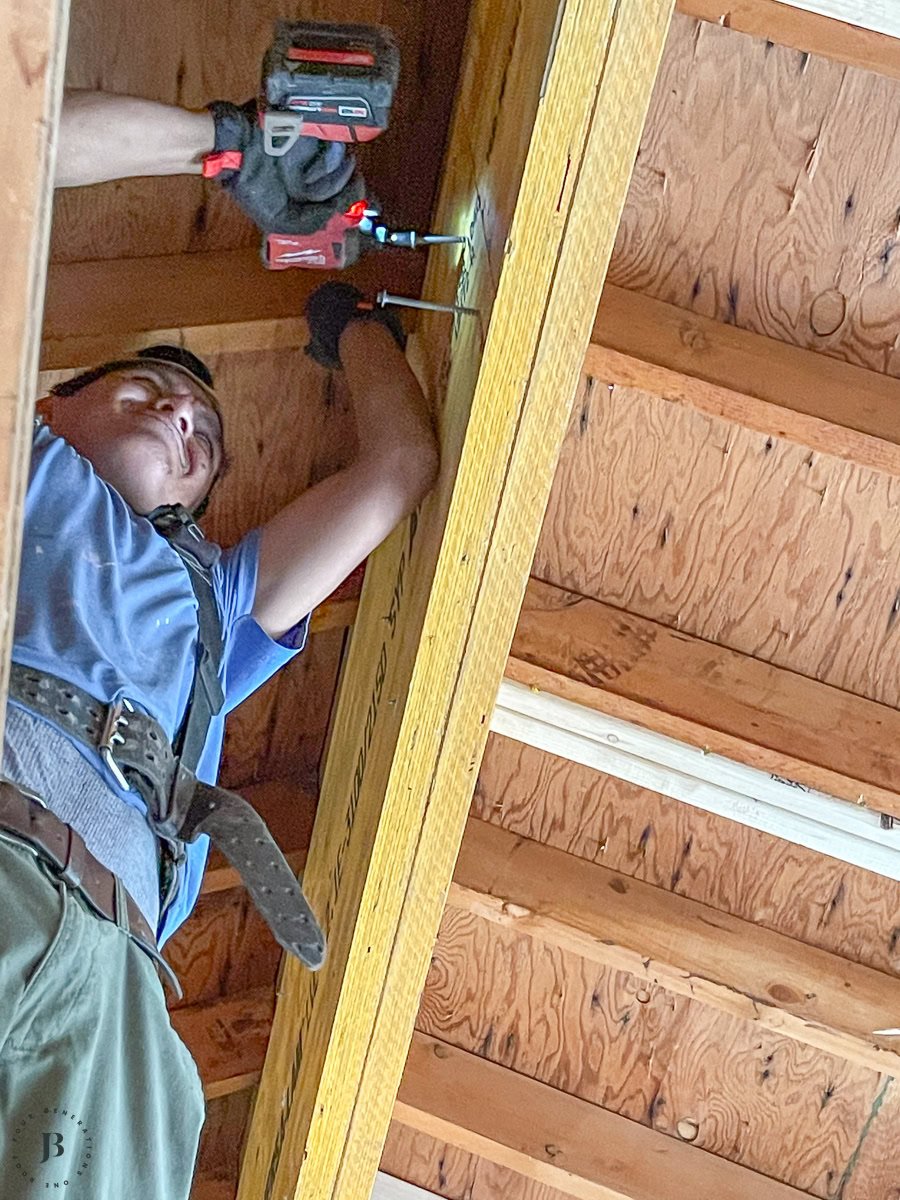
Once the support beam was in the house, they used support braces to assist in keeping the beam in place during installation.
How Expensive Is Removing A Load Bearing Wall?
We added two LVL support beams that were fastened together with lag bolts to create one load bearing wall beam.

The LVL beams were just under $800 which Jim picked up at our local lumber yard.
The support beam is fastened to support posts at each end of the house that continue down to the foundation (this is critical for proper framing construction when removing a wall).
The two LVL support beams up top are fastened together with lag bolts.
When installing a load bearing beam to replace a load bearing wall, you will need a design plan from a structural engineer with calculations to submit to the town for their records.
This type of wall removal project will likely require a permit from your town.
Be sure to check your town building requirements.

If you are hiring a licensed contractor for removing load bearing wall work, they should know all of the town requirements.

The architect/engineer drawing up your plans will measure the existing house conditions and calculate the load requirements for the load bearing beam in order to size the LVLs required.

The engineer will use a load bearing beam calculator to determine your materials needed for the wall removal.

Keep in mind, the cost of the LVL beam materials will not be your only cost. The cost of the support beam will be determined by the size calculated based on the weight of the structure.
Once the support beams were installed, they removed the temporary wall frame and bracing.
Another Related Post: See how Jim opened up another split level kitchen wall, by removing a load bearing wall, creating an amazing open kitchen with an island.

Overall, this load bearing wall removal project would have cost between $5000 and $8550 depending on the scope, architect costs and your licensed contractor. Obviously Jim and his crew did the work so that saved us on the labor, which is the most expensive part of the job.
The strapping (the long skinny pieces of wood running along the ceiling) are to attach the white planks that we have coming.

Yes!! The ceiling will not be sheetrock, it will be country style white planks!
The next step is to do the electrical wiring and insulate.
Frequently Asked Questions: Removing Load Bearing Wall
There’s no universal answer. The load bearing wall beam size depends on your specific structure’s span length, roof load, snow load for your region, and existing framing construction. Your structural engineer calculates this using load bearing beam calculators and building codes. For this project, we used two 20-foot LVL beams fastened together, but your requirements could be completely different based on your home’s structure.
No, absolutely not! Removing a load bearing wall without installing a proper support beam is dangerous and will cause structural failure. The load bearing beam replaces the wall’s function of holding up the roof and upper floors. You also need building permits, structural engineer drawings, and inspections at key stages. Unpermitted wall removal creates major problems when you sell and is potentially dangerous if not done correctly.
The best option is installing the load bearing beam in attic space above your ceiling (like we did in this project), so it’s completely hidden while still providing full structural support. If that’s not possible due to ceiling height limitations, you can box in an exposed beam with drywall or decorative trim, or incorporate it as an architectural element with wood wrapping or paint.
LVL beam (Laminated Veneer Lumber) is engineered wood made from thin wood veneers glued together under pressure. It’s stronger and more consistent than solid lumber because it eliminates natural wood defects. LVL beams are the standard choice for removing a wall in residential projects because they’re strong, lightweight compared to steel, easier to work with using standard tools, and typically more cost-effective for residential spans.
The physical wall removal and load bearing beam installation work typically takes 2-4 days with a professional crew (temporary supports, beam installation, removing the wall, finish framing construction). But factor in 2-4 weeks for structural engineer drawings, 1-4 weeks for permit approval depending on your municipality, and additional time for finish work after inspections. Total project timeline: 6-10 weeks from planning to completion.
Yes, absolutely. The structural engineer assesses your home’s framing, calculates loads, determines the proper support beam size, and provides stamped drawings required for building permits. Expect to pay $1000-$1,800 for engineering services. Trying to skip this step or having a contractor “eyeball” the load bearing wall beam sizing is dangerous and won’t pass inspection.
Looking to see all of the home remodeling projects we did in this split level home? See them in order below.
Split Level Home Renovation Series
- Split level home remodeling project – how it all started and the home before we tore it apart
- Small 5×8 bathroom remodel with cost and how we saved money by keeping the same layout
- Kitchen demo + adding a load bearing beam between the living room, dining room and kitchen
- Split level kitchen renovation before and after (you will not even recognize it!)
- Kitchen cabinet review at the split level home and how we packed storage features into the new space
- Installing shiplap on the new vaulted ceiling in the kitchen and living room at the split level
- Opening up a load bearing wall in the kitchen
- Split level entry way foyer makeover (before and after)
- How to increase front door width and height – front door makeover
- Installing solid core interior doors for a modern look
- Split-level house exterior makeover before and after
- Why we picked black windows with white interior
- How to modernize a split level home exterior
- Finished basement vinyl floor plank installation
- Split level front door ideas
- BONUS – See another split level home that sold 80K over asking price
Disclosure: This post is for demonstrative purposes only. Identifying and removing a load bearing wall is for a licensed professional and not a DIY homeowner project. Hire a professional and check with your local building department for the necessary permits and requirements.

Meet Jessica
What started as a hobby, Jessica’s blog now has millions of people visit yearly and while many of the projects and posts look and sound perfect, life hasn’t always been easy. Read Jessica’s story and how overcoming death, divorce and dementia was one of her biggest life lessons to date.