How To Remove Tile Backsplash
Article may have affiliate links. If you make a purchase, I may earn a tiny commission at no extra cost to you. Big thanks for supporting my small business.
Today I’m sharing how to remove tile backsplash as part of our kitchen renovation series. Whether you are doing a full kitchen reno or just want to refresh your existing backsplash, this post is for you! It’s a fairly simple process to remove yourself with just a few simple steps but is a little messy and does require patience!
Let’s take a look at how we removed our old kitchen tile backsplash in preparation for our new counter height backsplash.
How To Remove Tile Backsplash Without Damaging Cabinets
One of my biggest anxiety points in our kitchen renovation was not damaging the existing cabinets. If you have been following along, you know that we decided to renovate the kitchen and keep the cabinets – which was a huge savings!

Part of the renovation was getting new countertops and backsplash which meant, Jim’s crew got to the spend the day with me hovering over them like a hawk as they carefully and ever so gently removed the old backsplash.
I know some of you will be horrified that we removed the existing kitchen backsplash (and painted the cabinets) but you can read all about why we decided to update and modernize our kitchen in a post I shared a couple months ago, “modernizing our Mediterranean house with paint.”
Tools & Materials Needed To Remove Backsplash
1. Safety glasses
2. Hammer and chisel
4. Utility knife
5. Electric drill with masonry bit
6. Flat pry bar
7. Vacuum cleaner
*note: They do make removal tile backsplash tools which you can purchase on Amazon but the hammer, chisel and pry bar work as well.
*Be sure to cover your kitchen countertop with heavy duty drop cloths to protect it from the tile dropping and chipping it.
Removing Backsplash Tile: Step-By-Step
Step 1: Remove Grout
Score the grout between the tiles with a grout saw or utility knife. This will break the existing seal between the grout and tile

Remove the grout by chiseling with a flat head screwdriver and a hammer. I recommend wearing safety glasses too! These guys didn’t so shame on them!
Removing without breaking the tiles was not an option as the tile has been in place for over 20 years.
Step 2: Remove Tiles

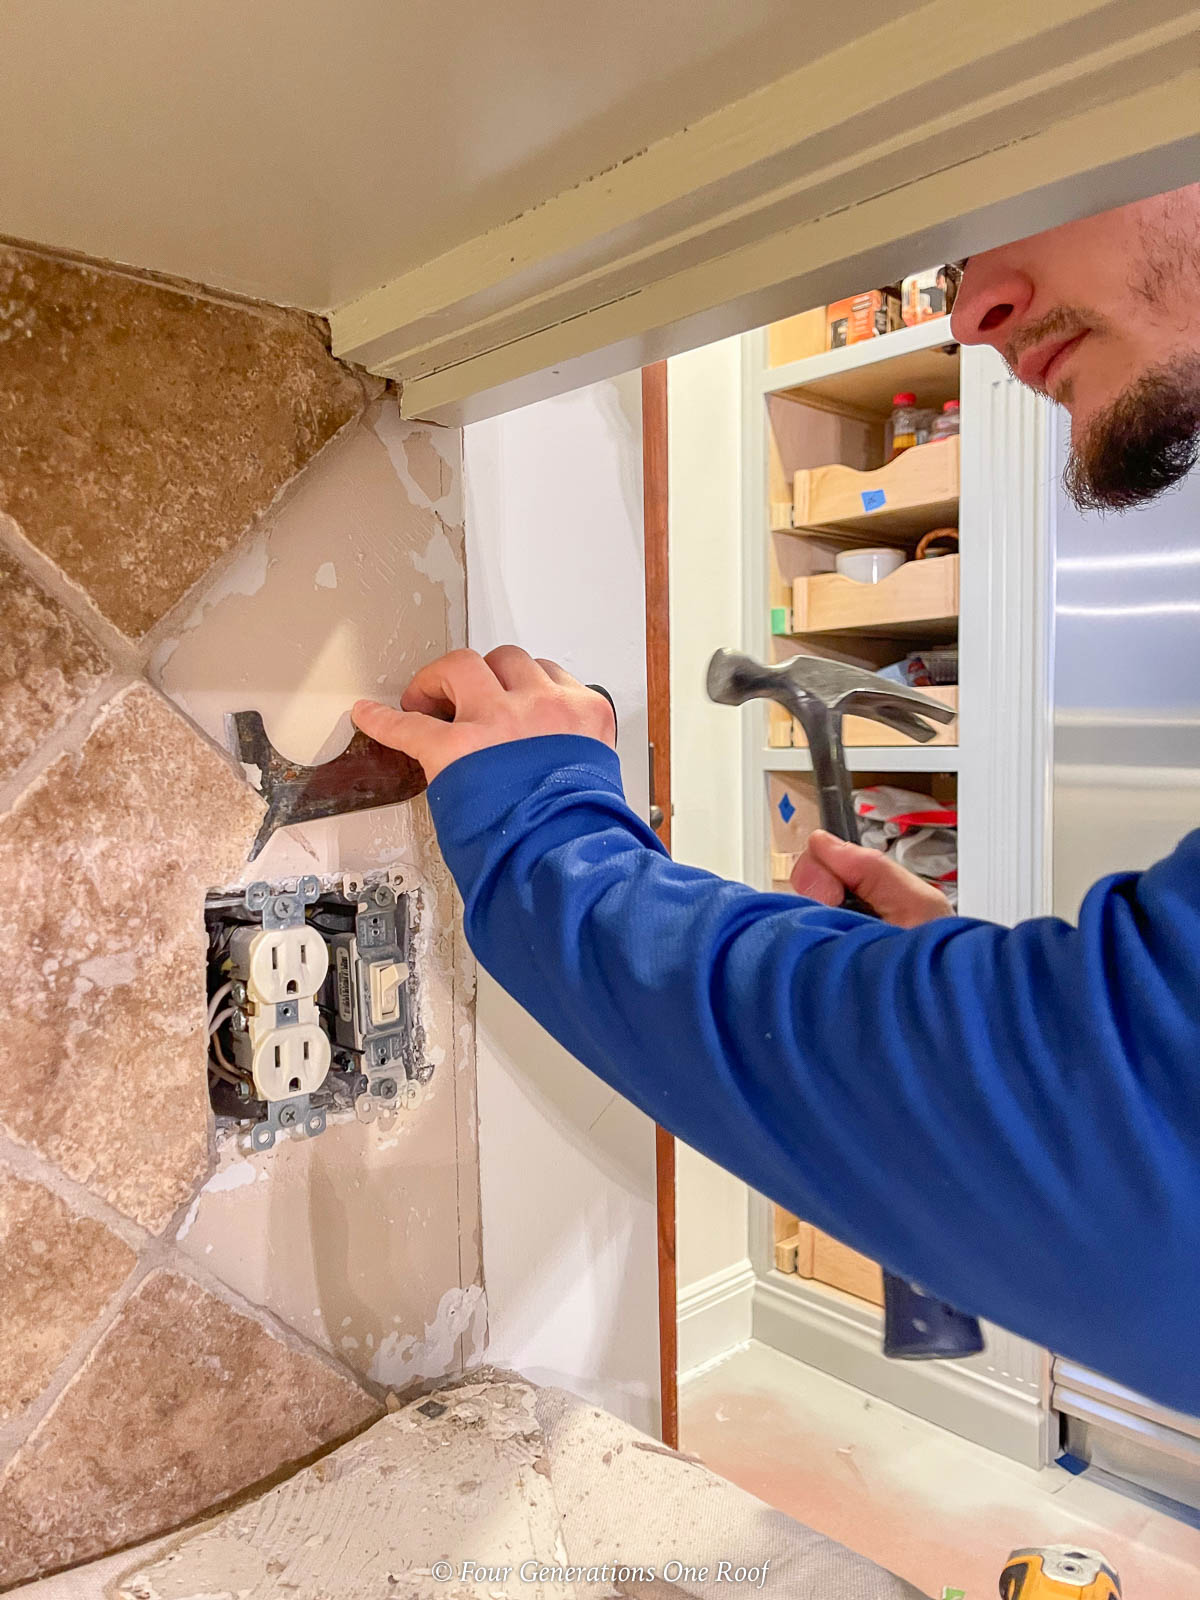
Use a masonry chisel and hammer to pry off the tiles one at a time.

If you are removing tiles near cabinetry, it’s imperative that you go slow and carefully! Work your way around the kitchen backsplash and vacuum and clean debris from the wall as you go.
Step 3: Clean & Repair Drywall
If you are getting new countertops and backsplash, you may need to patch any drywall holes with joint compound (depending on size) that occurred while removing the tile.

We decided to install a new counter height backsplash which is essentially a “counter slab” so we did not need to repair any of the drywall.
Is Tile Backsplash Hard To Remove?
Removing tile backsplash can be a tricky task, but with the right tools and know-how it can be done. If you are careful and take your time, you should be able to remove tile backsplash with relative ease.

Our biggest obstacle was the existing cabinets that we had just painted so it took a little longer. In hindsight, we would have painted the cabinets after the backsplash was removed but we couldn’t coordinate the schedules with the painter so we opted to move forward with the painting first. If you have ever done a home renovation, you know the importance of getting the contractor when they have availability! ha.

With patience and attention to detail, removing tile backsplash doesn’t have to be a difficult job.
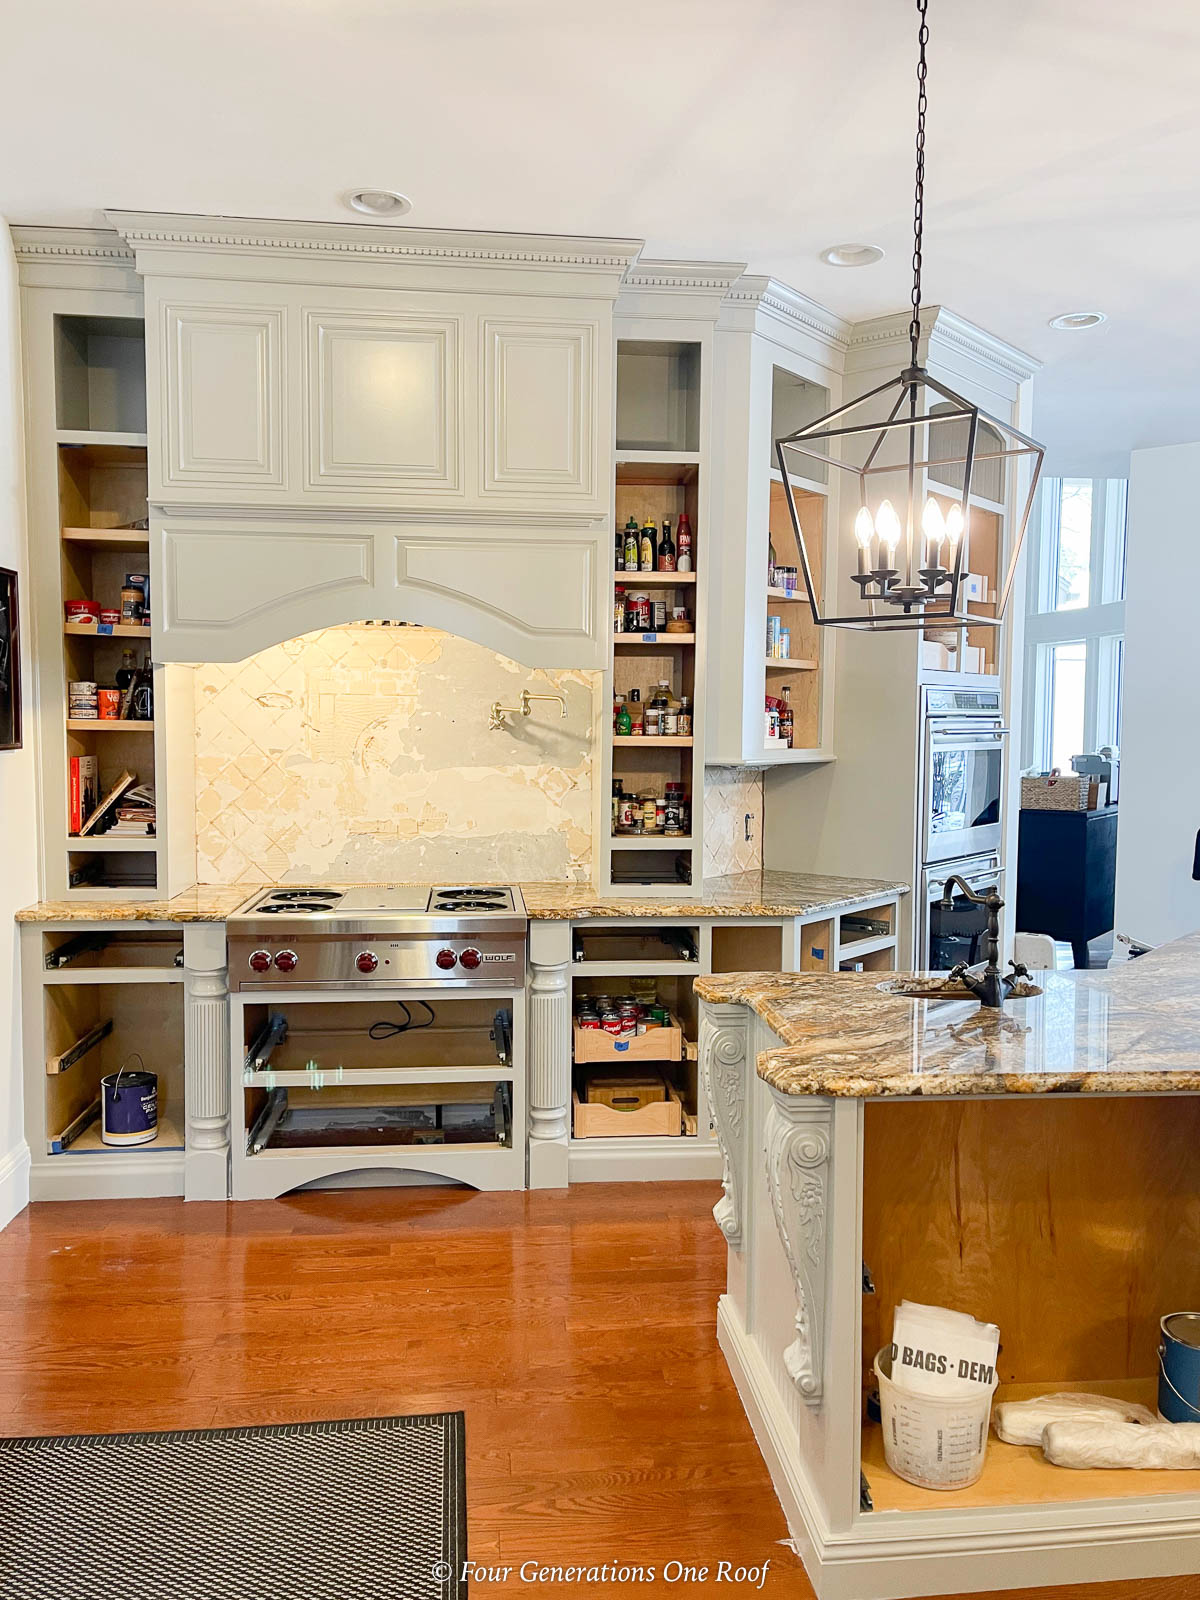
The picture below shows the kitchen cabinets painted in Mindful Gray by Sherwin Williams and the tile backsplash removed. It’s already so much brighter!

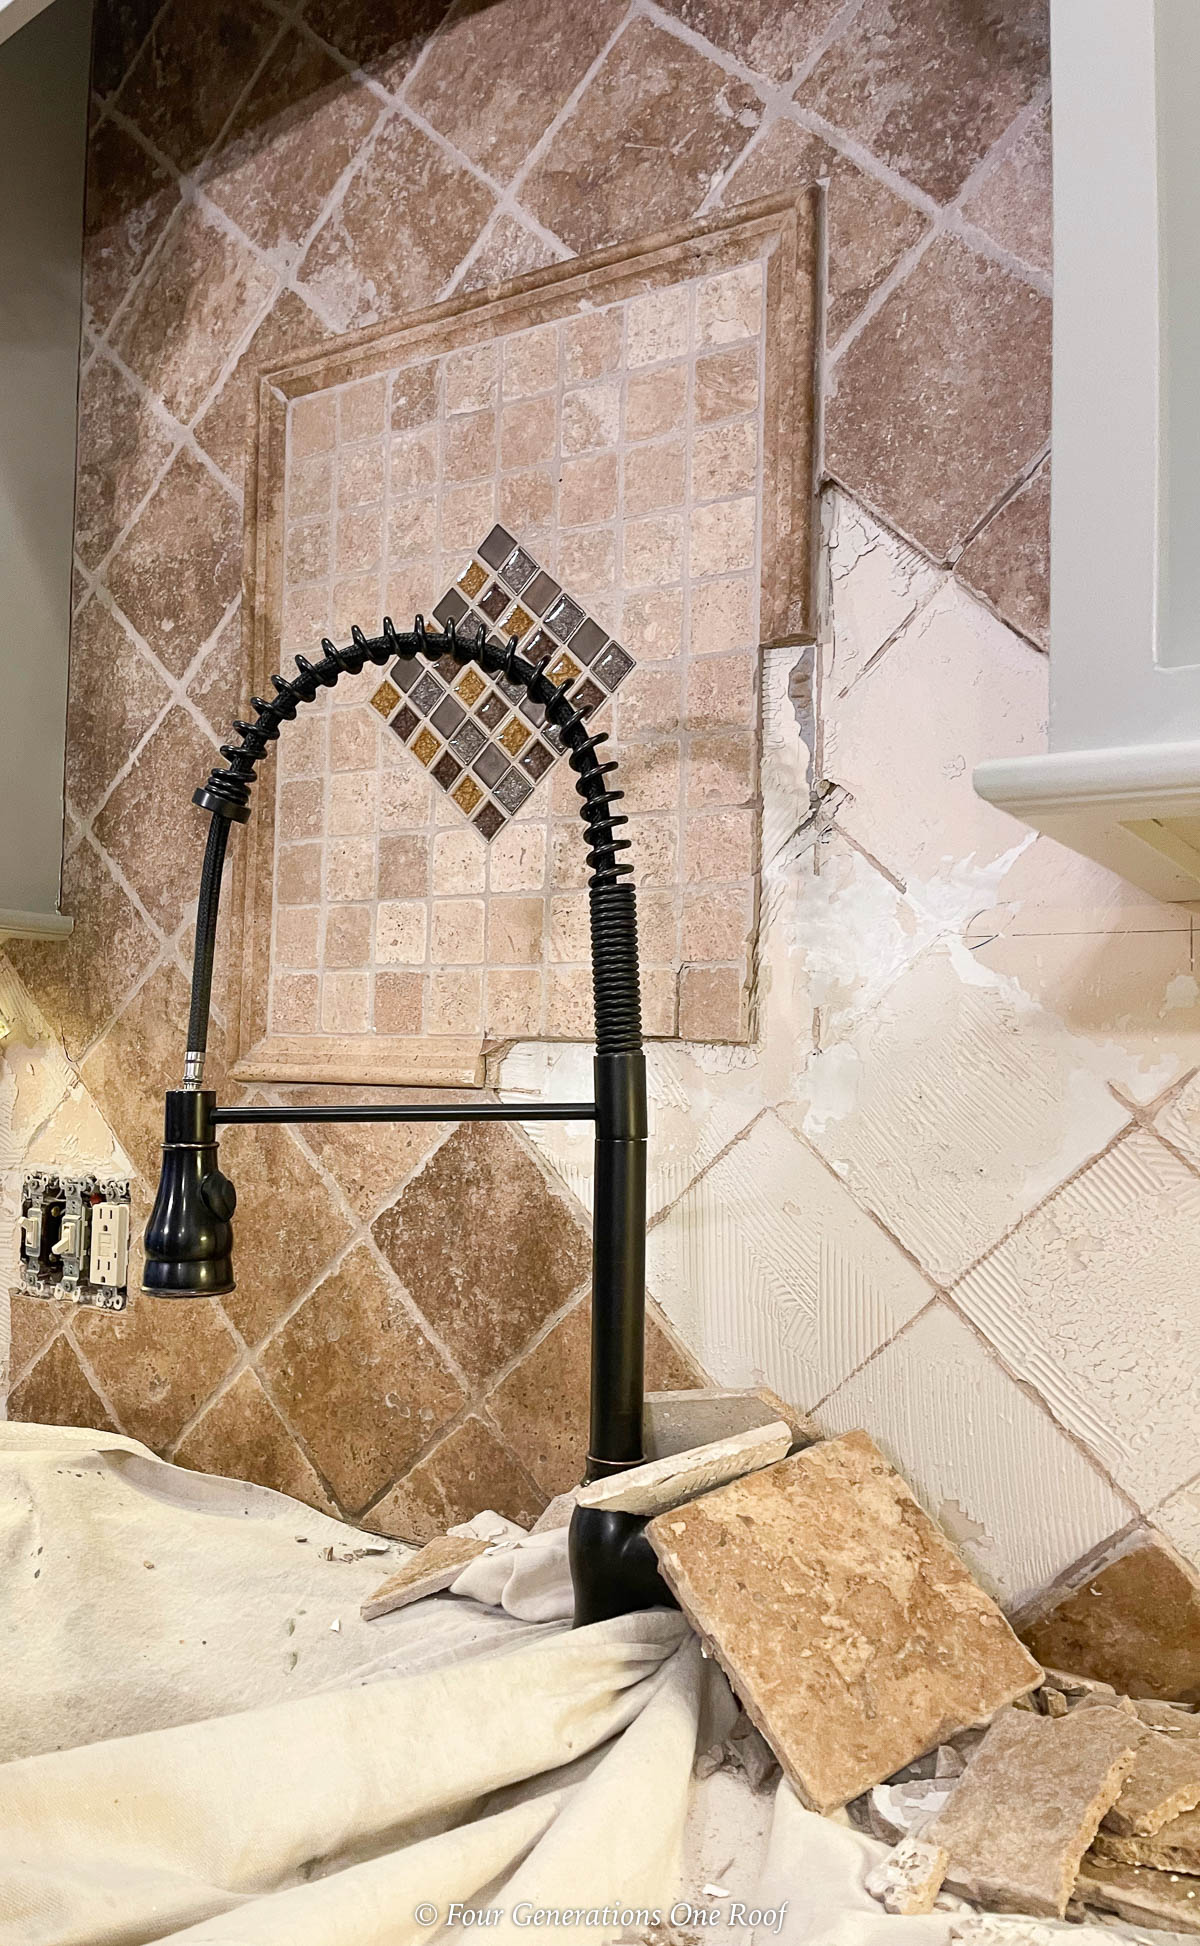
You will notice above, we had drywall damage from where we removed the detailed mosaic tiles. This is due to the tiles being very small and was unavoidable. We are installing full counter height backsplash so the drywall will not need to be patched but if we were installing a traditional tile backsplash, the hole would need to be fixed.
Let’s take a look at the kitchen backsplash before and after we removed the tile. Below is the kitchen with the backsplash and dark stained cabinets.

The picture below shows the kitchen cabinets painted gray with the tiled backsplash removed.

If you would like to see the kitchen with the the granite countertops removed, click through this post, how to remove granite without breaking it, as well as how to choose kitchen cabinet hardware to get a sneak peak of the new quart countertop and backsplash.
Things To Consider When Removing Tile From Wall
• If keeping existing drywall, take precautionary measures while removing tile from drywall to avoid extra damage to the wall
• Carefully remove any nails or screws that were used in installation before taking out tiles
• Keep an eye out for potential water leakage that may occur due to removing tiles, which can affect the drywall if not addressed quickly
Our pot filler below (above the cooktop) was the only area that had plumbing pipes behind the backsplash so we were extra careful when removing the tile backsplash in this area. I personally think Jim’s employee wanted to strangle me by the end of this project. -ha.

How Long Does It Take To Remove Tile Backsplash?
On a Saturday morning, Jim and 2 other workers spent around 3.5 hours removing the tile backsplash. The complexity of this home improvement project and the time taken is determined by the extent of the job, and whether it is being done around cabinets. Fortunately, we didn’t encounter too much adhesive behind the tiles so they removed easily, though removing the mosaic tiles and parts close to cabinets were a bit challenging.
More Of Our Kitchen Renovation Posts You Will Love
- Grey kitchen cabinets with white countertops (before and after)
- Calacatta quartz countertops (8 of the most stunning countertops in white)
- How to find a contractor for a kitchen remodel and hire with ease
- How to paint kitchen cabinets (step by step process on how we painted the cabinets)
- Best 7 grey kitchen cabinet paint colors (in real spaces and homes)
- how many coats of paint for kitchen cabinets (the exact number coats of primer and paint)
- Modernizing our Mediterranean kitchen & entire house (and why)
- Updating a kitchen without removing cabinets (why we kept our existing cabinets and savings)
- How to remove granite countertop without breaking it
- Countertop Templating Process (how the counter company measures and fabricated our new countertop)
- How to choose kitchen hardware
- How to remove tile backsplash (before and after)
- Quartz backsplash and is it right for you (this post)
- Best kitchen cabinet paint (all the details on the paint we used for this project)
More Kitchen Remodel Posts
Updating a kitchen can be a big job, but removing backsplash tiles without damaging the drywall doesn’t have to be. With the right tools and some patience, you can get rid of your old backsplash and make room for a new one. Just remember to take your time!

Meet Jessica
What started as a hobby, Jessica’s blog now has millions of people visit yearly and while many of the projects and posts look and sound perfect, life hasn’t always been easy. Read Jessica’s story and how overcoming death, divorce and dementia was one of her biggest life lessons to date.


