

1950s Bathroom Remodel Before and After
Article may have affiliate links. If you make a purchase, I may earn a tiny commission at no extra cost to you. Big thanks for supporting my small business.
Today I’m sharing our 1950s bathroom remodel before and after and how we increased the space by 4 feet to allow for a bigger bathtub.
Modernizing this old bathroom was a critical phase in our extensive whole-house renovation that began last year, resulting in a truly amazing transformation.
Modern 1950s Bathroom
Our goal for the home was to modernize while designing a transitional home.
The old bathroom, outdated and lacking any redeemable vintage bathroom charm, was completely gutted, including the removal of a wall between it and the dining room to gain an extra four feet of space.

In my recent post, 1950s cape cod master bedroom remodel, I detailed how we repurposed the old formal dining room, transforming it into a new second master bathroom and expanded the size of this original bathroom.
You will below where he removed the wall (the opening on the ceiling where the gap is) making room for the bathtub and new HVAC duct work.

By removing the dining room, we achieved our main objective for the bathroom (this is the hallway bathroom off the kitchen) which was to expand the space to fit a standard-sized bathtub and a full-size vanity.
How do you remodel an outdated bathroom
One of the first orders of business was to address the entire bathroom layout.
One that maximizes space and functionality, moving away from the original cramped design is ideal when remodeling an older home bathroom.
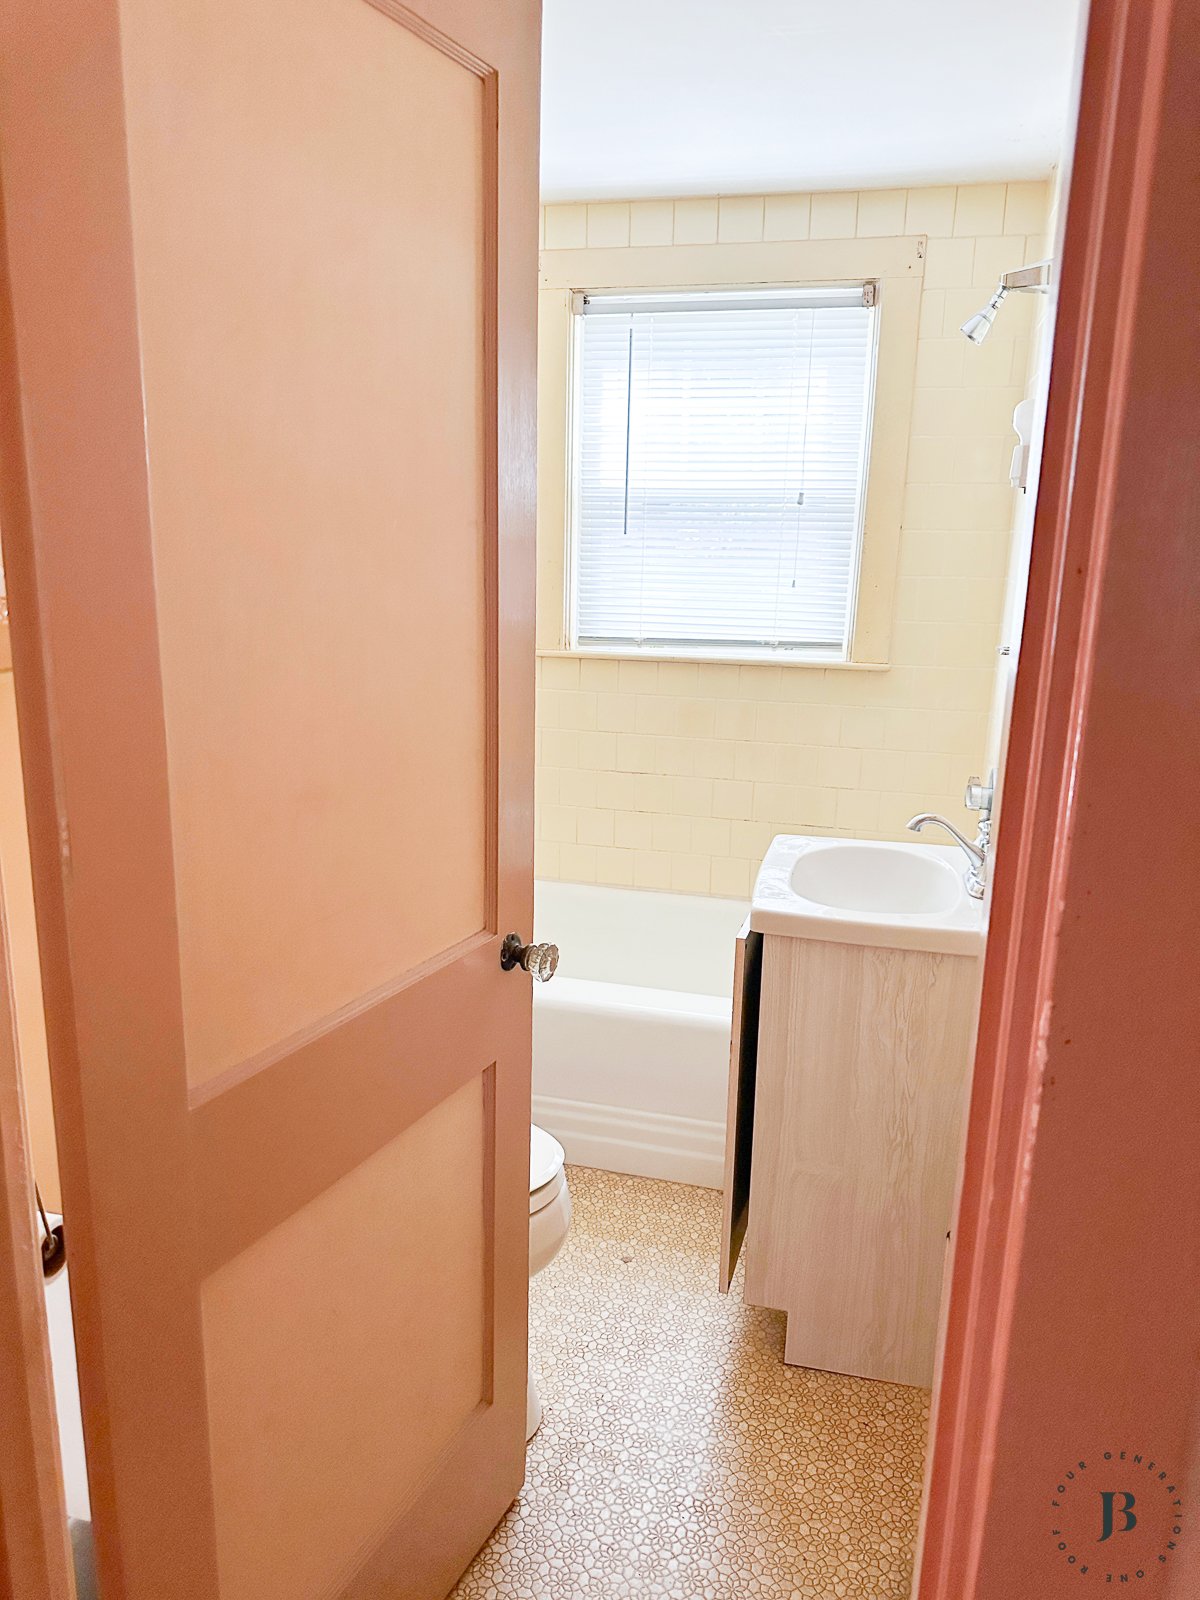
The old bathroom was cramped and the bathroom door hit the toilet when half opened so that was an immediate issue.
Step 1: Remove Old Bath Fixtures
The first thing we did was remove all the lighting fixtures, bath tub, toilet and vanity.
I’m pretty sure everything in this bathroom was a 1950 original, and I couldn’t have been happier to give it a first-class ticket to dumpster-ville.
Often times when Jim completes a demo, there may be pieces that are salvageable to either be reused or sold but not this time!
Step 2: Remove Drywall and Flooring
Jim removed the drywall in order to see the existing plumbing and electrical which ultimately, needed to be replaced.

The flooring was a quick removal process and within 1 hours, this entire bathroom was gutted and ready for it’s new look!
Step 3: Remove Wall Between Dining Room and Bathroom
Like I mentioned earlier, Jim took down the dining room wall, giving us the extra space we needed to not only expand the bathroom but also to move the plumbing around for installing a standard-size bathtub with a custom tile surround.

The removal of the wall made a huge difference!

Pretty amazing right!?
The tile we bought is a white and gray marble look for under $1.50 a square foot.
To customize the shower we upgraded the tub base to a soaking tub and added a shower niche.

Step 4: Address Plumbing and Electrical
For this bathroom renovation, we knew that the plumbing was old and needed to be addressed so while the walls were open, the new plumbing and electrical wires were installed.
New electrical was run for an exhaust fan/light combo as well as light fixtures above the mirror.
The plumbing was relocated from the window wall to the new bathtub wall.
Step 5: New Bathroom Walls and Floor
We decided to the walls a designer boost, so we introduced a shiplap accent wall.
Here is the bathroom after it was gutted.

Modern tile and shiplap combined, achieve a custom aesthetic without the hefty price tag.
Jim prepared the floor and bathtub walls for tiling by installing Durock Cement Board.
Here is the same view of the bathroom after the remodel.

Step 6: Picking Tile and Paint
We chose a budget-friendly gray and white marble wall tile to achieve a modern, refreshing vibe.
Using the same floor tile for the bathtub walls gave us a cohesive, custom appearance without breaking the bank.

When updating an old bathroom, opting for durable, beautiful tile for the walls and floors, along with neutral paint colors that blend the new bathroom with the home’s modern palette, ensures a timeless and seamless transition.
Step 7: New Vanity Installation
We installed a 36″ single sink vanity with cabinet and drawer storage.

Given the bathroom’s compact size, choosing a vanity with storage was essential.
To maintain a standard-sized bathtub, we moved the linen closet to the hallway.

This adjustment was minor, as the closet is conveniently located near the bathroom’s entrance.
Sometimes you have to pick and choose which upgrade is the most important and for this bathroom, having a “normal” size tub was imperative!

Step 8: Updated Bath Lighting & Fixtures
Nickel fixtures and mid-century lighting tied the look together providing a clean fresh vibe.

Sticking with the overall transitional feel, nickel finishes add a touch of elegance and durability to bathroom fixtures, while the mid-century bathroom vanity light brings timeless style.
Step 9: Bathroom Accessories
No bathroom makeover is finished without the right accessories!
A sleek, frameless mirror with a nickel finish, along with matching towel hooks and a towel bar, put the final touches on the space.

1950s Bathroom Ideas
Open shelving can be a great enhancement in a bathroom remodel, and the wall above the toilet would benefit from the addition of shelves in a warm wood tone.
Here is another before picture of the bathroom.
Here is the bathroom after the remodel.

Isn’t it amazing what removing the right hand wall did for this bathroom? It’s hard to believe it’s the same space!
Catch Up: Cape Cod House Remodel Series
- 1950s whole cape house renovation (see a full tour of this home before and after)
- 1950s bathroom remodel before and after
- 1950s Cape First Floor Master Bedroom Makeover (see how we added a 2nd bathroom to the house and walk-in closet)
- 1950s Cape Cod kitchen remodel
- 1950s Cape House Breezeway Renovation (before and after)
- 10 large shower tile ideas, if you have a bath remodel on your mind
Jim’s friends, the previous owners, were ecstatic about the complete house renovation. Adding to this, and I find myself saying this after every project, this remodel ranks as one of my all-time favorites.
More Small Bathroom Remodeling Ideas
- 10 large shower tile ideas, if you have a bath remodel on your mind.
- 1950s bathroom remodel before and after
- Small Bathroom Remodel Before and After
- Shower Tile Installation: Step by Step Guide in a small bathroom
- How to Build a Custom Tile Shower Niche in a shower
- 5×8 Bathroom Remodel Cost {before & after}
- Why a Barn Door To Bathroom Entrance Was a Smart Idea : Small bathroom remodel idea
- How to Hang Glass Shelves Easily with Glass Shelf Brackets in a bathroom makeover
- How to Paint Stripes on a Wall Perfectly Straight in a small bathroom before and after
.

Meet Jessica
What started as a hobby, Jessica’s blog now has millions of people visit yearly and while many of the projects and posts look and sound perfect, life hasn’t always been easy. Read Jessica’s story and how overcoming death, divorce and dementia was one of her biggest life lessons to date.
Hi Jessica…what a beautiful bathroom makeover! Can you tell me where you bought the beautiful tile for the floor and tub? TY
Do you know what size the bathroom became?
the bathroom ended up being 8×8 after the reno