Living Room Accent Wall Idea
Article may have affiliate links. If you make a purchase, I may earn a tiny commission at no extra cost to you. Big thanks for supporting my small business.
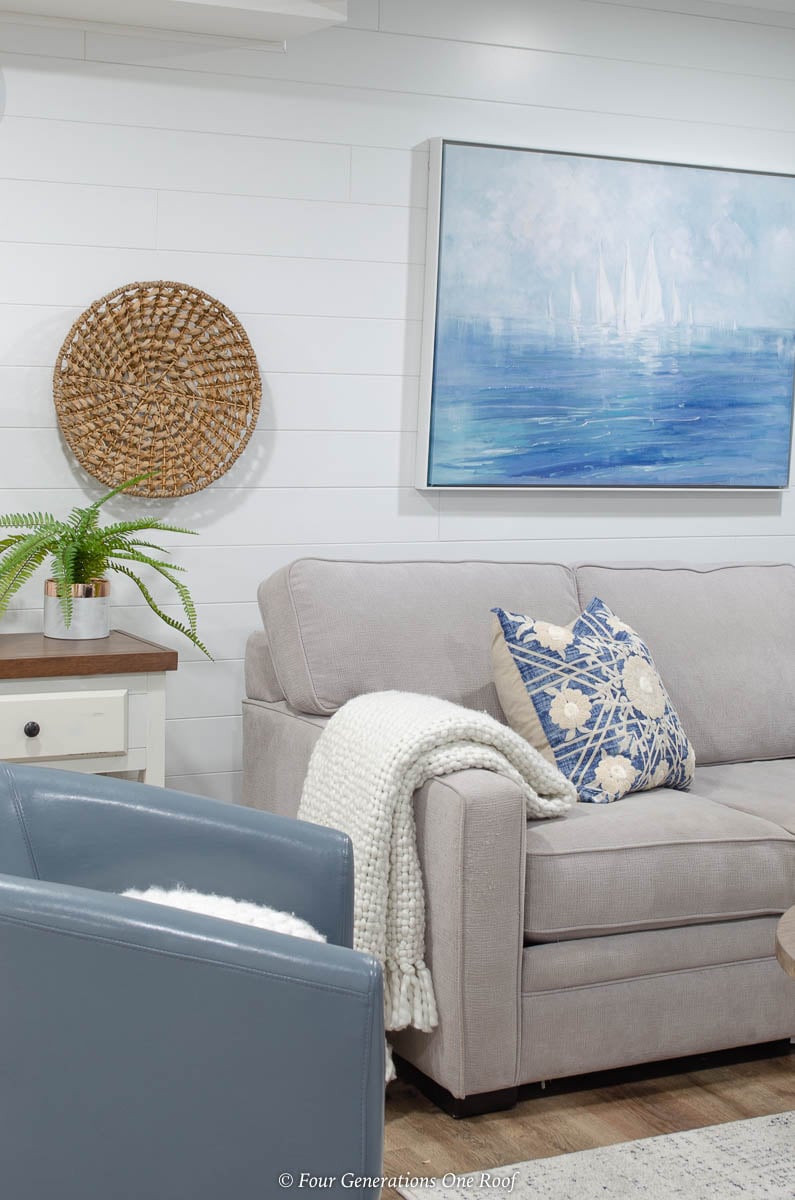
I have the best project ever for you today. I am SO excited to share with you our DIY White Wood-Look Plank Wall Project using Armstrong Ceilings WOODHAVEN Planks and clips. During our basement renovation, we decided to make a wood accent wall using the same product from Armstrong that we used on our ceiling.

Living Room Accent Wall
Our new living room in our finished basement needed a little pizzaz so creating an accent wall seemed like he most logical choice.
Adding planks or molding to a blank wall is a great way to add character and texture to a space.

Originally I was thinking a planked wood ceiling and a planked wood accent wall may be too much “planks” but I decided to gamble and I am so glad I did!
Here is the wall after Jim framed out the wall over the cement foundation.


We used the WOODHAVEN Painted White 5″ x 84″ planks for our accent wall.
We knew we were making an accent wall on this “wall” so we opted to use MDF wood instead of sheetrock to save money.
Sheetrock and plaster are expensive!
Step 1 – add first row of planks
Start by adding your first row of planks and use a level to ensure you are starting off straight.

The white wood planked wall looks amaa-aaazing!
The best part, it was ridiculously easy to install.

We picked the solid white planks because the are paintable.
I don’t have any plans on painting them but you never know down the road. I wanted the option to paint them just in case.
The planks we used on our ceiling are white woven texture and are not paintable.

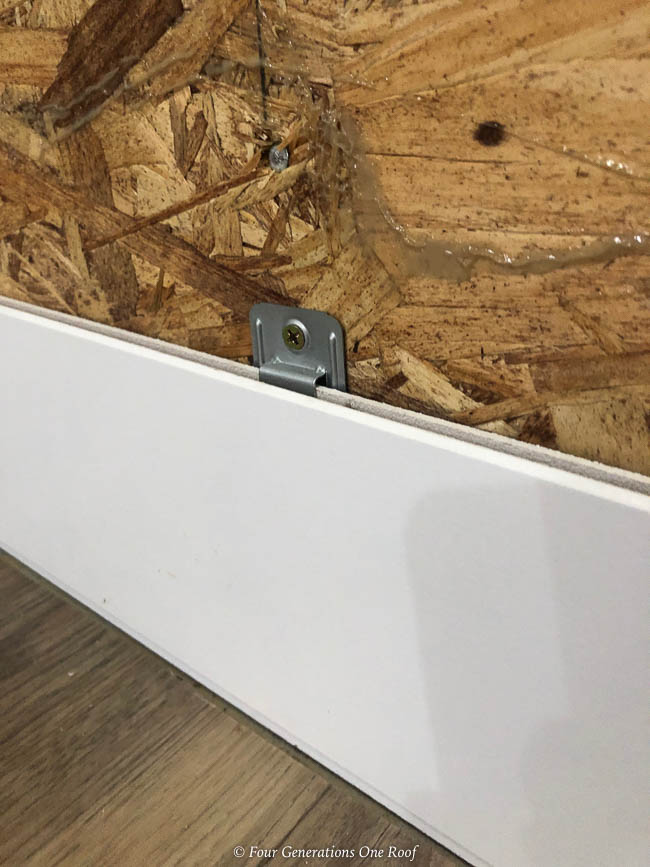
Step 2 – fasten with clips to the wall
Once you have your first row installed, simply screw the clips that come with the planks to the wall and stack your next row of planks (they are tongue and groove so they slide into each other very easily).
The clips keep the planks in place.

Repeat the same process until you reach the ceiling. You will need to cut out your electrical outlet holes.

You will need to cut your end pieces and pieces along the ceiling to fit.
You will notice that we cut out speaker holes too for a surround sound system. The wood is very easy to work with so it was simple to cut out the holes.

We used a round corner moulding along the top where the planks met the ceiling simply to add a finished look.

This wall took about 2 hours to complete.
Our DIY White Wood-Look Plank Wall Project was so easy!

Update: Here is the full basement makeover before and after .
You can purchase these planks at Lowes . The accent wall is white paintable and the ceiling is white woven. I personally also love the Coastal planks as well.
Plank Wall Ideas
The Armstrong Woodhaven white wood planks are lightweight and so easy to work with. The planked wall adds architectural interest to the space and provides a great focal point for this part of the basement which will be the TV/Xbox area. You can find more Armstrong Accent Wall Ideas here.
Be sure to catch all the basement renovation blog posts ( basement post #1 storage | basement post #2 framing | Basement Post #3 flooring | Basement Post #4 ceiling )
This post was sponsored by Armstrong. All opinions and words are 100% my own. Stay tuned, the final reveal will be in the next week ! This post contains affiliate links for your shopping convenience.

Meet Jessica
What started as a hobby, Jessica’s blog now has millions of people visit yearly and while many of the projects and posts look and sound perfect, life hasn’t always been easy. Read Jessica’s story and how overcoming death, divorce and dementia was one of her biggest life lessons to date.


