

Simple DIY Board and Batten Tutorial Bedroom
Article may have affiliate links. If you make a purchase, I may earn a tiny commission at no extra cost to you. Big thanks for supporting my small business.
Board and batten walls are the perfect solution for adding charm and depth to any room. This versatile paneling style typically features vertical battens that create a stunning 3D effect while guiding the eye upward, making the space feel taller and more open.
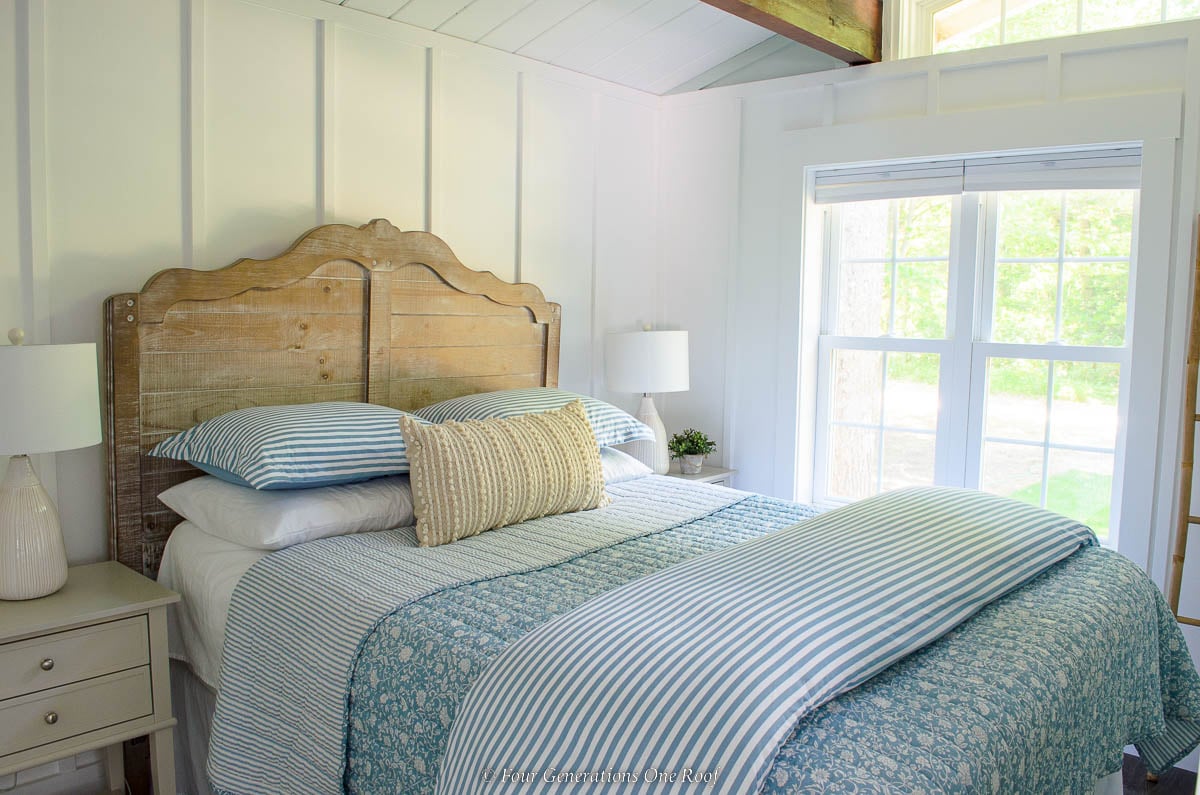
At our small lake house that we recently remodeled, we used DIY board and batten paneling in the bedrooms to complement the vaulted ceilings and exposed beams.
By running the battens 3/4 of the way up the walls, we enhanced the room’s airy feel while staying on budget. DIY board and batten is not only stylish but also one of the most affordable ways to elevate your home’s design!
Now let’s take a look at how we turned this bedroom into a beautiful cozy bedroom!
Tools Needed
• Brad Nailer: A nail gun for attaching batten strips to the wall.
• Chop Saw: Perfect for cutting precise angles on your batten strips.
• Skill Saw: Great for cutting the batten strips to length.
• Level: Ensures your batten strips are perfectly straight.
• Tape Measure: Helps you measure and space batten strips accurately.
• Caulking Gun: Makes applying caulking easy and clean.
• Miter Saw: Ideal for making angled cuts for precise edges.
• Table Saw: Cuts large pieces of MDF down to size.
Materials You’ll Need
• MDF (batten strips): These create the “batten” look on the wall.
• Adhesive (liquid nails): A strong glue to secure strips to the wall.
• Caulking (paintable): Seals gaps between the batten and wall for a smooth finish.
• Brad Nails: Holds the batten strips firmly in place.
• Wood Filler: Covers nail holes for a polished, seamless appearance.
Step by Step Installation Process
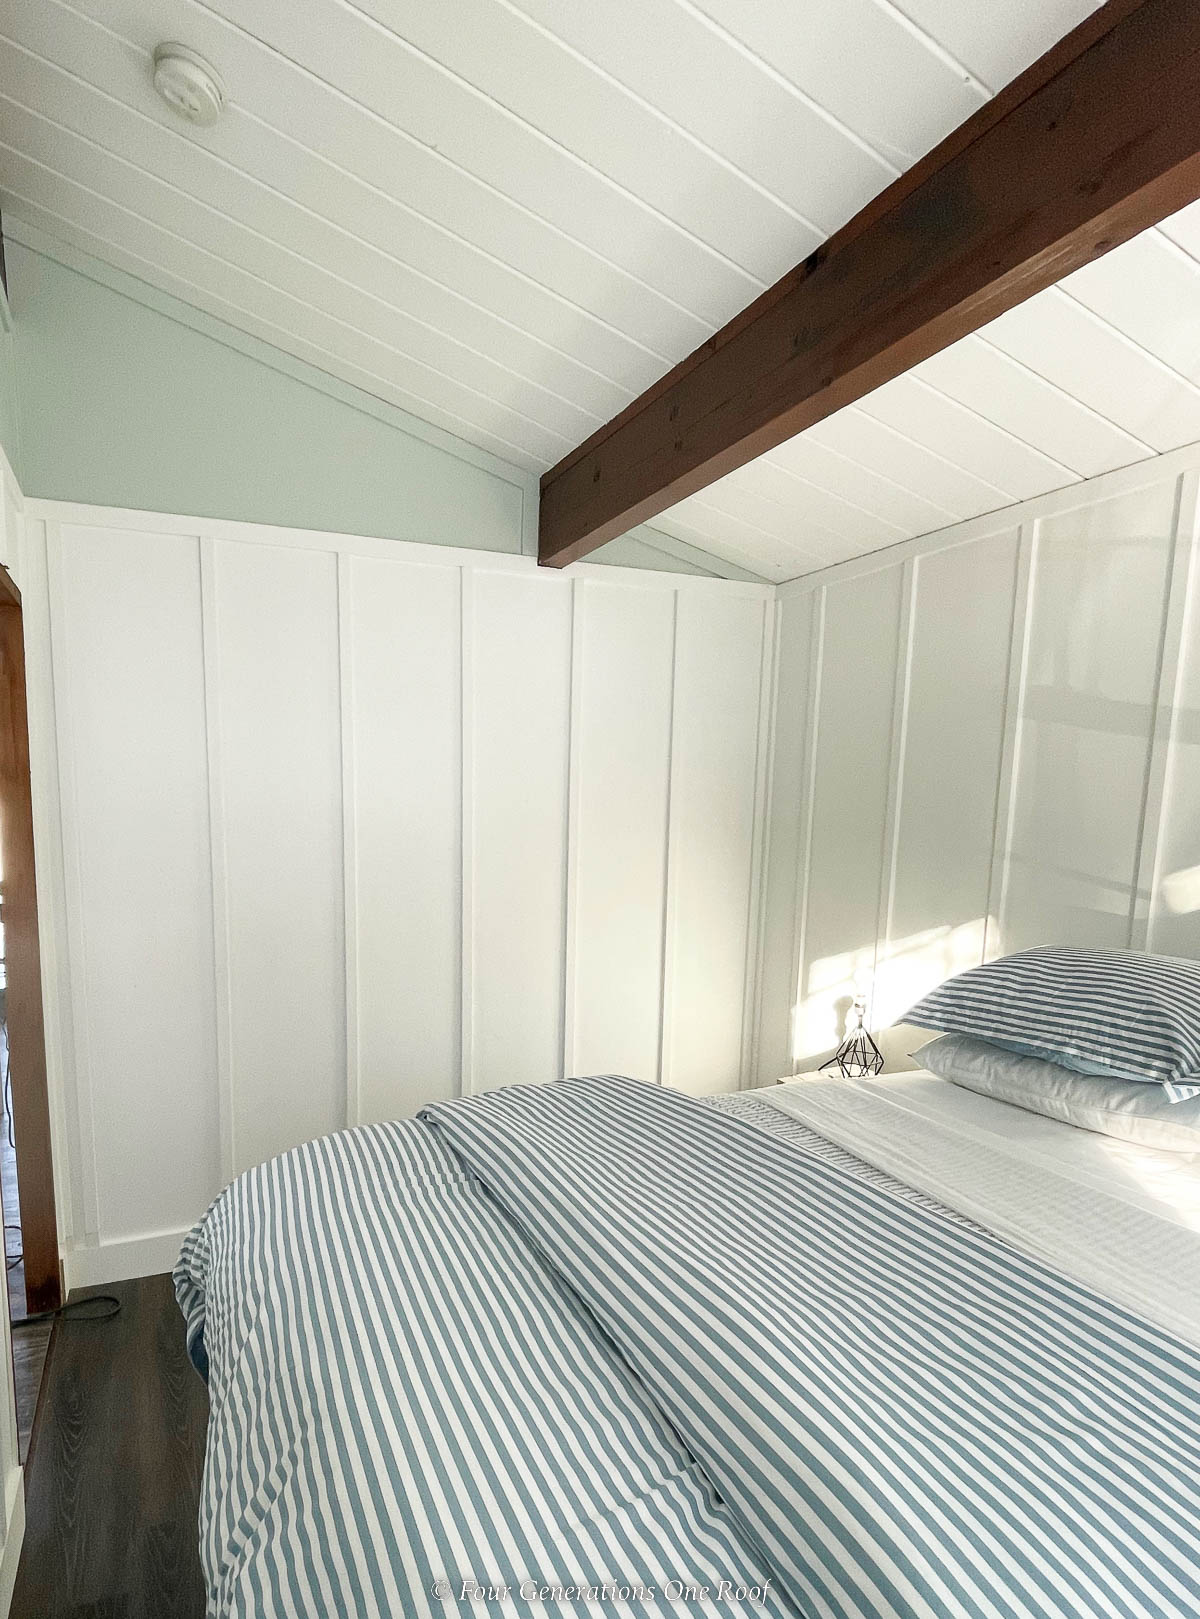
When we bought the house, the walls were covered with dated paneling that had been painted, wainscoting on the lower portion and some areas had wallpaper that was painted.
We removed the wainscoting (see image below), added wall insulation (there was no insulation in the house) then added sheetrock (our board) as the final layer.

We decided to hang the board (the sheetrock) over all the walls in the bedrooms in order to start fresh and painted the ceilings in Chantilly Lace white to create a cohesive look.

This application is for applying batten pieces to a smooth wall. If you have textured walls, you may opt to add “board” over your existing walls like we did using sheetrock.
Batten Spacing & Baseboard
For this room, we decided to install a trim piece where the angle of the ceiling met the wall and cut the batten strips each 7′ to meet the trim piece.
Spacing in between batten pieces is a personal preference but 12-16″ is good guide.
Notice how the batten pieces around the window are shorter.

If you look closely in the picture below our baseboard is 5″ craftsman style.
The batten pieces from top to bottom are flush against the top of the baseboard and upper trim piece.
Depending on what type of baseboard you have, you may need to cut the batten wood on an angle with a miter saw so the wood fits flush.
Painting Board & Batten Walls
We picked Benjamin Moore Seafoam Green for the top part of the wall and Benjamin Moore Chantilly Lace for the board and batten wall.
I love how the walls look with the walls look painted white with the green accent color on top. The warm toned beams also have a beautiful contrast!
Be sure to take your time when filling the nail holes and sanding so you achieve a smooth finish during the painting process. I personally like the spackle that turns white when it’s dry.
Board & Batten Bedrooms


Here is another bedroom in the house where we installed a simple board and batten accent wall.

I LOVE how the accent wall looks with the blue and green duvet cover with the Wrought Iron headboard.

The 3rd bedroom in the house also features board and batten throughout the room.
I love how the walls look in this kids nautical space with plaid bedding.
Here is the bedroom before we installed the board and batten. It’s honestly hard to believe it’s the same room!

Not only did we add board and batten to all the bedroom walls in the house, we replaced all the windows and painted.

Isn’t this the cutest room ever! I love this space and our Airbnb (yes you can now rent our lake house!) guests always rave that their kids love this bunk room.

Overall, board and batten is very cheap and easy diy project and the installation is so simple! It’s a popular application in bedrooms, bathrooms, and entryway or a dining room but will look create visual interest in any space.

Meet Jessica
What started as a hobby, Jessica’s blog now has millions of people visit yearly and while many of the projects and posts look and sound perfect, life hasn’t always been easy. Read Jessica’s story and how overcoming death, divorce and dementia was one of her biggest life lessons to date.
Come Enjoy a Stay at our Lake House
Our newly renovated waterfront lake house retreat with 1500 SF (7 beds), 3BR, 2BA, open concept living room + kitchen + lower level w/ arcade game is the perfect destination for your next getaway.