

How to Install Wood Floor Vent Covers: DIY Guide (Before & After)
Article may have affiliate links. If you make a purchase, I may earn a tiny commission at no extra cost to you. Big thanks for supporting my small business.
Here’s what nobody tells you about floor vents: Those old metal registers are killing your hardwood floor’s vibe. Swapping them out for custom wood vents might be the easiest way to make a $3,100 investment look like you spent $10K on your floors.

After we refinished our red oak floors to a lighter, modern look, those old metal floor vents stuck out like a sore thumb. We replaced them with custom wood floor vent covers and the transformation was stunning—the seamless transition from floor to vent is so smooth you barely notice them.
My step-by-step guide shows you exactly how to install wood floor vent covers without hiring a pro!
Why Replace Metal Floor Vents with Wood Covers?
The difference is night and day (seriously, you will see what I mean in a minute).
The old metal registers (you know, those long grate things—not even sure what they’re officially called, ha) looked dated and cheap against our newly refinished floors.

What makes wood vent covers worth it:
- Seamless look that blends with your hardwood
- Custom sizing to fit your exact openings
- Can be stained to match your floor perfectly
- Way more elegant than metal grates
- Adds that high-end finish buyers notice
I personally love the square hole detail on the wood vents—so much prettier than those metal slats.
The whole floor just looks more cohesive and expensive.
Installing Wood Floor Vents: What You Actually Need
Tools and Materials
- Tape measure
- Unfinished wood vent covers (we used red oak to match our floors)
- Sandpaper (medium and fine grit)
- Bona Nordic Seal (for staining)
- Bona Traffic HD Satin Finish
- Brushes or cloths for applying sealer and finish
- Screwdriver (if removing screwed-in vents)
- Chisel and hammer
- Multitool or Oscillating Tool (this was crucial)
- Pencil or marker for labeling
- Vacuum cleaner
- Soft cloths
Real talk: You’ll probably spend around $2,100 total for materials (our labor to have the installed was $1000) and custom sizing if you’re doing a whole house. Worth every penny.
Want the exact tools and products we used for this whole project? Grab my Red Oak Flooring Guide, it’s all laid out in one place so you’re not hunting through a dozen posts like I did.
Grab the guide HERE.
Step-by-Step: How to Install Wood Floor Vent Covers
Step 1: Measure Your Vent Openings
Start by removing the old metal vent covers and measuring the length and width of each duct opening.

This ensures you order the correct size for the new wood vent covers—most manufacturers have size charts to help you pick the right fit.
Pro tip: Write down the measurements for each vent location. Trust me, they’re not all the same size.
Step 2: Order the Right Wood Vent Covers
We purchased unfinished wood floor vents from our local flooring store in red oak to match the same grain as our red oak floors.
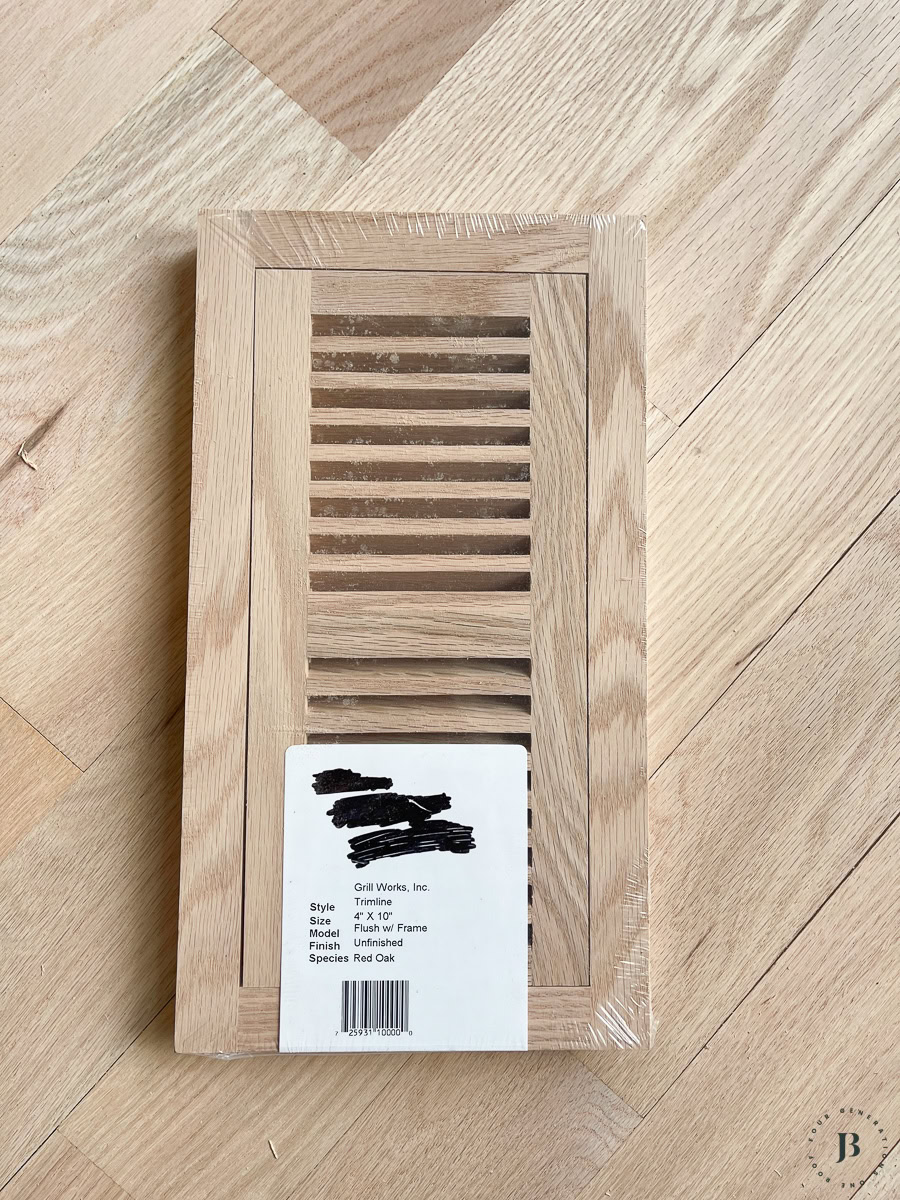
Make sure the dimensions are slightly larger than the vent opening for proper coverage—you want them to sit flush and look seamless.
You can also grab unfinished wooden vent covers on Amazon which are cheaper, but we needed larger custom air return vents so we got everything from one supplier to keep the finish consistent.
Step 3: Fit the New Vents (This is the Tricky Part)
This step was a bit tricky since the original vent holes had to be enlarged—this is where the multitool became your best friend.
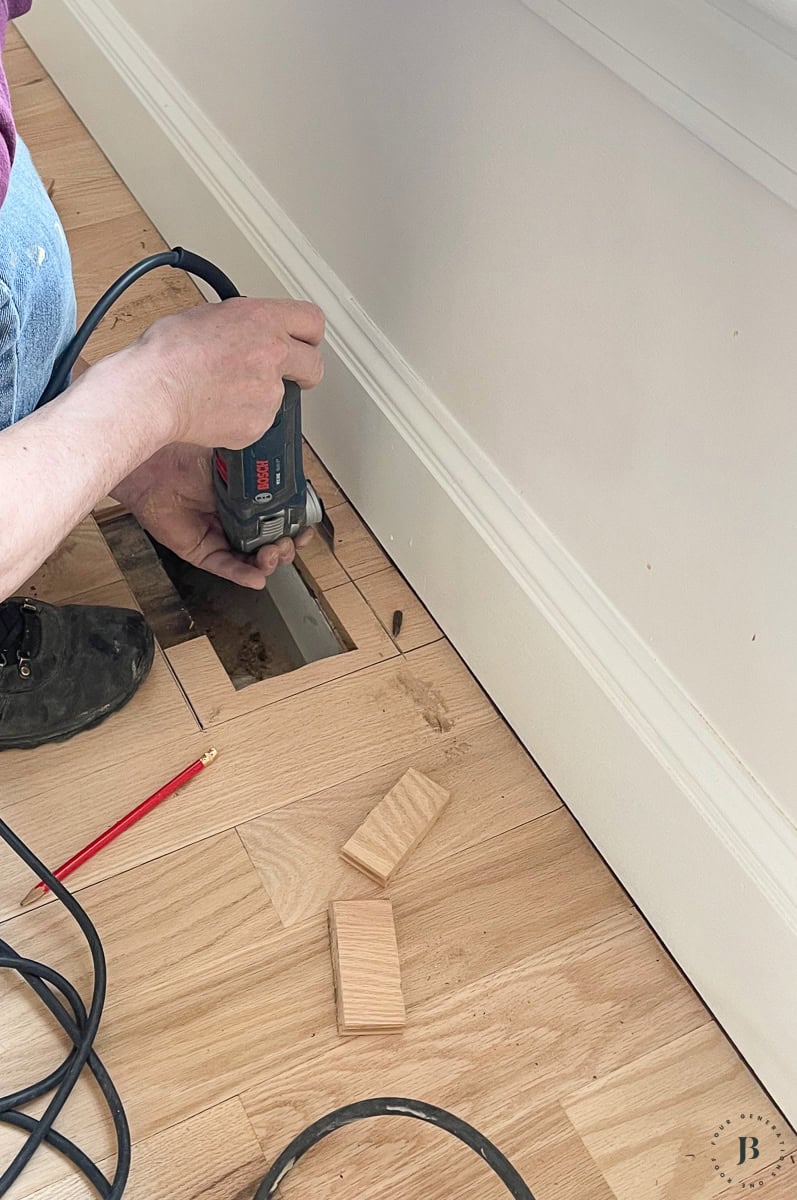
Here’s how to do it:
- Place the new vent over the opening and trace its outline onto the floor
- Use a chisel and hammer (or multitool) to carefully cut out the traced area
- This creates a recessed frame for the vent to sit flush with the floor
Take your time here. Rushing this step will show in the final result.
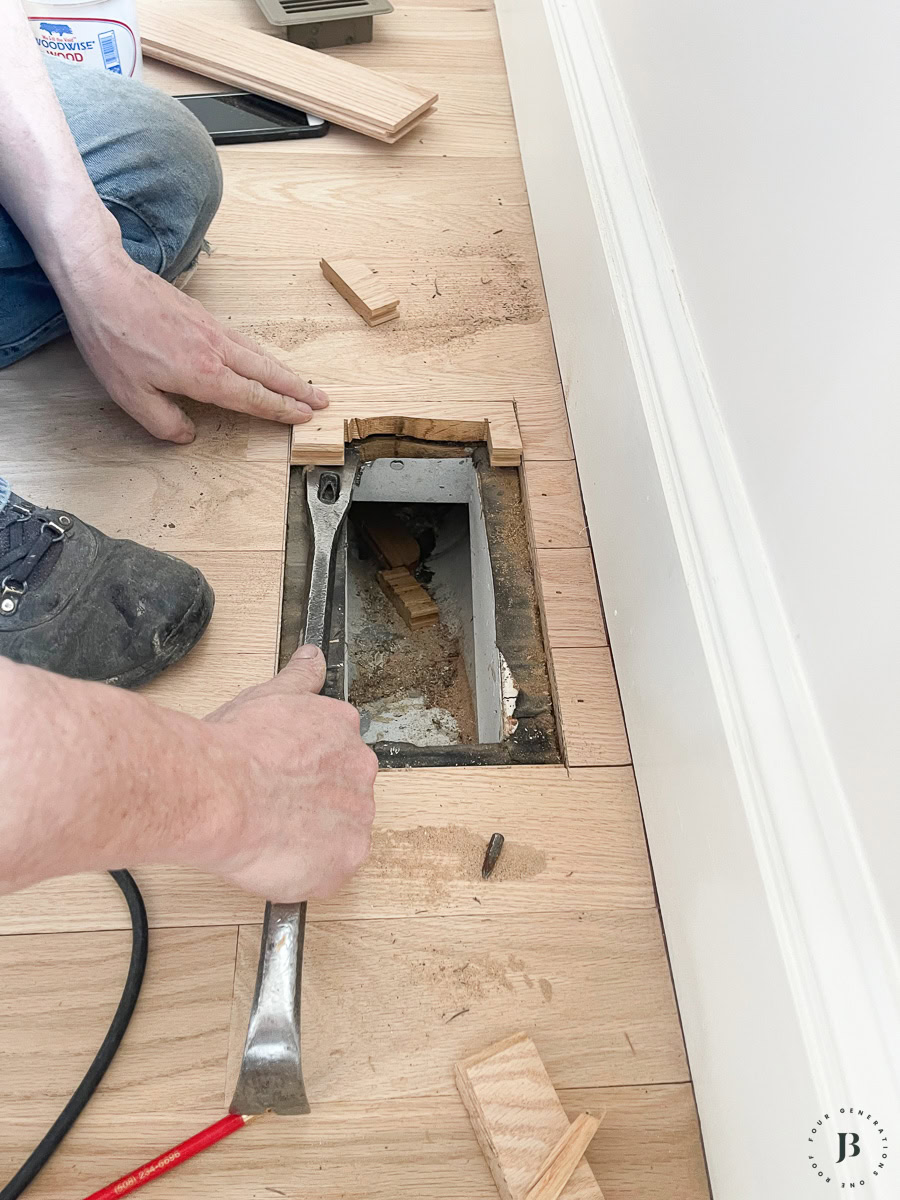
Step 4: Label Everything (Seriously, Don’t Skip This)
Labeling your vent covers with the corresponding vent holes is a must.
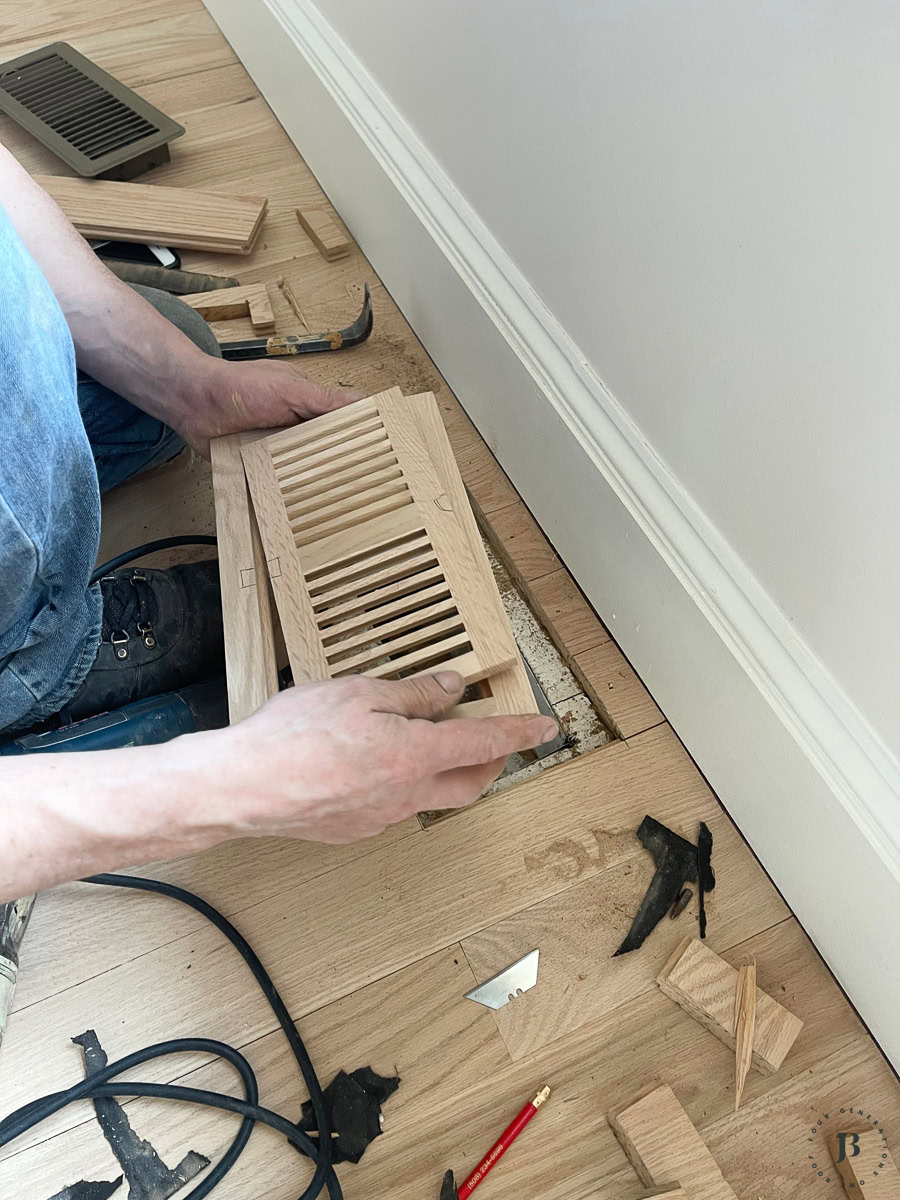
Assign a unique letter or number to each vent and write it on both the vent cover and the floor opening. This will save you so much frustration when it’s time to reinstall after staining and finishing.
Related: See how we refinished these red oak floors to look like white oak
Step 5: Prep the Vent Covers
Sand the vents using medium-grit sandpaper to smooth rough spots, then finish with fine-grit sandpaper for a polished surface.
Here is the floor vent before we stained it.
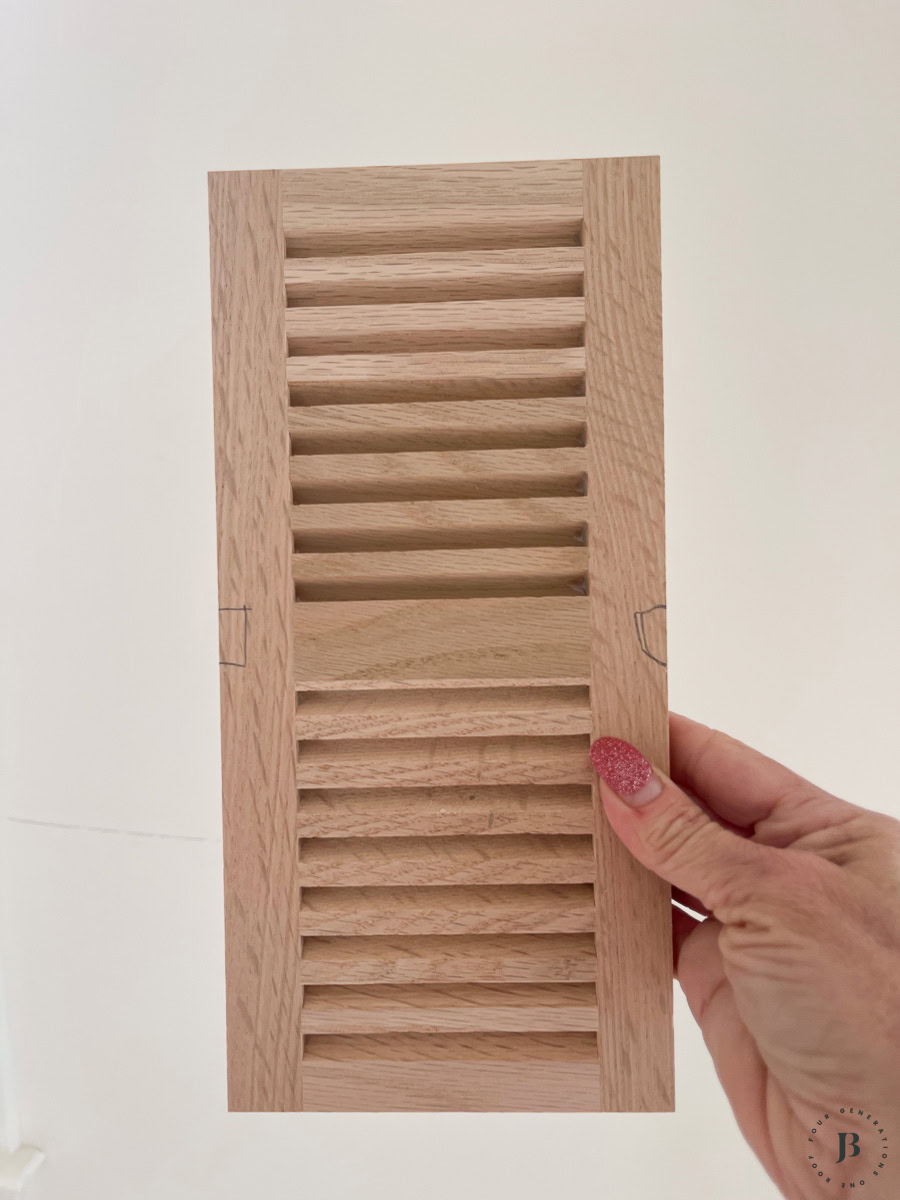
We laid out all our vents on the kitchen island, covering it with a paint drop cloth. Made the sanding and staining process so much easier.
Once the unfinished covers are lightly sanded, wipe them with a damp cloth to remove all dust and debris. Any dust left behind will show up in the finish.
Step 6: Stain with Bona Nordic Seal
Make sure to stain the vent covers to match your hardwood floor color.

I swore I had pictures of the staining process, but I can’t find them anywhere. We used a clean brush to apply a coat of Bona Nordic Seal, working with the wood grain.
This product gives a light, white-washed look that perfectly matches floors finished in a similar style.
The difference is wild—the unstained vent looked completely different from our floors, but after one coat of Bona Nordic Seal, it looked exactly like our refinished red oak.
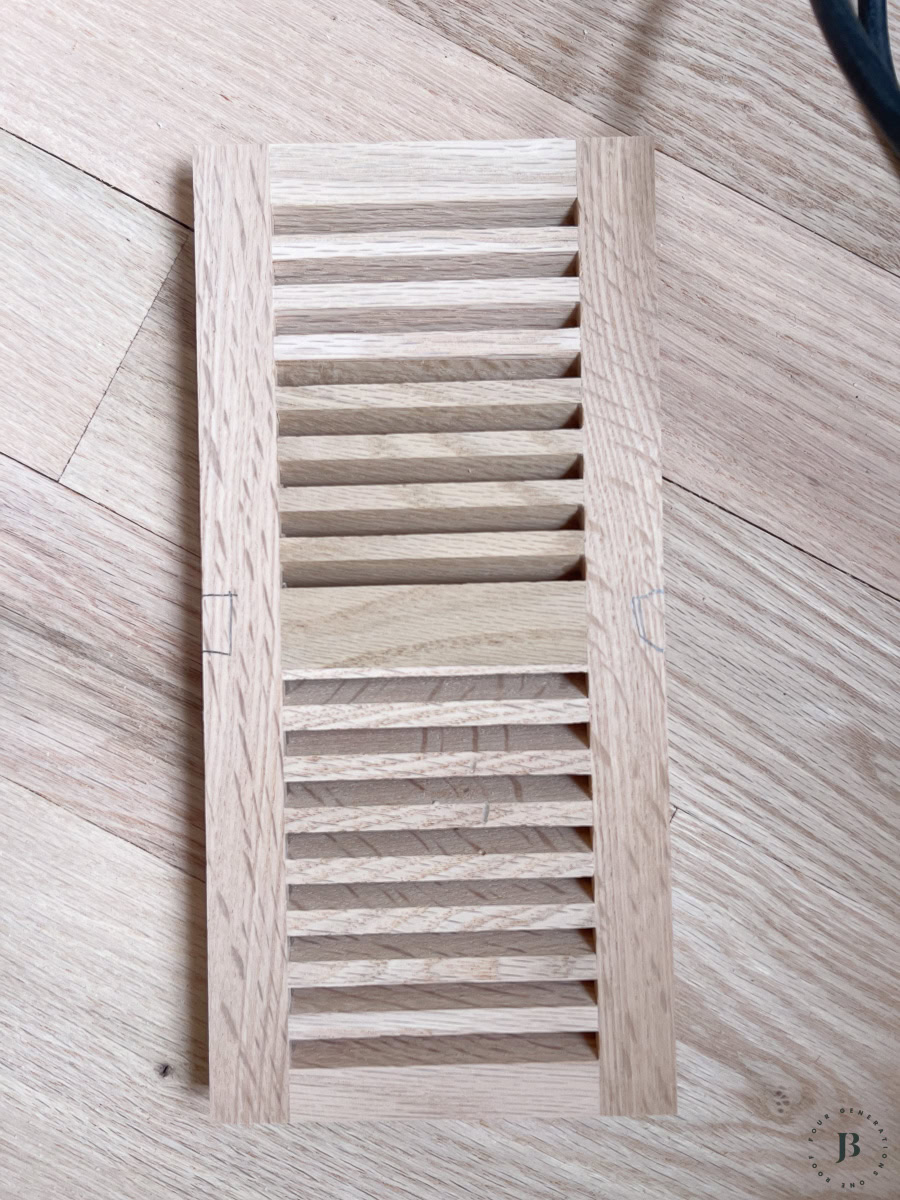
Let the wood vent covers dry for a full 24 hours before moving to the next step.
Don’t rush this step!
Step 7: Apply Bona Traffic HD Satin Finish
Once the sealer was completely dry, we applied a coat of Bona Traffic HD Satin Finish to protect the vents and match the floor’s sheen.
Let the finish dry thoroughly, then sand lightly with fine-grit sandpaper and apply a second coat if needed for durability.
This finish protects the vents from foot traffic and keeps them looking fresh.
Step 8: Install the Finished Wood Vent Covers
Place the dried and finished vent covers into their designated openings (this is where your labeling pays off), ensuring they fit snugly and sit flush with the floor.
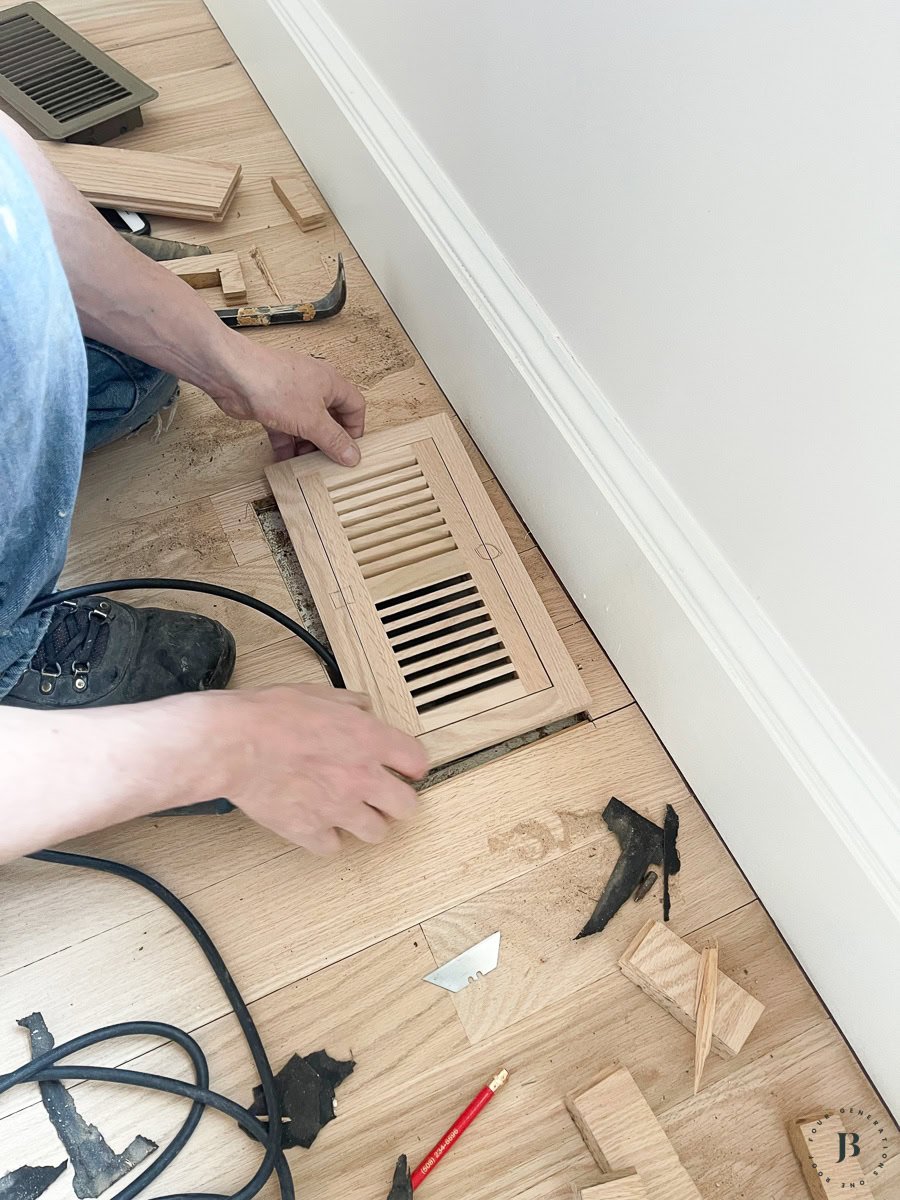
How the vents work:
The floor vents come in two pieces:
- The outer edge trim piece (creates the frame)
- The center vent piece (the actual grate with the square holes)
For vents that require screws, pre-drill holes to prevent splitting the wood.
The floor vents come in two pieces—the outer edge trim piece (below),
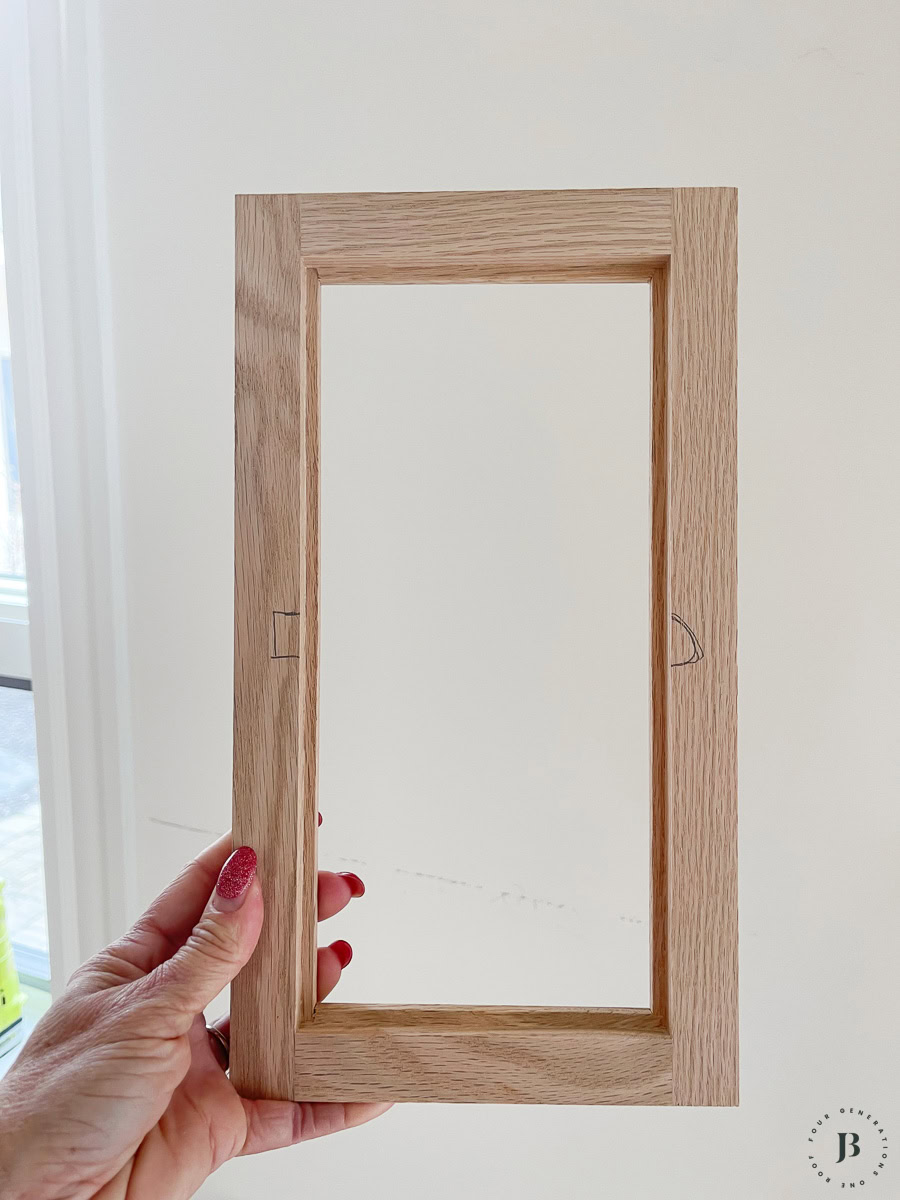
and the center vent piece with the square hole detail (below).
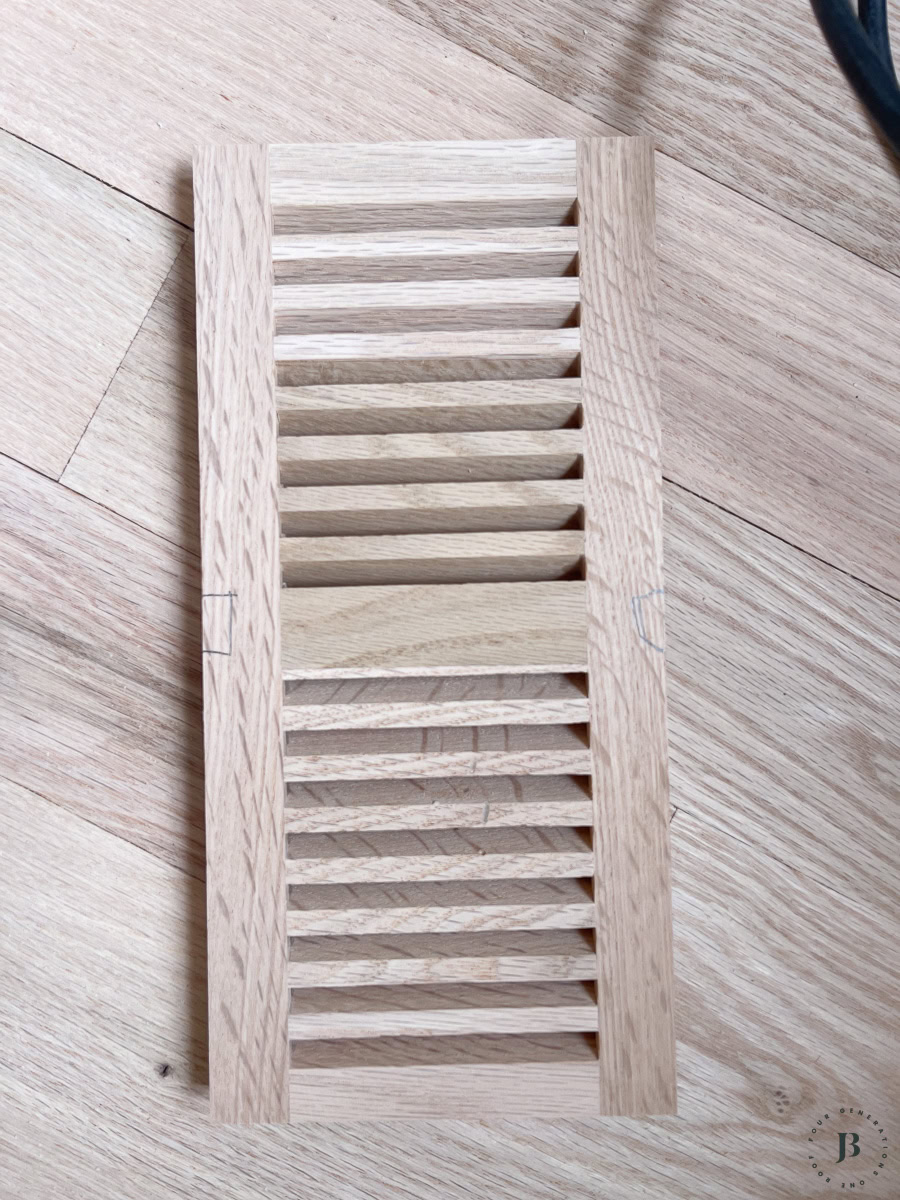
They fit together seamlessly, creating a smooth, flat surface on the floor. When installed correctly, the transition from floor to vent is so smooth you barely notice it—that’s the whole point.
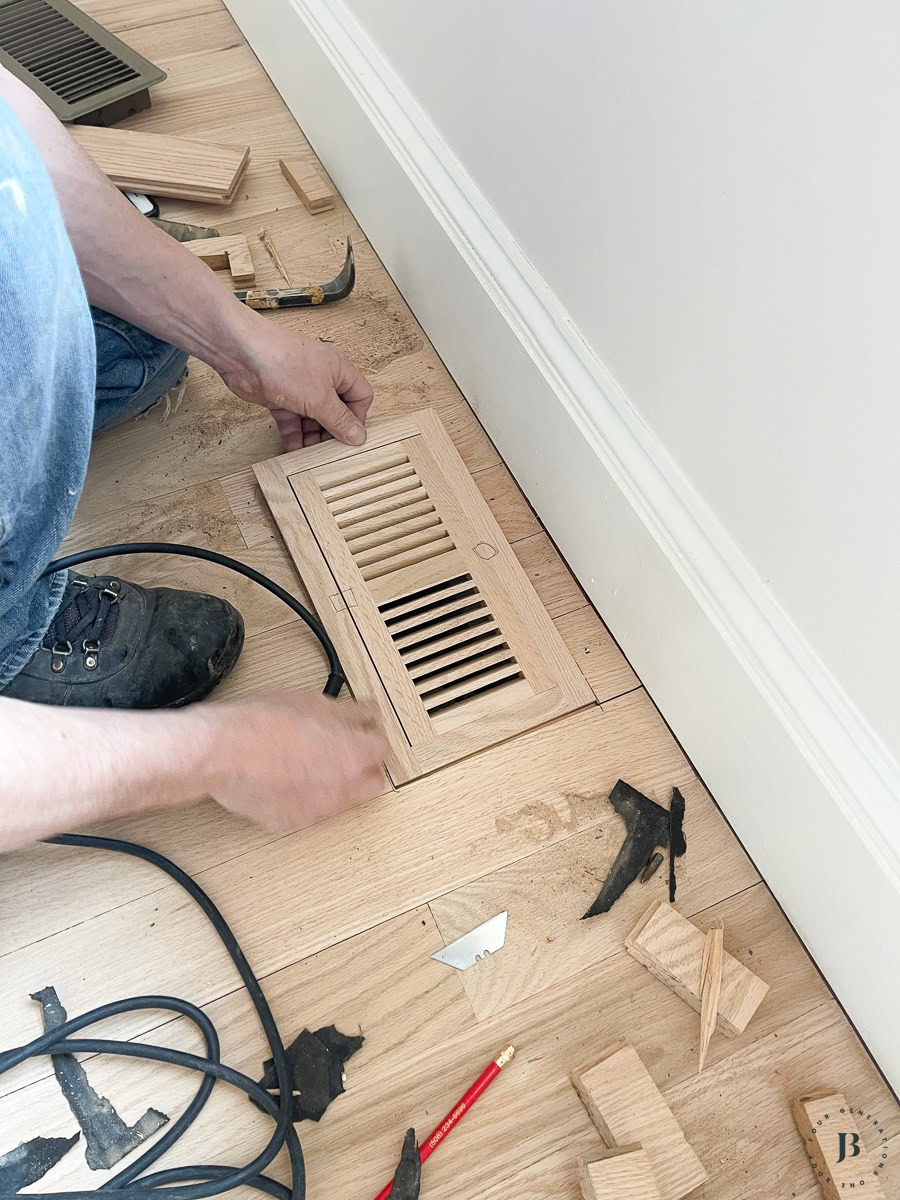
Quick fix: If you need to repair any cracks or dings on the surrounding wood floor from the installation, wood filler (in the same color as your floor) works great.
Is Replacing Floor Vents Worth the Cost?
The difference between the old metal vent covers and the newly refinished wood ones is huge.

Total investment: $2,300 for materials and installation

Why it was worth every penny:
Swapping out those old metal floor registers for custom wood vents was a game changer and really elevated the new floors.
The seamless transition from the floor to the wood vent is smooth, and I personally love the square hole detail on the vents—so much prettier than those metal long grates (not sure what they’re exactly called, but you know what I mean, ha).
When you’re dropping serious money on refinishing hardwood floors, spending an extra $2,300 to make them look professionally installed and cohesive is absolutely the best investment. Those metal vents would have cheapened the whole look.
Common Questions About Wood Floor Vent Installation
Do wood vents restrict airflow?
Not if they’re sized correctly. Ours work just as well as the old metal ones.
Can you DIY this project?
Yes, but you need the right tools (especially that multitool for cutting). If you’re not comfortable with precision cutting, hire a pro for the fitting part and DIY the staining.
How long does installation take?
Plan for a full weekend—one day for fitting and cutting, one day for staining and finishing, then installation once everything’s dry.
I’m curious—have you upgraded your floor vents? Comment below or send me a quick email!
Click through the posts below to join us on our hardwood floor refinishing journey!
More Of Our Red Oak Flooring Transformation
- The actual cost to refinish our red oak floors vs replacing. The gap is significant!
- Refinishing red oak floors to look like white oak (before and after) – you will be amazed at the before and after of our home going from dark stained floors to a light white oak look!
- We upgraded our floor vent covers to wood floor vents that match the new floor perfectly.
- The difference between red oak and white oak – both wood species have varying undertones with red oak having more pink pigment. See the grain differences and the hardness density.
- Best red oak stain colors – we tried several colors and clear sealers to find the perfect shade.
- Bona Nordic Seal – see how we got most of the red/pink undertone out of our red oak floors.
- 1 year later with our refinished red oak hardwood floors and how they are holding up.
- How to replace old metal floor vents with custom wood vent covers transforming our hardwood floors

Meet Jessica
What started as a hobby, Jessica’s blog now has millions of people visit yearly and while many of the projects and posts look and sound perfect, life hasn’t always been easy. Read Jessica’s story and how overcoming death, divorce and dementia was one of her biggest life lessons to date.