

How to Grow Hydrangeas in Pots: What Actually Works (And What We Do Every Summer Around Our Pool)
Article may have affiliate links. If you make a purchase, I may earn a tiny commission at no extra cost to you. Big thanks for supporting my small business.
Yes, hydrangeas grow beautifully in pots and as a perennial, they will come back year after year if you care for them properly! The keys are choosing the right pot size (at least 18 to 20 inches in diameter), using well-draining potting mix, watering deeply every 1 to 3 days depending on heat, and transplanting them into the ground each fall.
We have grown Endless Summer and Cityline Vienna hydrangeas in pots around our pool in Massachusetts for years, starting with 4 plants at $29.99 each and we get them back every single season!
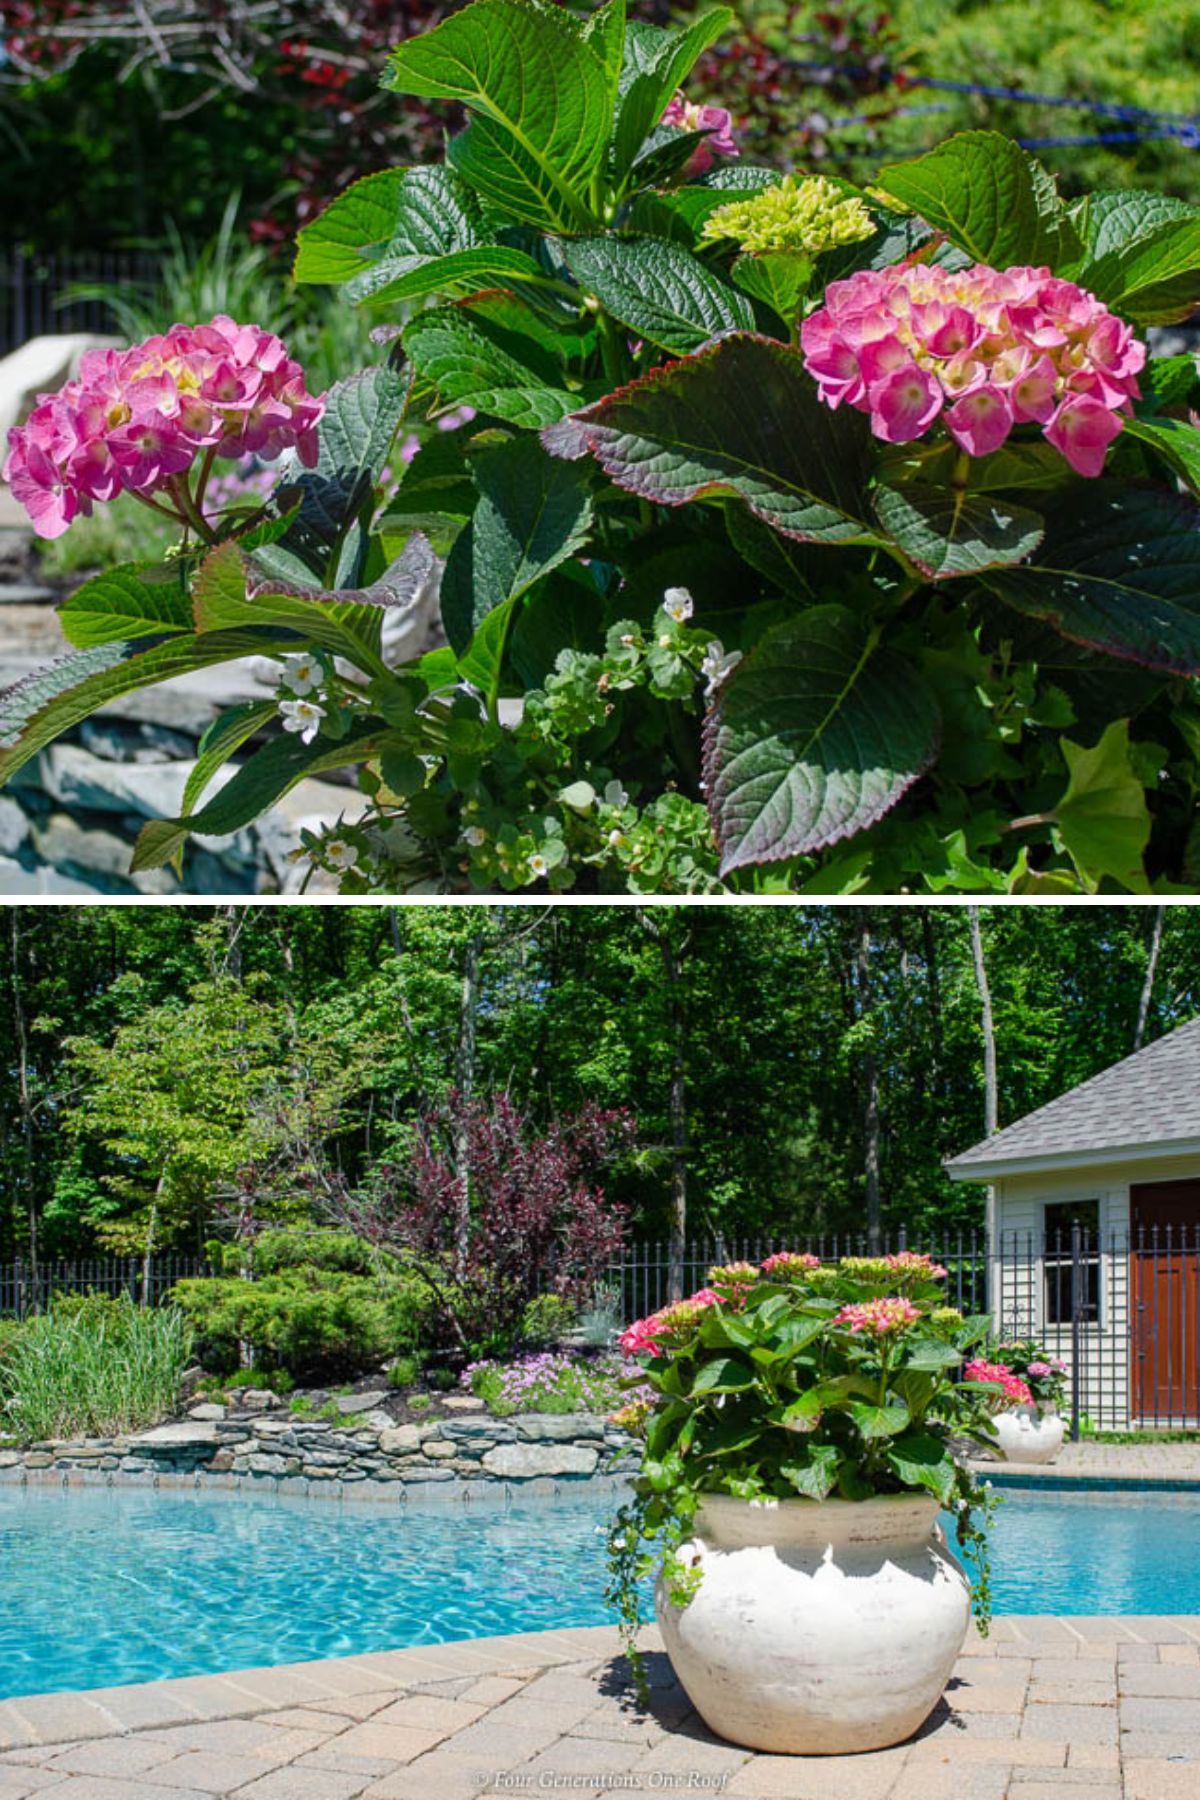
We plant 4 to 6 potted hydrangeas around our pool every summer. Have for years. Every spring my mom and I do a full reset of the pool area, new pots, fresh soil, same hydrangeas we transferred in October.
It started as a practical decision. We wanted lush color around the pool without committing to permanent flower beds in every spot. What we did not expect was how easy it would become once we figured out the system!
Here is everything we have learned.
Why Potted Hydrangeas Are Worth the Investment
Here is the math that convinced us to stop buying annuals.
A hanging annual basket runs $25 to $35, looks gorgeous for 8 to 10 weeks, and then it is dead. Investment: gone. We figured this out together after one too many dead hanging baskets.
A Cityline Vienna or Endless Summer hydrangea bush? Also around $29.99. But it is a perennial, meaning if you care for it correctly, it comes back every year, fuller and more vibrant than the season before!
We bought 4 plants in the spring, pot them up around the pool, and transfer them to a flower bed every fall. By year two, the same plants are noticeably bigger. That is not a garden expense, that is a garden investment!
After about 3 years of living in a pot and being repotted each spring, we transition the plant permanently into the ground. The roots eventually need more space to spread and grow than any container can give them.
This is actually a bonus! Those transplanted hydrangeas become established perennials in our flower beds, and we start fresh with new container plants the following season. It keeps the potted ones from getting out of control and adds to the garden at the same time!
Choosing the Right Pot for Hydrangeas
Size matters more than looks
The most common mistake is going too small. Hydrangeas have aggressive root systems and will exhaust a small container by mid-summer. Go big: at least 3x the size of the base of the plant, which practically means a minimum of 18 to 20 inches in diameter.
Drainage holes are non-negotiable
No drainage = root rot = dead plant. Full stop. If you fall in love with a pot without drainage holes, grab a drill with a 1-inch bit and make a few yourself. Takes 5 minutes.
Pot material matters in cold climates
We have read so many accounts of people losing their pots and their plants after the first hard freeze because they chose clay, terracotta, or ceramic without checking whether it was frostproof. (That would absolutely drive us crazy after all that work!) If you are in New England or anywhere with real winters, look for a frostproof sticker on the bottom. Resin and composite pots handle freeze-thaw cycles just fine.

Best Hydrangeas for Growing in Pots
Compact and mid-size varieties do better in containers because they do not outgrow their pots as quickly. Our personal favorites for Massachusetts:
- Endless Summer – reblooms on both old and new wood. Forgiving and reliable, which matters when you are learning.
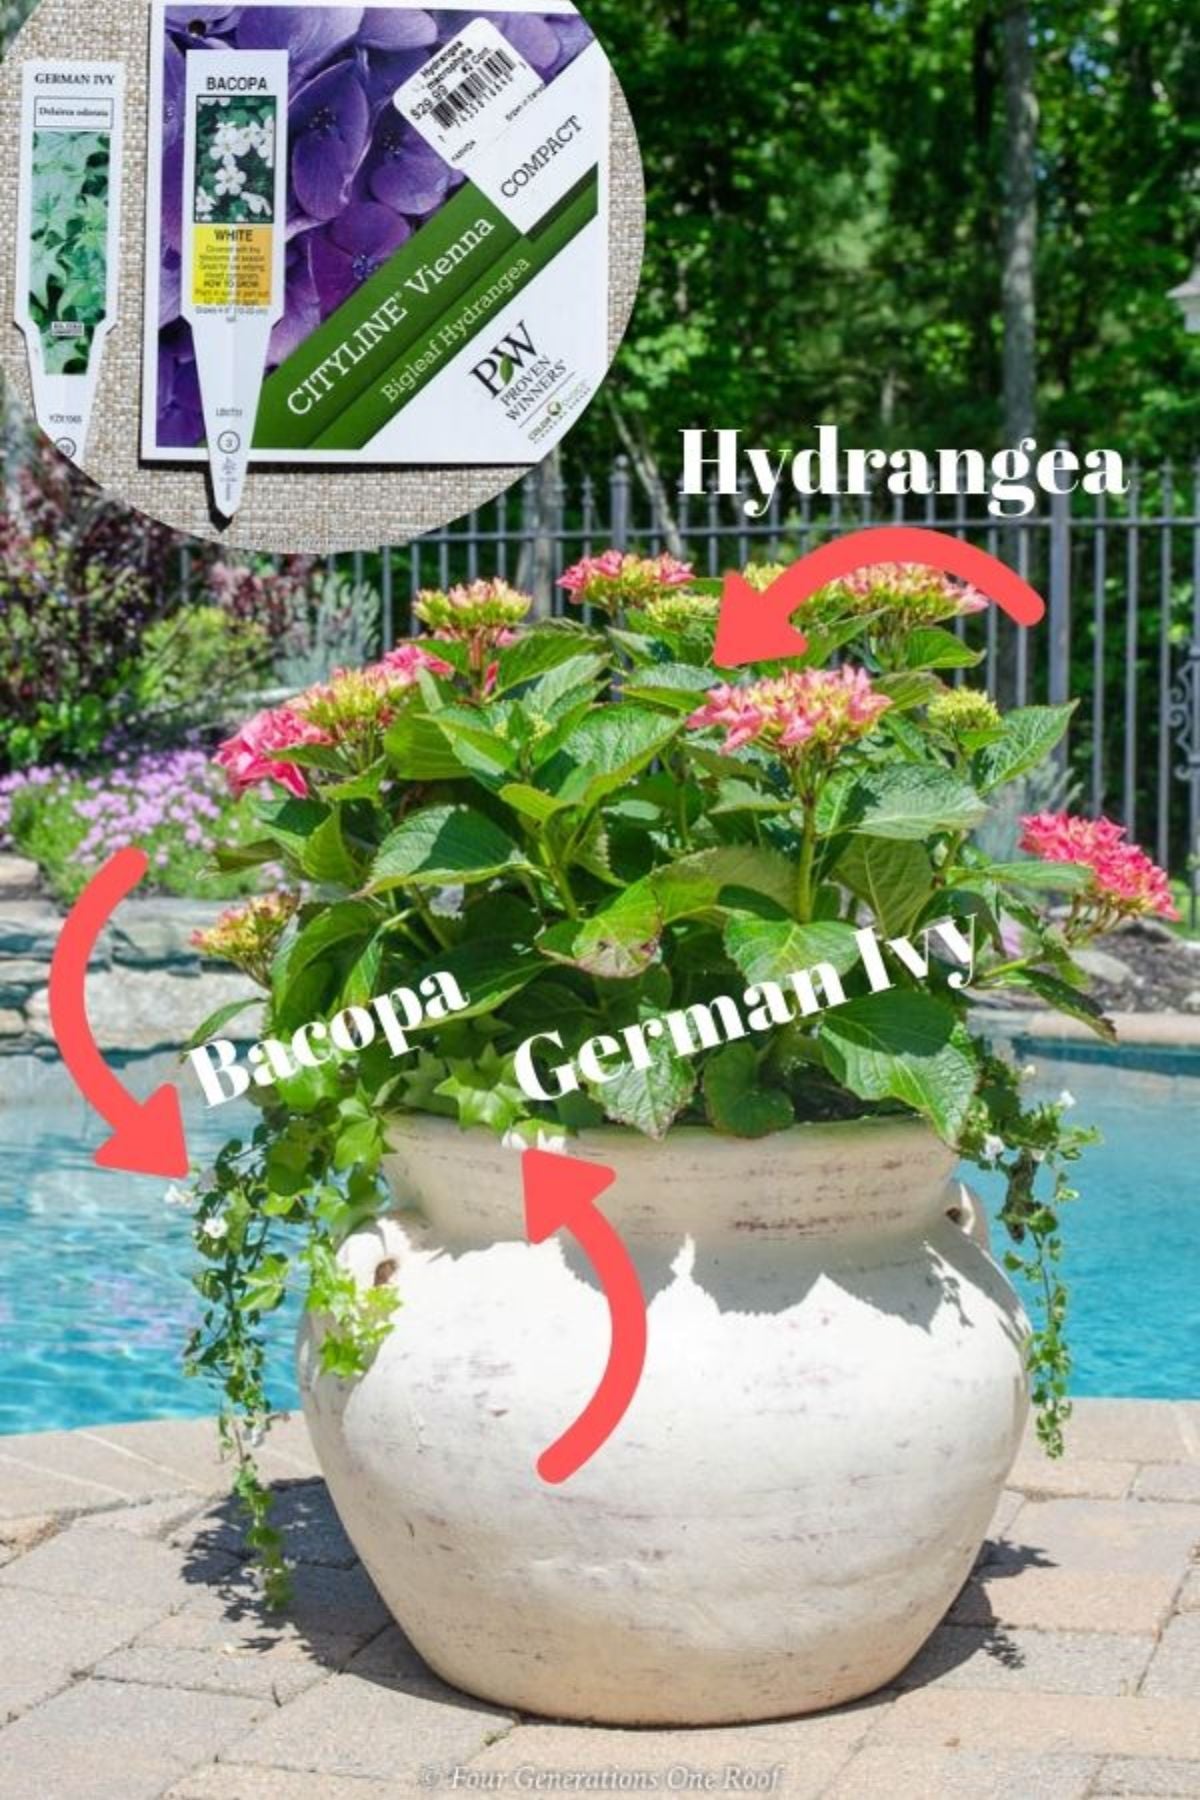
- Cityline Vienna (Compact Bigleaf) – stunning color, stays compact, does beautifully in a pot for a full season.
- Little Quick Fire and Bobo – panicle varieties, great for sunnier spots, very manageable in containers.
Other varieties that do well in pots: Paris Rapa, Paraplu, and Fire Light.
One important note: bigleaf hydrangeas bloom on old wood (they set next year’s flower buds before winter). Do not hard prune them in fall or you will cut off next season’s blooms. Light shaping only.

Soil, Fertilizer, and the Hydrangea Color Secret
Use quality potting mix, not garden soil. We grab a bag with fertilizer already mixed in from Home Depot or Lowes. Garden soil is too dense and holds too much water.
Mix in compost alongside the potting mix. And add 2 to 3 handfuls of small rocks at the very bottom of the pot before adding soil (extra drainage insurance in full sun where you are watering every day).
The soil pH and flower color connection
The acidity of your soil determines whether your blooms come out pink or blue on bigleaf varieties. More acidic = blue. More alkaline = pink. We use a potting mix and fertilizer formulated to keep the Cityline Vienna blooms pink.
Stop fertilizing after late July
Fertilize in early spring around the base of the plant (not touching the stems) and water it in well. Stop after late July. Fertilizing in late summer encourages new growth right when the plant should be winding down for dormancy. Being too attentive with fertilizer in August actually works against you.

Sun, Placement, and the Afternoon Wilt (Do Not Panic)
Our pool area gets full sun, which works well for Endless Summer and Cityline Vienna. Morning sun with some afternoon shade is ideal, it reduces watering frequency and protects blooms from heat stress.
The beauty of containers is you can move them if a spot is not working.
The first summer we had potted hydrangeas in full sun, we watched them droop dramatically every afternoon and convinced ourselves something was wrong. Mophead hydrangeas flag in the heat (don’t panic! it is a self-defense mechanism, not a distress signal).
The real test: do they perk back up by morning? If yes, they are fine. We learned to just wait it out. (Easier said than done, we know.🫣)
Watering: The Full Sun Reality
Pots dry out fast, especially in full sun. Watering the entire property has become my mom’s afternoon ritual since she retired, and the hydrangeas around the pool are a non-negotiable part of that routine.
The whole property takes her close to an hour. (She finds it relaxing. We are not arguing with that.😉)
In a Massachusetts summer, potted hydrangeas in full sun need water every single day in July and August. In spring and early fall, every 2 to 3 days is usually enough.
The finger test is always your best guide: stick your finger about an inch into the soil. Dry = water. Still moist = wait.
Pour slowly around the entire base of the plant until water runs out of the drainage holes. Never over the top of the flowers (that encourages fungal disease). Morning is best so roots absorb moisture before the heat of the day.
What to Plant Alongside Your Hydrangeas
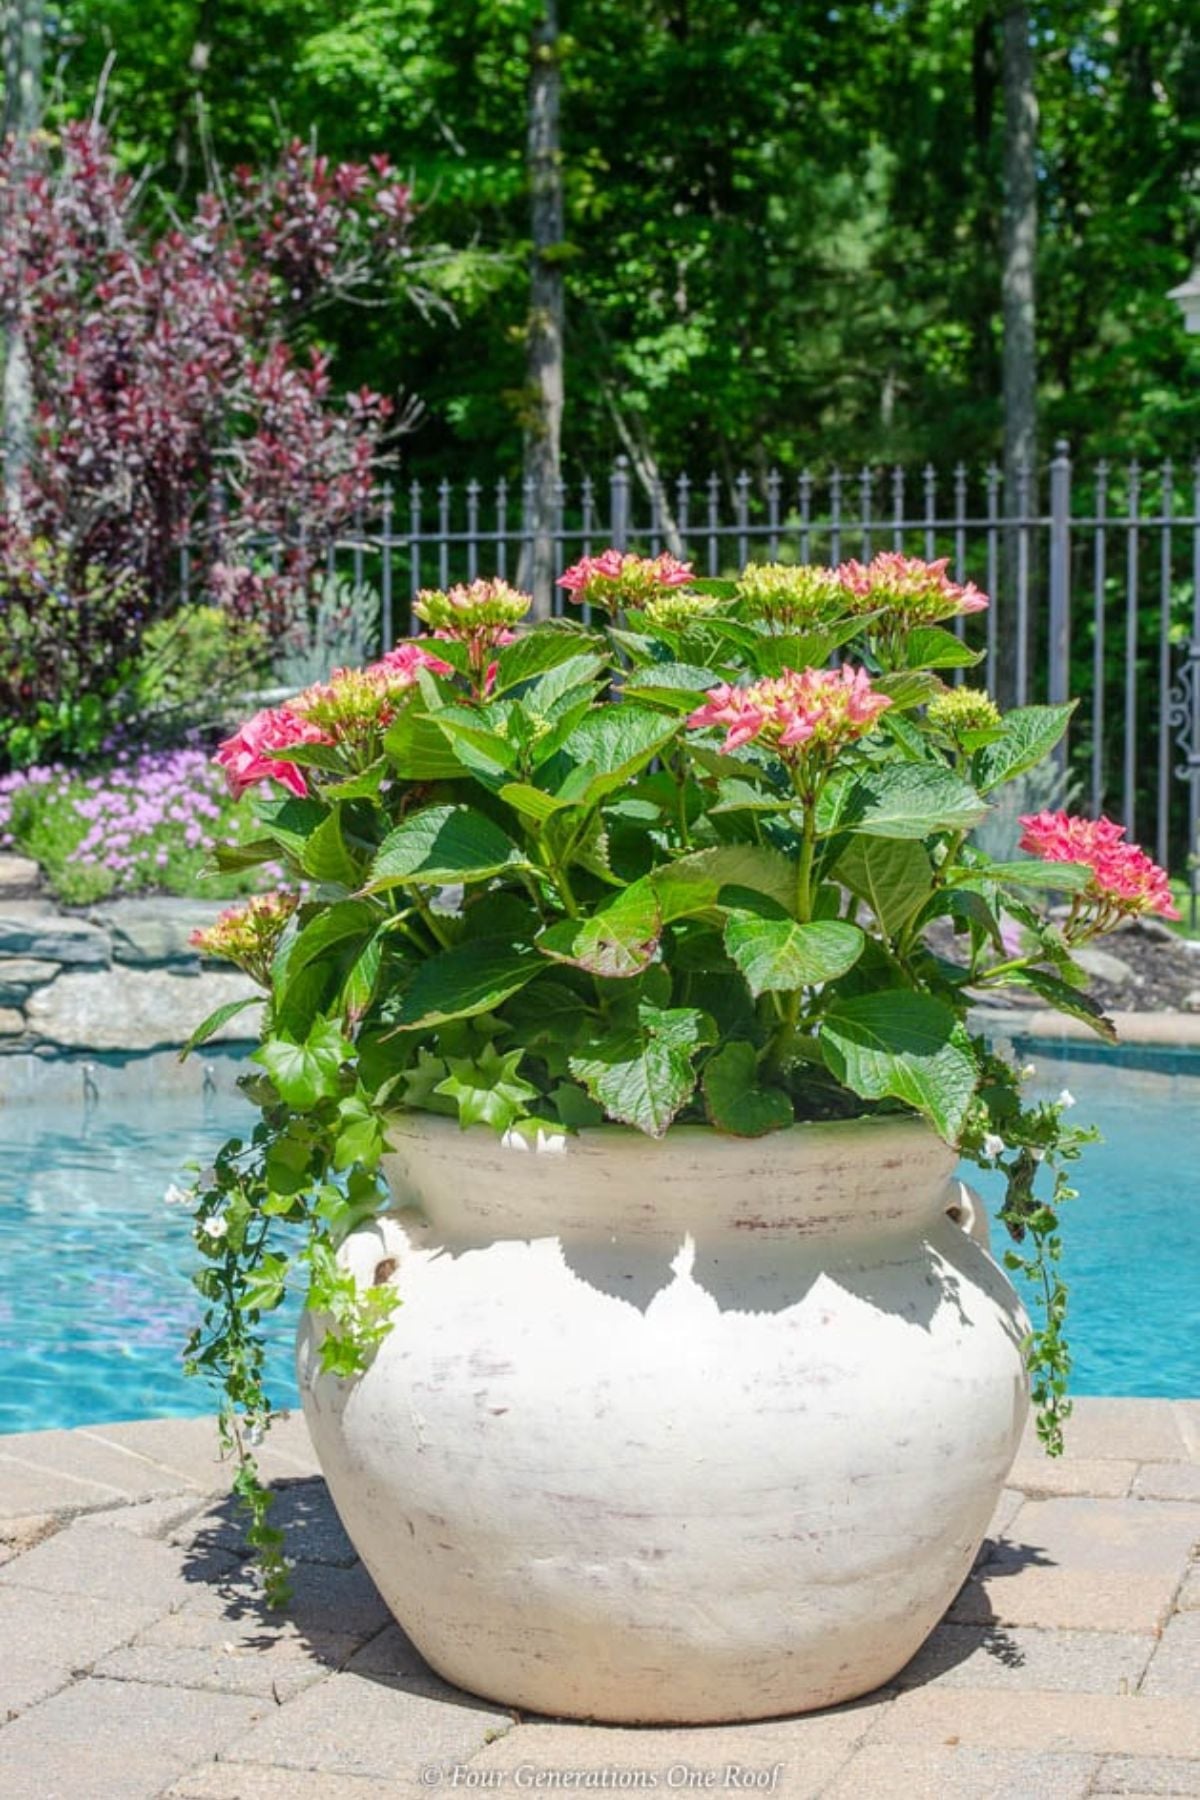
We plant White Bacopa and German Ivy alongside ours, the trailing growth spills over the edges beautifully and photographs really well around the pool.
Other combinations that work well: sweet potato vine for full sun spots, coleus for shadier areas, and calibrachoa (million bells) for continuous color from spring through fall.
Match water needs. You do not want drought-tolerant plants competing in a pot you are watering every single day.

Winter Care: The Plastic Pot Trick
In Massachusetts, we do not leave the hydrangeas in their decorative pots over winter. Here is what we do instead:
In fall, we remove the bush from the pretty pot, transfer it into a cheap plastic nursery pot, and plant that plastic pot directly into the ground in a flower bed. The surrounding soil acts as insulation.
Come spring, we dig up the plastic pot, pop the bush back into the decorative container with fresh potting mix, and it comes back fuller than the year before.
After about 3 years of this cycle, the plant is ready to go into the ground permanently. The roots have outgrown what any container can offer.
We plant it in a flower bed, add it to our growing collection of established hydrangeas, and start fresh with a new container plant the following spring. A system that feeds itself!
In Massachusetts, our pots run from roughly May through October. After that, into the ground they go.

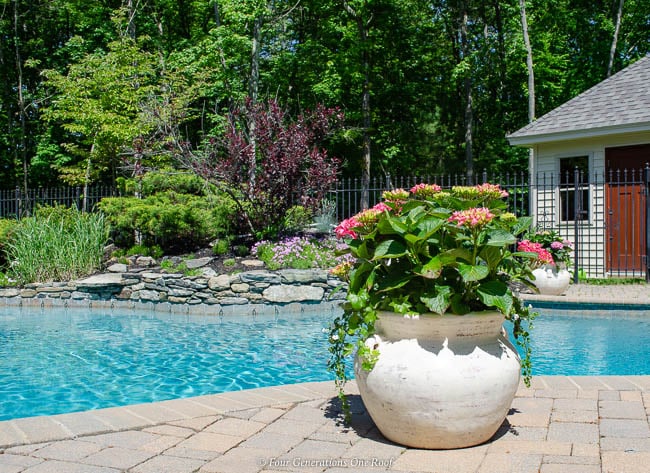
Our Pool Potted Hydrangea Setup
We keep 3 large containers around the pool each summer. We started with 4 plants at $29.99 each (about $120 total) and most of those original plants are now permanent fixtures in our flower beds.
Every summer, my mom’s friends come to use the pool and without fail someone asks about the hydrangeas. Are those real? Yes. Same plants from a few years ago. (The look on their faces is worth the 20 minutes of fall transplanting every single time.😄)
The white Bacopa spilling over the edges, the German Ivy trailing down the sides, it gives the whole pool area that full, lush look without the permanence of in-ground beds in every corner. Every fall they go back into the ground. Every summer they come back better than before!

FAQs About Growing Hydrangeas in Pots
Yes. Choose a pot at least 18 to 20 inches in diameter with drainage holes, use quality potting mix, and water regularly. In cold climates, plan to overwinter them in the ground.
Endless Summer, Cityline Vienna, Little Quick Fire, and Bobo. For cold climates like Massachusetts (Zone 6), choose a variety rated 2 zones hardier than yours.
Every 2 to 3 days in mild weather, daily in hot summer sun. Use the finger test: press your finger an inch into the soil. If it is dry, water thoroughly until it runs from the drainage holes.
Normal heat stress, not a watering problem. Check if they recover by morning. If yes, they are fine.
Not in Zone 6 and below. Transfer to a plastic nursery pot in fall and plant it directly in the ground. Dig it up in spring — it comes back fuller every year.
Avoid clay, terracotta, and untreated ceramic — these crack in freezing temperatures. Look for composite or resin pots labeled frostproof.
Acidic soil = blue. Alkaline soil = pink. Use a potting mix and fertilizer formulated for your target color.
After late July. Fertilize in early spring only, around the base of the plant, watered in well.
Plant a Hydrangea in a Container
Materials
- 18 to 20 inch pot with drainage holes
- Small rocks (for drainage)
- Quality potting mix
- Compost
Instructions
- Choose your pot. At least 18 to 20 inches in diameter with drainage holes. Frostproof if you are in a cold climate.
- Add a drainage layer. 2 to 3 handfuls of small rocks at the bottom before adding soil.
- Mix your soil. Quality potting mix plus compost. No garden soil.
- Plant at the right depth. Soil line from the nursery pot sits 1 to 2 inches below the rim of your container.
- Water thoroughly. Slowly around the base until water flows from the drainage holes.
- Choose your location. Morning sun with afternoon shade is ideal. Full sun = daily watering in summer.

Meet Jessica
What started as a hobby, Jessica’s blog now has millions of people visit yearly and while many of the projects and posts look and sound perfect, life hasn’t always been easy. Read Jessica’s story and how overcoming death, divorce and dementia was one of her biggest life lessons to date.