DIY Couch – how to make a large couch small {with a sawzall}
Article may have affiliate links. If you make a purchase, I may earn a tiny commission at no extra cost to you. Big thanks for supporting my small business.
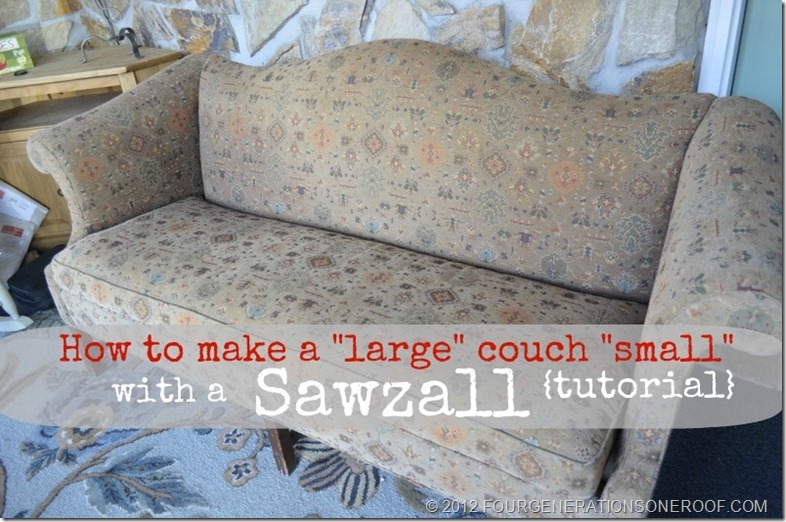
This is probably the most ridiculous post I have done since I started blogging. I even agree, it was crazy. The peanut gallery (my husband, dad and gramp) all told me I had lost my mind. Have you ever had a piece of furniture that was too big but didn’t want to get rid of it? Today I am sharing our DIY couch and how to make a large couch small by using a sawzall to cut 2 feet out of the middle.
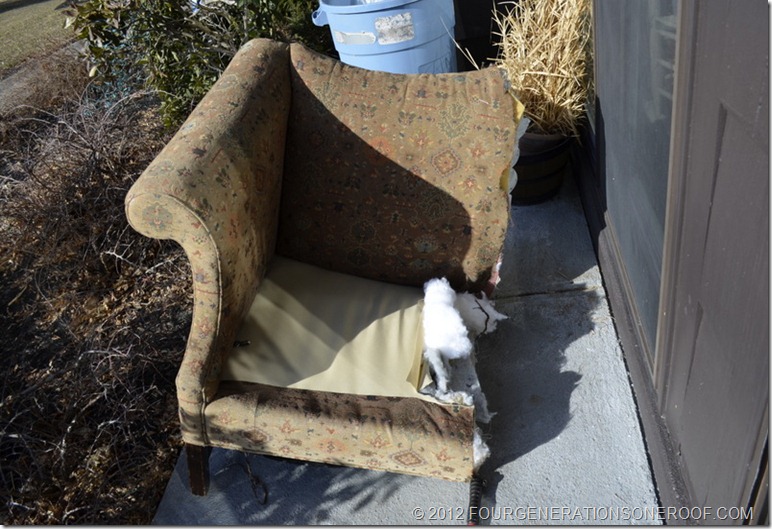
This couch was given to me over 10 years ago by a family friend. Absolutely, nothing wrong with it just to big for our home now and not my style anymore.
We needed a small couch for the foyer and this was the only piece around. I didn’t have a place for it and needed a smaller one, so why not make this smaller? Worse case scenario, it goes to the dump.
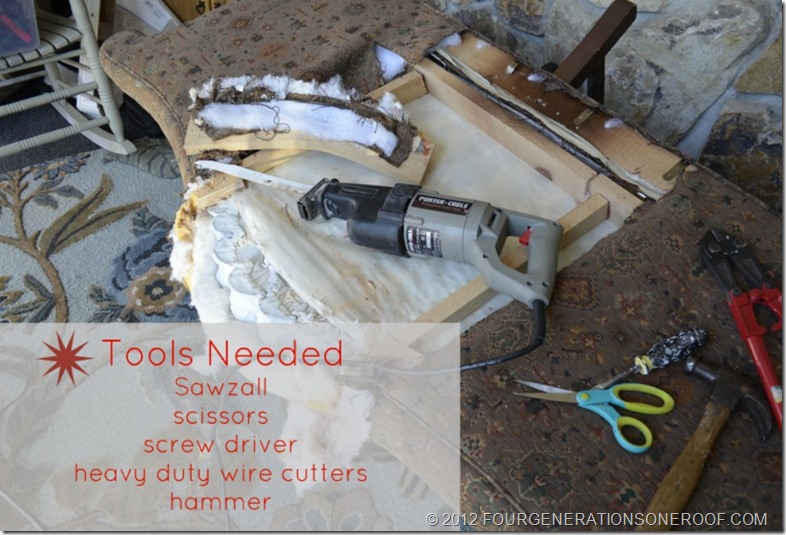
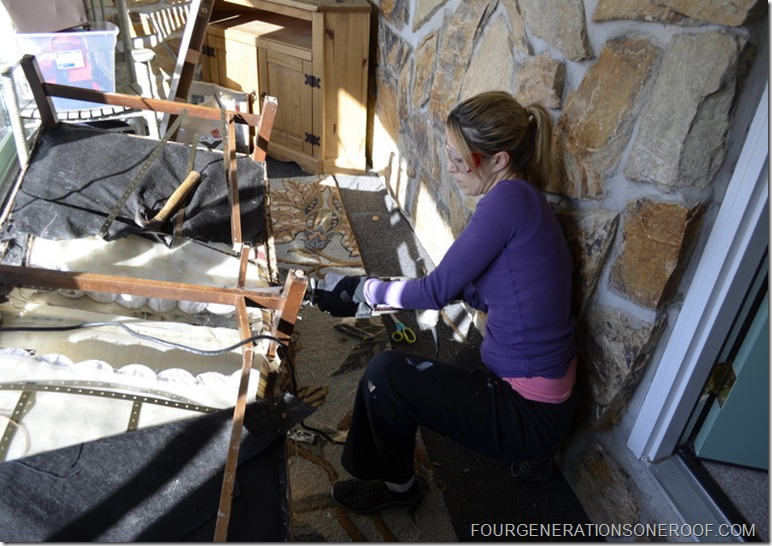
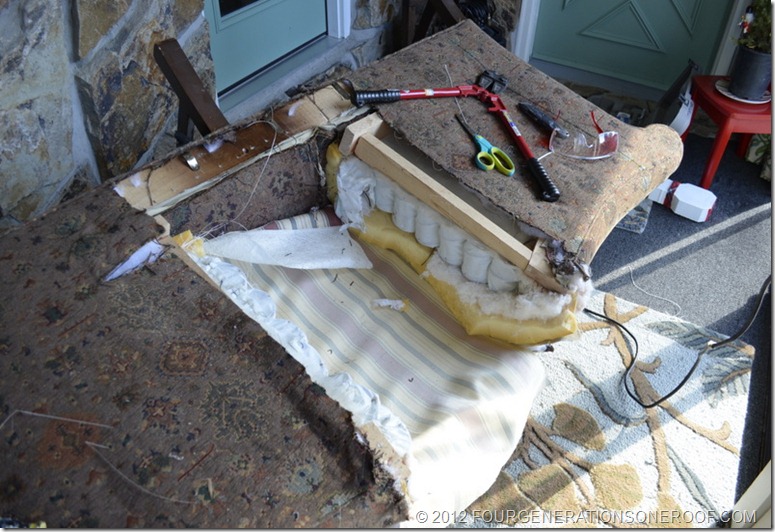
First, you need to remove any fabric and/or metal (tacks). Be sure to remove anything that may be in the way of your blade. Once you have removed everything, work in sections and remove the “guts” of the sofa. You will need wire cutters to remove the spring coils.
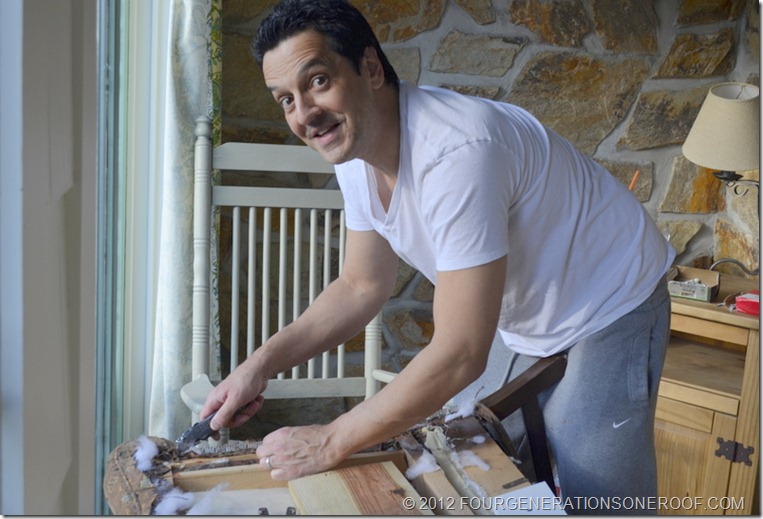
I did convince my husband to help me pull all the nails/staples out for me. I needed some muscles. This was his first day off in 15 days and he was very annoyed with me.
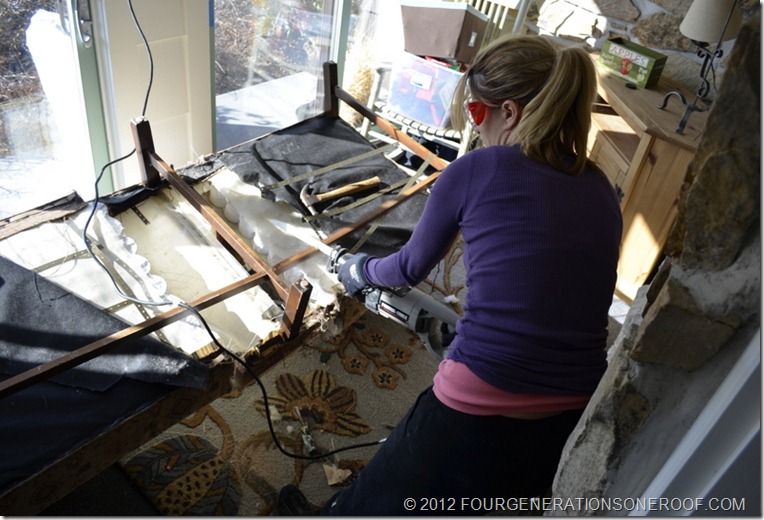
Once that is completed, start sawzalling. I didn’t say I was scared but I was. The sawzall is definitely a tool you need to be careful with. I looked like the biggest wack job cutting a couch in half and my body shaking.
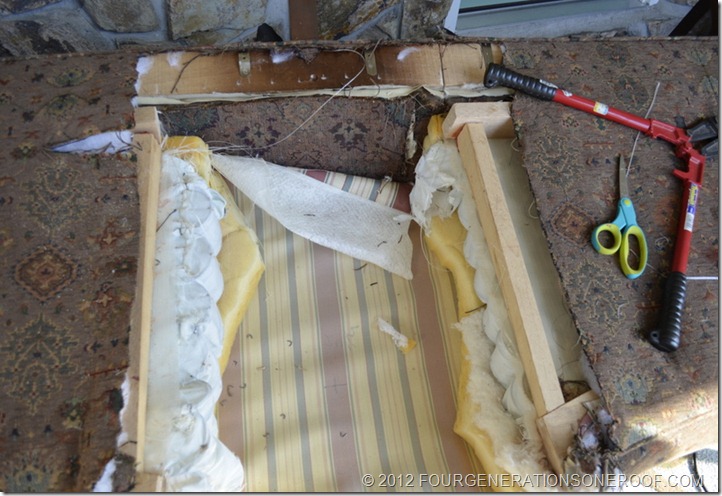
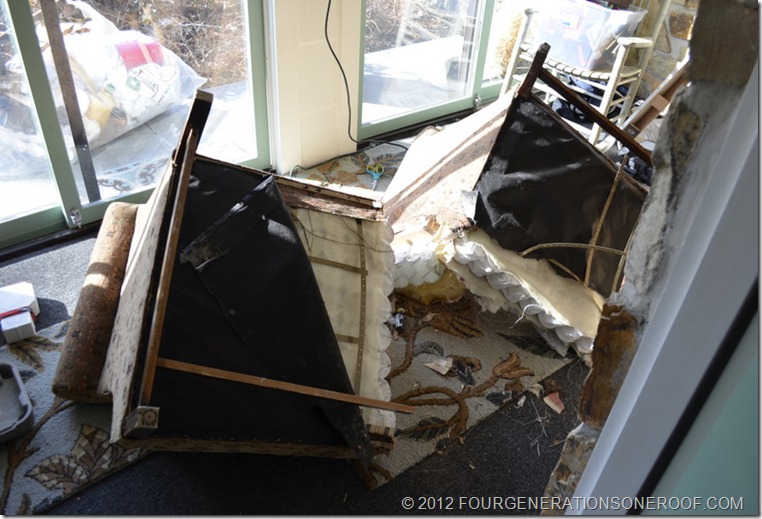
Depending on the insides of your couch, you will just need to work in sections removing the insides and removing the wood.
Couch lovers, please do not send me hate mail.
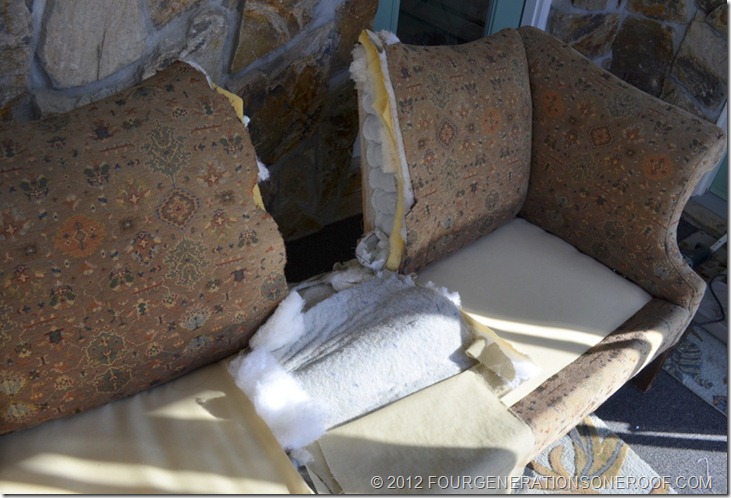
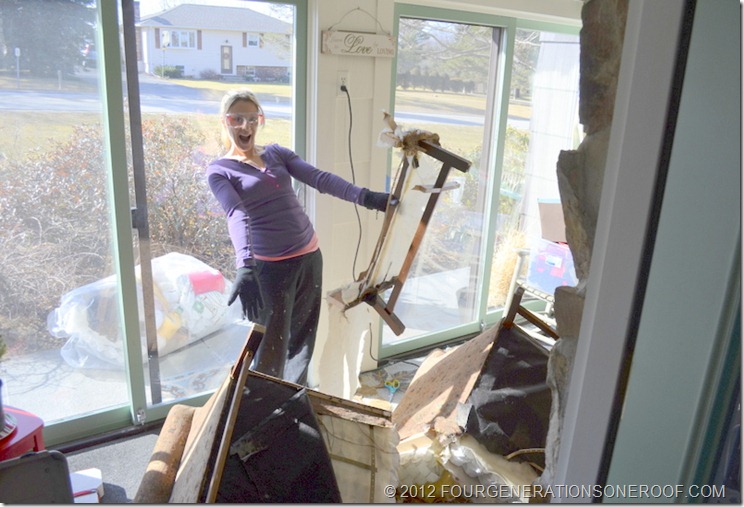
I was starting to feel a little overwhelmed here. My dad was lurking and peeking out the window so I knew I better get this thing back together. I will admit though, I was wondering how I was going to do that. At this point, my gram and gramps came home and lets just say, my gramps just shook his head and said a few expletive terms we won’t mention here on the blog.
Can you say, train wreck?
RELATED: Easy DIY Reupholstering Tips and Tricks
This picture makes me laugh.
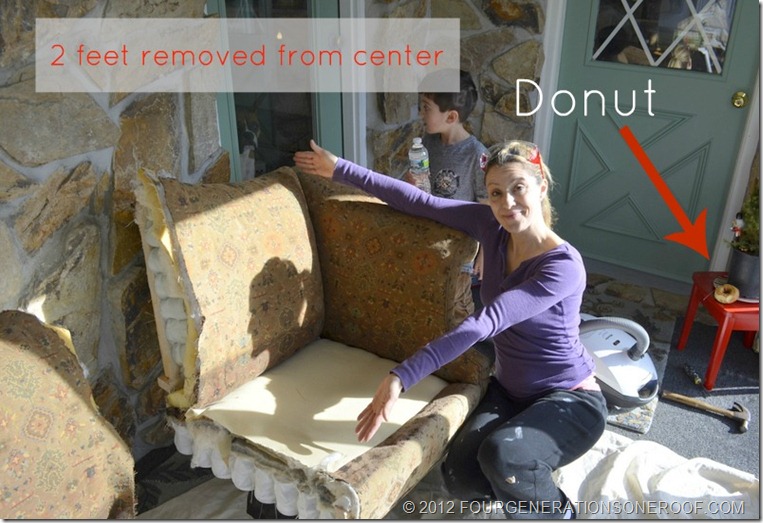
I removed about 2 feet from the middle.
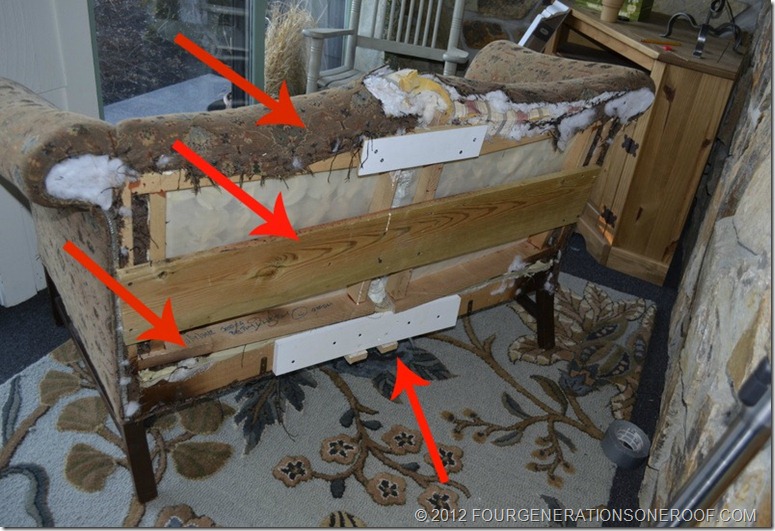
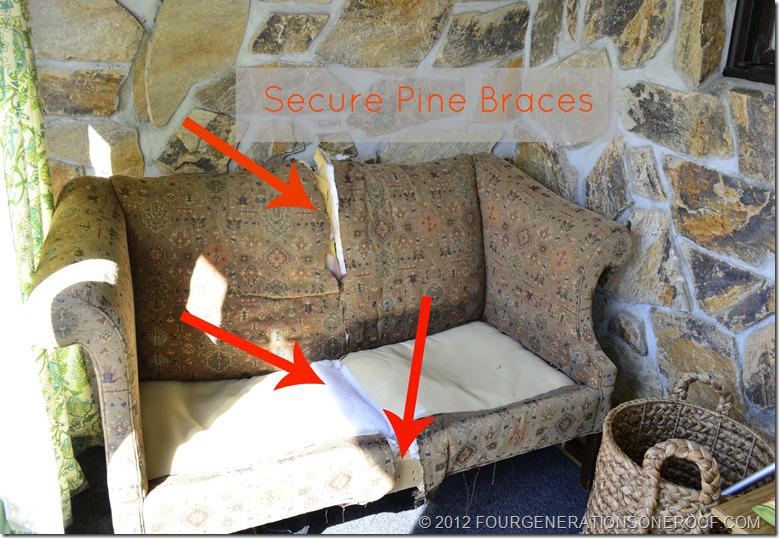
Once I got the mess cleaned up and just the two pieces in the room, I fastened pine braces with a bazillion heavy duty screws across the back. Oh my goodness, my fear was that if my dad sat on this thing, it would collapse. I would NEVER hear the end of it.
The sides of the couch as well as the center braces (that were original to the couch) were oak wood. Oak is very strong and difficult to screw into so you will need to drill pilot holes first so your screws will fasten properly. I braced the bottom (underneath), backside and front. You will also need to brace the “seat part”. You can use 2×4’s (which are stronger than pine) depending on the size and weight of the couch.
The pine braces fit right under the existing foam & coils. You need to make sure you secure the couch with solid wood on the back and seat area. This couch doesn’t even make a squeak . I had my brother, who is a big boy, tried it out and it’s solid.
Stay tuned. In a week or so, I plan to admit this baby to the hospital and sew her up with some muslin, new foam and a pretty new slipcover. UPDATE: This couch has been reupholstered two times since this project. Be sure to check out how to reupholster a couch with an old slipcover (no sew) and our DIY Couch upholstered in a pair of old drapes.

Meet Jessica
What started as a hobby, Jessica’s blog now has millions of people visit yearly and while many of the projects and posts look and sound perfect, life hasn’t always been easy. Read Jessica’s story and how overcoming death, divorce and dementia was one of her biggest life lessons to date.




You are very brave! :o)
You are very brave! :o)
You are every DIY'ers HERO!! WOW! You got guts lady and I'm lovin it! Can't wait to see your finished couch! 🙂 WooWOO!!
You win the BOLD award this week! Way to go! HOLLA, HOLLA!
Way to go!! I'm trying to figure out if I am sorry you didn't do this about a month ago when I was trying to move my heavy couch!! But you are my hero too!! Can't wait for the next installment!! Hope you gave your husband a donut too 🙂
~pat
I LOVE that you took a sawzall to your couch!! Love it. Can't wait to see the finished product, but in the meantime just wanted to say, girl you've got some guts!!
This is insane! You are going to make history with this one! It's a great idea but you need a lot of nerve to pull it off. I love the idea and am giving you a standing ovation….go girl….can't wait to see the finished product!
Oh My! You are either very brave or a little crazy! Or both! LOL I Like where you've gotten so far!
Hahaha!!! That.is.awesome. Worst case, yeah, it went to the dump. But it looks like you're powering through. I tell my husband and kids they can't say anything "negative" until a project is done because a lot of projects can look "ugly" in process!
Oh my goodness!!! I think it's hysterical. I can't wait to see the end result of this. Good luck!
Wow… you are much more adventurous that I am. Can't wait to see how it looks in the end!
you go girl!
i can't wait to see the finish product. you are my hero!
xoxo
Girl, you are crazy (but, in the best of ways)! I can't get over what you've done and I can't wait to see it finished!!
You are so brave and a bit of a genius! I never would have thought of this! Can't wait to see the finished project!
oh wow!! look forward to the finished project reveal.
cheryl xox.
Wow! I agree – crazy post and crazy idea! But it looks like it's going to work! 🙂
That's awesome! I can't wait to see!!!!
Now that is the most entertaining blog post EVER! lol 3 snaps to you and an extra donut too 😉 WAY TO GO!
LOL I can't believe you got all Dr. Frankenstein with that couch! I'm in awe Jess you have big brass…err guts 🙂 Can't wait to see the finished product!
I LOVE THIS!I hopped over here from Vintage Revivals after reading your comment about the sawsall and your couch. You got guts and then some! It's also great that at least your hubby was willing to help out, even if he thought you were nuts. Will be watching for the finished product! No pressure huh?!
Thank you so much for the sweet comment on facebook! I'm sorry that the comment link didn't work out. Let me know if you ever have problems again 🙂
I love your blog! I already re-pinned this on pinterest and I didn't even know it was yours 🙂
blessings,
karianne
Ha ha, you are kidding me, this is SO awesome! This project would be perfect for our linky party featuring "Transformations" called Repurpose-Remodel-Reveal, I know our readers would love to see it too! (It starts tomorrow- Friday, March 16th 2012 at 7:00 am and reoccures every 1st and 3rd Friday)
-Whitney @ TheRoosterAndTheHen
You are a crazy nutcase! Seriously! Ha Ha.
Love this …
🙂
Linda
LOL! You are one brave girl! Can't wait to see you work your magic 🙂
Oh my God (yes, feel the need for full words) this entire post (not just the one picture) made me laugh! Serious crazy in the best way! I don't know you but I want to be friends with anyone who'd take a sawzall to a couch!
Jessica,
Love how you took the bull by the horns and got the job done! I purchased a very expensive sofa once for the basement of a home prior to the Fairfield House. Once it was delivered I discovered much to my dismay that it would not make the tight corner into the stairwell. I got it down there the same way you are shrinking yours! 😀
Your Friend,
Deborah
Thanks Deborah! Yes, big couches can be a pain to move around!
Wow! That is an epic makeover! I saw the finished product…had to pop over here to see how you put it back together. Again…wow!
You make this look very doable!! As soon as I saw it (saw the finished project first and LOVE the upholstery from drapes) I was worried about my family sitting down hard on it and falling thru to the floor. Now that I know how to prevent that, I just need to find a big couch….
ha. That is funny b/c I made my brother sit on it who is about 6'4 and 240lbs and he sat right in the middle….solid! Pheww! Good luck. Just brace it good and use heavy duty screws (no nail gun) (screws are much stronger) and you'll be fine 🙂 Good luck and ship some pics over if you do it! Have a great weekend!
Thank you Jean! 🙂
How amazing!!!! I can’t believe you just literally sawed your couch apart and braced it back together. Too cool.
Thank you 🙂
I love it! Think it turned out great and it’s awesome that you just went for it!!
Thank you Theresa!
This is fantastic! Love seeing what you do showing off your creativity and the fact wonderful results can come from doing things your own way than the retail way. One tip: 2×4’s refer to lumber dimension, (actually 1.5″x3.5″) not wood type or strength, and usually are made of pine.
It makes me so happy to see there is someone else out there who has the same crazy thoughts I do!! 🙂 I have a nice, comfy, old couch about the size yours ( before you cut it) , but the room is too short for the couch. Just yesterday I got the crazy idea of cutting the couch in half. (I was already imagining how nuts my husband and others might think for my even considering this). I didn’t really think I would find anything on the internet about such a crazy idea, but figured what the heck. So… as I sit here and sip my morning tea, I found your blog. I also had a great laugh out loud by myself at your sense of humor. (I did see that donut btw). Great arcticle. Thank you SO much for posting this project! Oh, and the couch looks gorgeous!!
I know this is an old post, but I just bought an old claw and ball couch for $20 with the thoughts of turning it into a settee. I thought I was crazy until I saw this. Now I can’t wait to tackle the project:)
haha good luck! 😉
Love your work, you are brilliant! This is something I would definitely do! Lol 😃
I’m the downunder Ozzie version of you, but, I’m a bit older! Lol 😂🤣😂
haha thank you! 🙂