How to Make a Wooden Box with Scrap Flooring
Article may have affiliate links. If you make a purchase, I may earn a tiny commission at no extra cost to you. Big thanks for supporting my small business.
Today I am showing you how to make wooden box with flooring. It’s the cutest wood box crate ever and we used left over flooring planks from our basement makeover. Jim got a taste of blogger life a couple weekends ago when I asked him if he wanted to help me make a Christmas crate in partnership with Arrow Fastener.
How to Make a Wooden Box

Our DIY wooden box is filled will Christmas goodies near our tree but would also be perfect year round as a plant holder. You can make this wooden box in any size, just cut your flooring planks to the size you want.
Our small wooden box took no time at all to make and is a great project for beginning woodworkers.
Wooden storage boxes are perfect decorative items especially during the holidays and even better if you can make your own!
If you already have wooden boxes on hand, try stenciling a holiday saying or painting them to use as props around your Christmas tree or fireplace.

We used gray flooring planks to make the wood crate and I think it looks adorable!

DIY Wooden Box Supplies
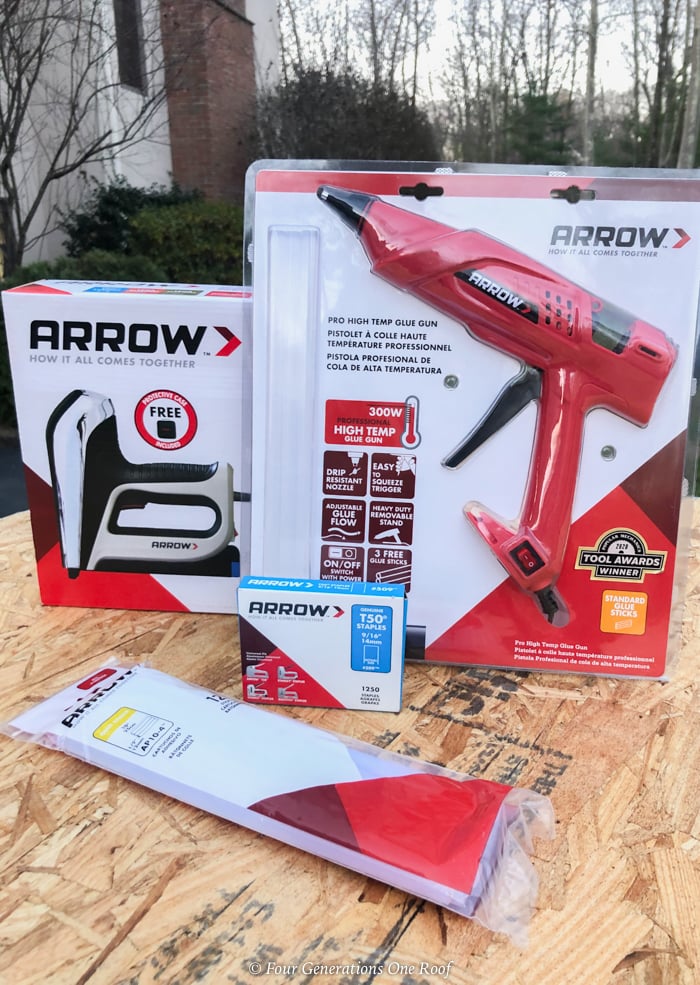
- Arrow Fastener GT300 Professional High Temp Glue Gun and glue. You can purchase this glue gun on Amazon (it’s on sale! It would make a pretty cool Christmas gift too)
- Wood for your crate (I used prefinished wood flooring that I bought at my local hardware store)
- Skill saw (to cut your wood)
- Speed square (you can buy a speed square here on Amazon – another great gift idea!)
- Arrow T50AC electric staple gun
How to Build a Wooden Box
The first step is to cut your wood planks to the desired size with a skill saw.
Our wooden box measurements were 18″ x 13″.

We removed our gray wooden floor planks from the box and cut them to size.

Using the edge of a speed square, we drew a straight line and used a skill saw to cut the plank flooring.


Once we had all of our pieces of gray flooring planks cut to size, we used the Arrow GT300 Glue Gun to fasten the sides together.

The glue sticks almost immediately and is very strong! Be sure to let the glue dry completely.

We made two sets of square boxes and then stacked them on top of each other to make the box.

We used the Arrow GT300 Glue Gun to adhere all sides of the wood planks and reinforced with glue inside the box in the creases.

Be sure to use your speed square as you are glueing the wood box together to ensure the box is straight and square.

Once we glued the first part of the box together, we glued the wooden floor pieces to the bottom to enclose the bottom portion of the box.
We left a space in between each piece on the bottom as seen below.

Once wood pieces were glued together, we reinforced the top and bottom with the Arrow T50AC electric staple gun and nailer using 9/16″ inch staples.

The Arrow T50AC electric staple gun and nailer was so easy to use and required little effort on my part.
I can remember using my grandfather’s staple gun a few years back (it was not an electric staple gun) however, I think it was as old as he was.
My grandfather would have loved this Arrow electric staple gun.

Simple Wooden Box
Our DIY wooden box using flooring planks (you could use plywood or scrap wood too) was a fun project and Jim giggled when we finished saying, “ok, now what are you going to do with this wooden box?”
“Make it pretty,” was my response!

You could also add handles to the sides or create a fun saying on the front with a calligraphy marker. Another fun option would be to add wheels to your wooden box too. Whether you are making a large wooden box or a small wooden box, the details and instructions are the same.
Additionally, decorating a homemade wooden box for Christmas Eve would be fun too.

Purchase this look by clicking these links –> Flocked Christmas Tree (I have this tree too if you like more flock on your tree) | Red Ribbon | Red Berry Picks | Burlap Satchel Bags (make your own like I did here) | buffalo check ribbon |
If you have a small dog or cat, just add a comfy throw pillow inside and you have an instant pet bed.
Be sure to check out my DIY Christmas advent calendar garland post from this past weekend. I made the burlap satchels in 30 minutes (from start to finish and that included hanging them on the tree!) and I love how they look.

Get our free
Ultimate Christmas Planner

Meet Jessica
What started as a hobby, Jessica’s blog now has millions of people visit yearly and while many of the projects and posts look and sound perfect, life hasn’t always been easy. Read Jessica’s story and how overcoming death, divorce and dementia was one of her biggest life lessons to date.


