

Bathroom board and batten wainscoting
Article may have affiliate links. If you make a purchase, I may earn a tiny commission at no extra cost to you. Big thanks for supporting my small business.
In our latest bathroom makeover, I tackled a full-wall DIY board and batten feature, which, I must confess, turned out to be a bit more labor-intensive and challenging than anticipated. This wasn’t just your run-of-the-mill half or three-quarters wall board and batten setup.
When I first started this project, I underestimated the sheer volume of measuring and cutting required. However, once the process was underway, there was no turning back!

I purchased two sheets of 4×8 1/2″ MDF wood at Home Depot.
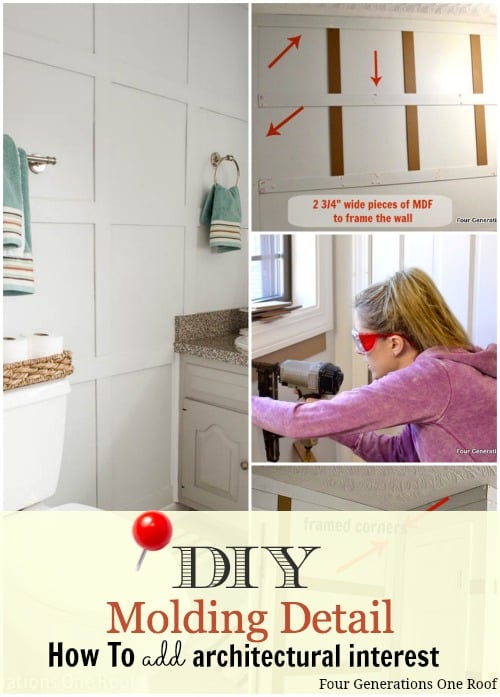
I cut each board (strip) using the table saw at our workplace to 2 3/4″ wide.
How wide your boards (strips) are is completely up to you.
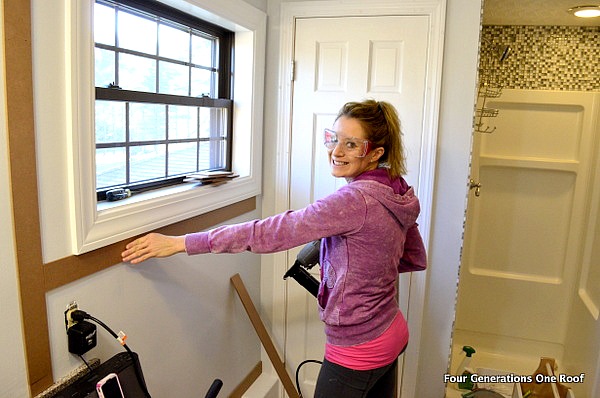
I started by framing the wall with the 2 3/4″ pieces of MDF.
You essentially will box in the wall.
Once your wall is framed (top, sides and bottom), you will then need to determine the size of the squares you want.
My squares are roughly 28″x28″.

This room doesn’t have a lot of natural light so the quality of these pictures are not that great. Once I determined how big I wanted my squares, I measured the length of the wall and ran the pieces of MDF (7′ for this particular wall) across.
NOTE: you will need to cut around any light sockets or switches.
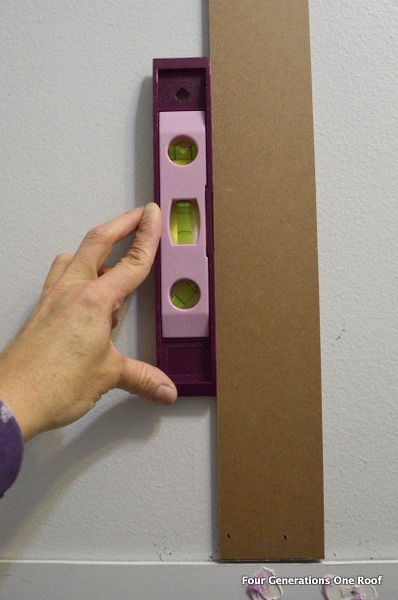
Next, I cut the “in between” MDF pieces and used my smaller level to ensure they were straight.
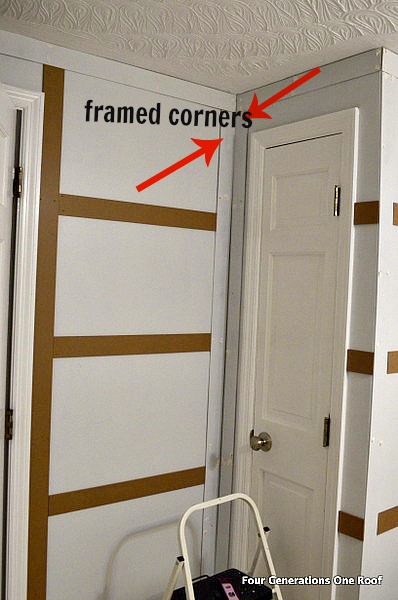
You can see I worked my way around the room framing the walls with the MDF and adding smaller pieces to create my square wainscoting look.
Note below, some of the MDF is already painted as I decided to prime some pieces first.
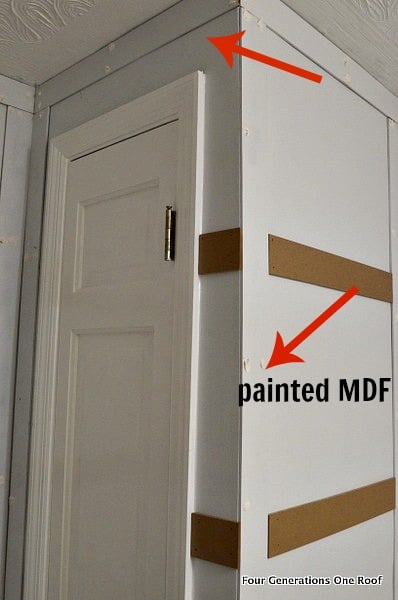
Note how I framed the corners in this next picture.
I used white paintable Caulking to fill in all the gaps throughout the room as well as spackle to fill the nail holes.
I used an air compressor and nail gun with 1 1/4″ nails to adhere to the wall.
I would not suggest going below 1/2″ MDF as the power from the nail gun will force your nail to go right through the MDF and you will be left with a hole and the MDF will not be secured to the wall.
Be sure to use 1/2″ or higher.
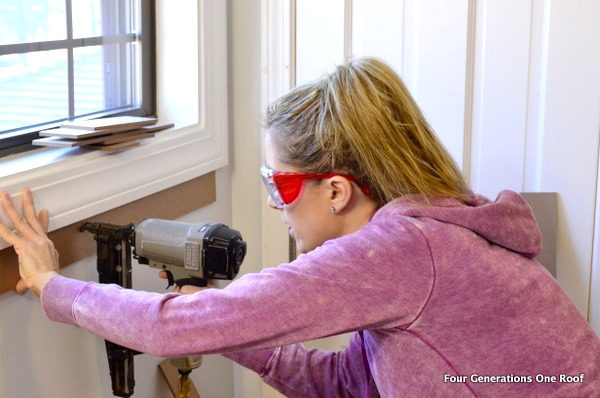
Make sure you where your safety glasses.
Once you have gone around the room and added all your MDF boards (took me about 8 hours) it’s time to fill all your nail holes, caulk every seam and gap.

Once that is dry, you need to sand . This was the painful, “I can’t believe I got myself into this project” moment. This took me about 5 hours.

Once you are finished sanding and cleaning your walls (I vacuumed mine), they will be incredibly dusty and dirty, it’s time to add your paint. I used Sherwin Williams rhinestone color on the walls.

Finally, after all the measuring, cutting, nailing, caulking and sanding, the board and batten wainscoting was finished. Would I do it again? Absolutely, but I would enlist some help!

Here is a picture of our spring bathroom makeover with Better Homes and Gardens.

If you are looking for more board and batten tutorials, visit these posts below:
- board and batten wall in our bedroom at the lake house
- dining room board and batten makeover
- square board and batten wall treatment (wainscotting) in a bathroom
- diy board and batten bathroom – 1950s small bathroom makeover
You can see more board and batten wainscoting pictures of this space by checking out our bathroom renovation post from last month.
If you are not interested in doing such an elaborate board and batten project such as this, check out our dining room makeover where I show you how to install basic flat board and batten panels 3/4 high on a wall as well as our recent mudroom makeover where I installed the same type of board and batten wainscoting.

Meet Jessica
What started as a hobby, Jessica’s blog now has millions of people visit yearly and while many of the projects and posts look and sound perfect, life hasn’t always been easy. Read Jessica’s story and how overcoming death, divorce and dementia was one of her biggest life lessons to date.
It looks so good though! Great job!
Thank you Ali!
I think it looks amazing Jess! It adds so much architectural detail to the room. Great tutorial too!
Thank you Kimberly! hehehehe
Jessica, this is amazing! holy smokes it looks so good!
we’re about to take on board & batten for the first time in a couple of weeks. eek!
Thank you Miss Kelly! Did you get your truck unloaded from your IKEA extravaganza yet!? Good grief, did you save anything for anyone else to buy? 🙂 Good luck on your project!
It looks absolutely fabulous Jessica! Fantastic job! 🙂
Wow- that’s my favorite kind of wainscoting but haven’t attempted it yet! Featured this on my Saturday favorites!! Claire
Thank you Claire! So sweet of you 🙂
Looks amazing! I am wanting to do this to my entryway… What is the point of the sanding though? Can’t I pant the wood as is? Or is sanding needed to adhere the two together? Looks amazing!
I only sanded b/c when you fill in the nail holes with putty, you need to sand the putty once it’s dry to get it smooth prior to painting 🙂
I love your wainscoting! It looks beautiful! I’m definitely going to use that!
I have this hideous wainscoting (a-la 1960’s) in my tiny bathroom, which was also installed as my tub surround. I’ve been thinking about swapping it out for beadboard, but it’s so expensive! I’ll have to replace the tub surround (due to the condition), but this will be a great solution for the rest of the room!
Thanks, Jessica! You have just helped me save my reno budget!
Shannon, The DIY Newbie
Thank you Shannon and good luck with your project 🙂
I’m loving all your projects! One question I have is are your walls textured? We are going to do batten & board soon but we want the smooth finish. Would you have a recommendation on how to get the smooth finish? Like maybe add plywood then batten & board? I hope I’m making sense!
Hi, thank you! Yes, you could add plywood or they actually sell an MDF version (which might be lighter and less expensive). Good luck and send some pictures when you are finished, I would love to see the room!
Was the MDF at 8 1/2 standard at Home Depot? I went there today and all I saw was standard 8ft. Did you have to specifically ask for the 8 1/2?
8′ is what I got and then cut them down
I love this – didn’t think of using MDF to achieve the look. I mostly love that the thin strips add a lot of visual interest without making the room feel like it is closing in at all.